
Step-by-Step Guide: Mastering Text Wrapping Techniques in Excel

Step-by-Step Guide: Mastering Text Wrapping Techniques in Excel
Quick Links
- Wrap Using a Keyboard Shortcut
- Wrap Using The “Wrap Text” Option
- Wrap Using the “Format” Option
- Wrap Manually Using Line Breaks
Wrapping your text in Microsoft Excel keeps your easy to read. It also makes the width of your columns more consistent, which will help your spreadsheets look more professional. Here are four different ways to do it.
Wrap Using a Keyboard Shortcut
Perhaps the quickest way to wrap text to the inside of a cell (so that the text automatically fits and doesn’t get cut off) is by using a keyboard shortcut. First, open your Excel document and select the cell you want to wrap. Then press Alt+H, then “W”. The text in the cell will wrap to fit automatically, which is useful for quickly wrapping text one cell at a time.
Wrap Using The “Wrap Text” Option
Another easy way to wrap text in Excel is to use the “Wrap Text” option on the ribbon. First, start by opening a new or existing document in Microsoft Excel. Then navigate to the ribbon (the toolbar at the top of the screen) and select the “Home” tab to make the ribbon appear.
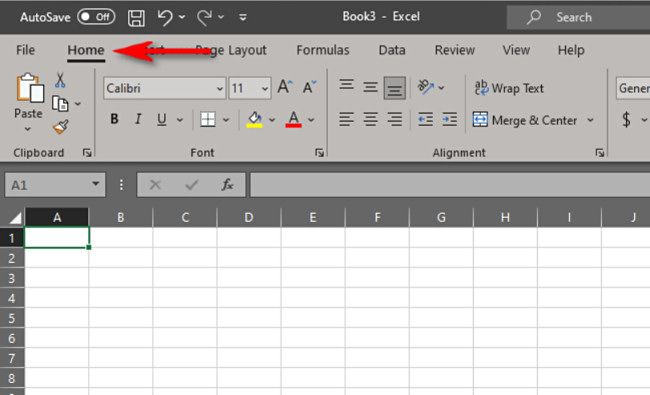
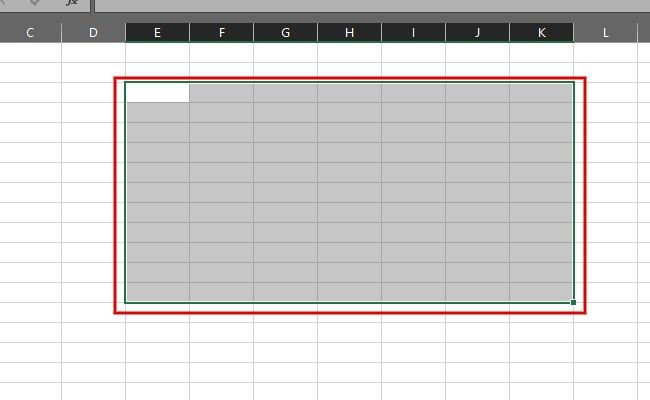
In the body of the spreadsheet, select any cell or a range of cells where you want your text to automatically wrap as you type.
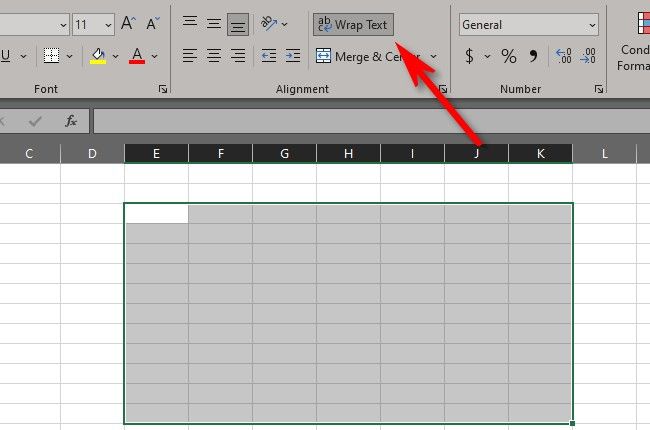
In the “Home” ribbon, click “Wrap Text.” The button now appears slightly shaded, showing that any text you write in the selected cells will wrap to fit inside each cell completely.
Type anything you want into the cells you selected. The text will wrap automatically so you can read it easily and avoid text overflow into other cells.
When working with multiple cells, press Enter or simply click the next line to see the magic of text wrapping working in real-time.
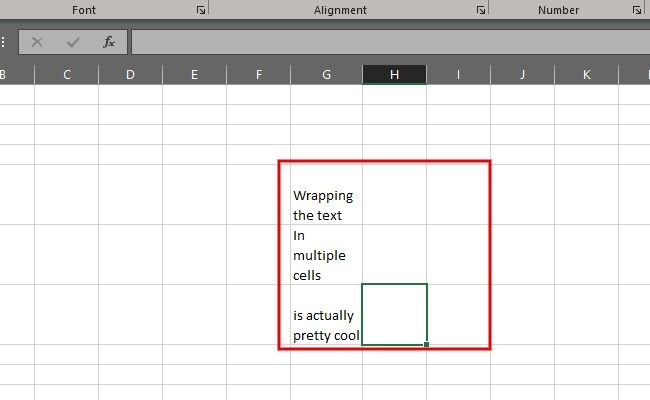
Wrapping text using this method is extremely useful if you’re formatting cells in a hurry, and it’s ideal if you want to select a large number of cells to automatically format as you fill in the data.
The only drawback to wrapping text this way is that you have to manually resize the width of the cell if you have a significant amount of text in it. For example, writing a lot of text in a single cell makes it look overly compact and difficult to read.
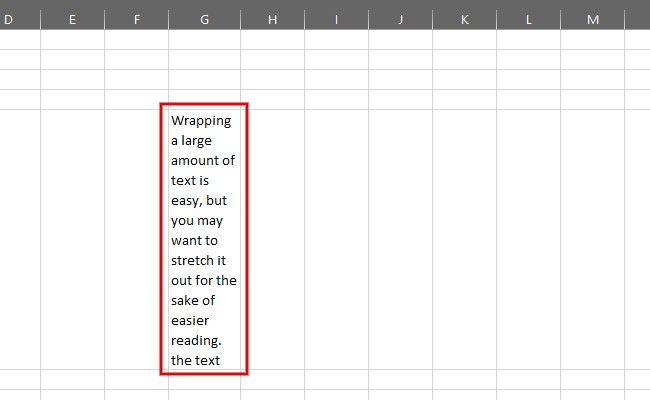
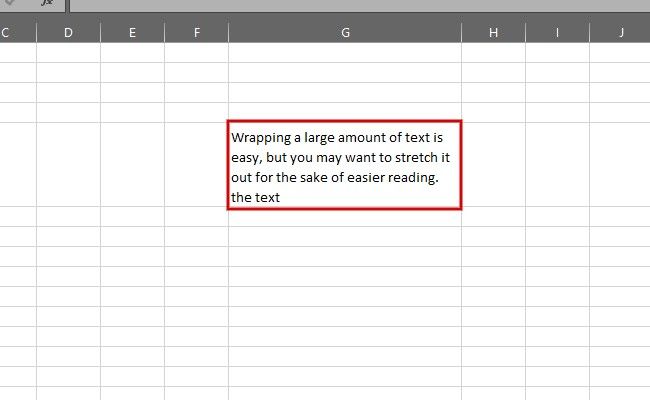
To fix this manually, widen the column by navigating to the edge of the column in the toolbar and clicking it. You’ll see the width value for that column pop up in a little box. Drag the cursor to the right until it reaches your desired size.
You can do the same thing to adjust the row height and make it look a little tidier. Adjust the height and width until you’re happy with the result.
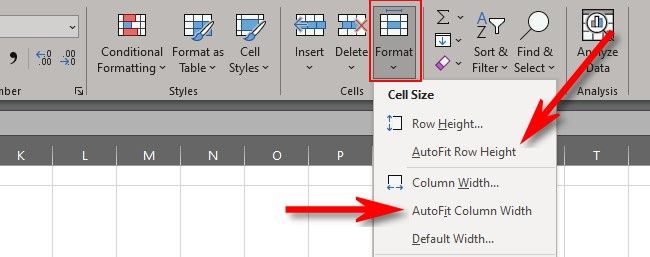
To automatically fit the cell size to the text, select the cell and switch to the “Home” tab in the ribbon. Then click “Format.” Depending on your needs, select the option to “AutoFit Row Height,” “AutoFit Column Width,” or both. These will automatically adjust these options to fit your wrapped text.
Wrap Using the “Format” Option
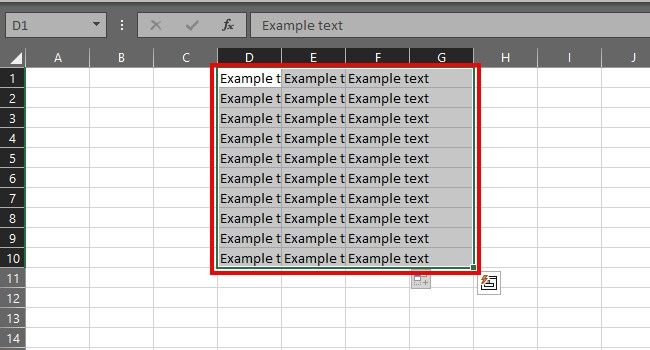
You can also wrap text in Excel using the “Format” option. First, select any single cell or range of cells in the body of your spreadsheet that you want to wrap.
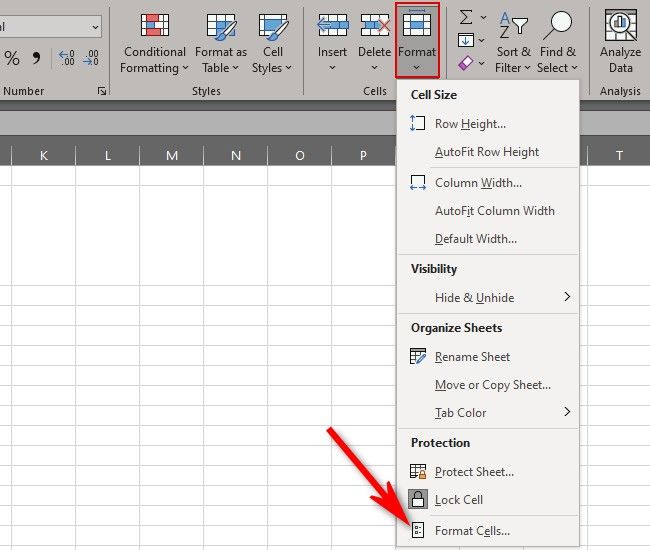
In the “Home” tab of the ribbon, select “Format.” A drop-down menu will appear. Click “Format Cells.”
(You can access the same menu by right-clicking in any cell or range of cells and selecting “Format Cells,” which might be a little faster depending on your preference.)
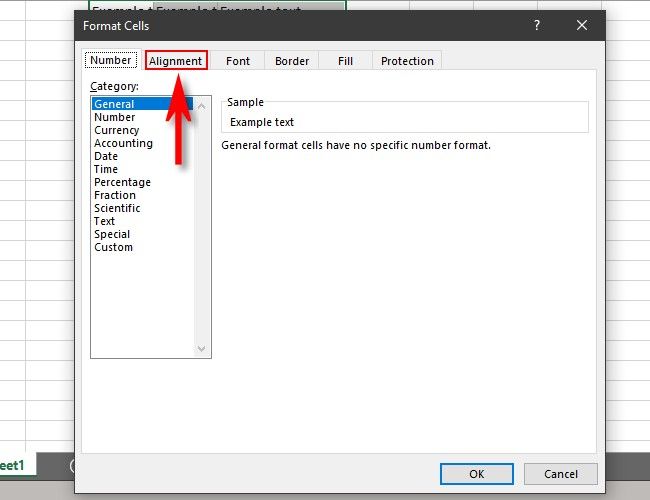
After selecting “Format Cells,” A formatting menu will appear. In the format menu, click the “Alignment” tab.
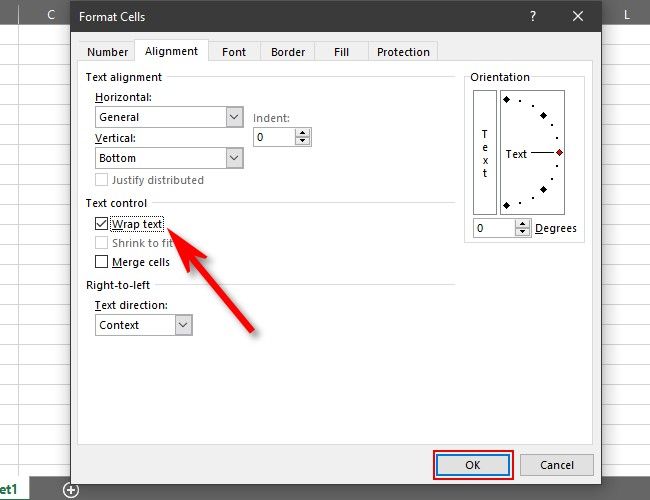
Under “Alignment,” place a check mark beside “Wrap Text” in the “Text Control” section. Then click “OK” to save your settings.
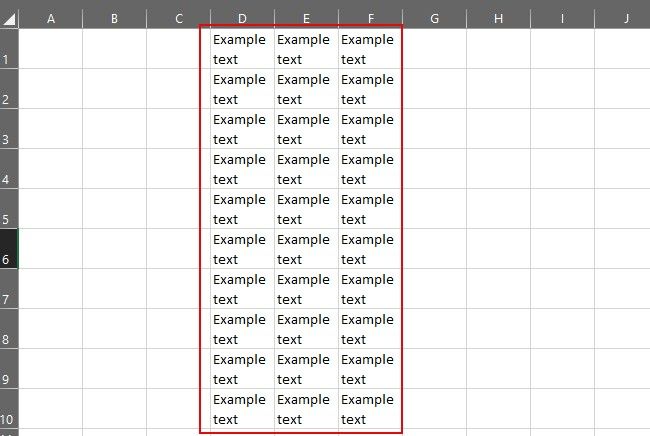
This will wrap any existing text in the cells you just selected and formatted.
The cell does not need to contain text for you to format it to wrap text in the future. Using this method makes it easier to pick and choose which cells you want to format this way. It also allows you to format cells individually with different parameters (merging, numerical values, formulas, etc.) while also enabling a text wrap as you input data.
Related: How to Use and Create Cell Styles in Microsoft Excel
Wrap Manually Using Line Breaks
You can also wrap text manually using line breaks. To do so, select the cell you want to type in while wrapping. Navigate up to the formula bar just below the ribbon and click it.
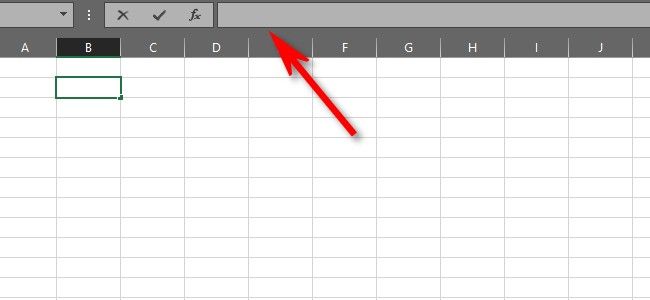
Begin typing. When you reach the end of the line you wish to wrap, position your cursor at the end of the line and press Alt+Enter.
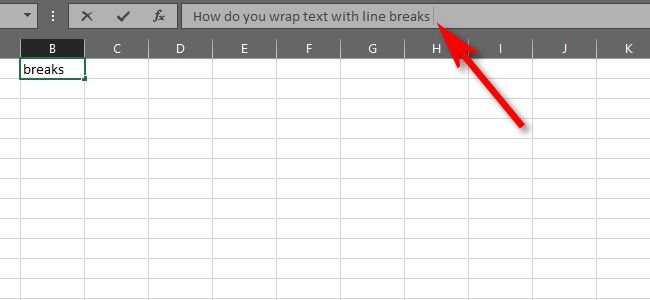
This will neatly wrap the text in the cell.
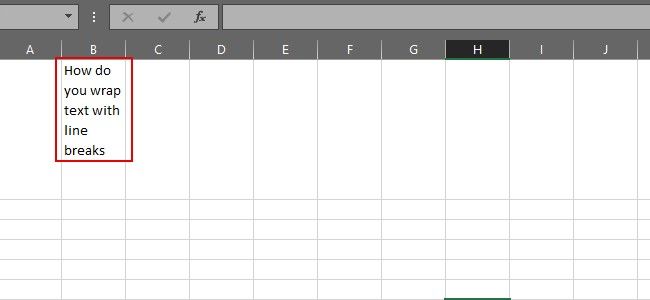
You can write as much or as little as you want in the cell, using line breaks to set up wrapping as you complete sentences and avoiding overflow text . Good luck, and happy wrapping!
Related: How to Hide Comments, Formulas, Overflow Text, and Gridlines in Excel
Also read:
- [New] Streamlining Online Meetings Zoom for WIN10
- AmazonBasics 12-Sheet High-Security Shredder - Comprehensive Evaluation
- Apple Reveals the Powerhouse M1 Ultra CPU: A Game-Changing Leap in Computing Performance | Tech Analysis
- Apple Watch Showdown: Discovering Your Perfect Match with the Ultra Vs. Series 8
- Countering LSA Protection OFF Alert in Windows OS
- Display Demise: Laptop's Last Stand
- Fix Cant Take Screenshot Due to Security Policy on Sony Xperia 5 V | Dr.fone
- Fixing Silent Sound Capture: A Step-by-Step Guide for W11 Users
- Fixing Unopened Sharing Error in Windows 10/11'S Experience
- From Theory to Reality: Exploring ChatGPT's Applications
- In 2024, Expert Screen Capture Recommendations for Google Meet Professionals
- Inside ftdibus.sys: How It Challenges Windows Memory Security
- Rectifying Faulty USB Stick Behavior on Windows Systems
- Streamline Your Windows Aesthetics in 8 Easy Steps
- Unveiling 5 Best Non-Samsung Camera Picks for Gear Enthusiasts
- Title: Step-by-Step Guide: Mastering Text Wrapping Techniques in Excel
- Author: Richard
- Created at : 2024-12-02 00:02:08
- Updated at : 2024-12-07 00:13:32
- Link: https://win11-tips.techidaily.com/step-by-step-guide-mastering-text-wrapping-techniques-in-excel/
- License: This work is licensed under CC BY-NC-SA 4.0.