Step-by-Step Guide: Personalized Window Snaps in Windows

Step-by-Step Guide: Personalized Window Snaps in Windows
With the Snap Layouts feature in Windows, you can snap your windows into different positions and organize your computer screen to your liking. As useful as this feature is, it does not give you the option to edit pre-defined layouts or customize them in any way.
Fortunately, you don’t have to settle for the default snap layout options. With PowerToys, you can create custom snap layouts for your Windows 10 or 11 computer and multitask with ease. Let’s see how.
Disclaimer: This post includes affiliate links
If you click on a link and make a purchase, I may receive a commission at no extra cost to you.
How to Create Custom Snap Layouts in PowerToys
PowerToys’ FancyZones feature lets you arrange your windows into custom layouts. Here’s how you can use its layout editor to create and save custom snap layouts.
- Download and install PowerToys from Microsoft Store.
- Once installed, open thePowerToys appusing the search menu .
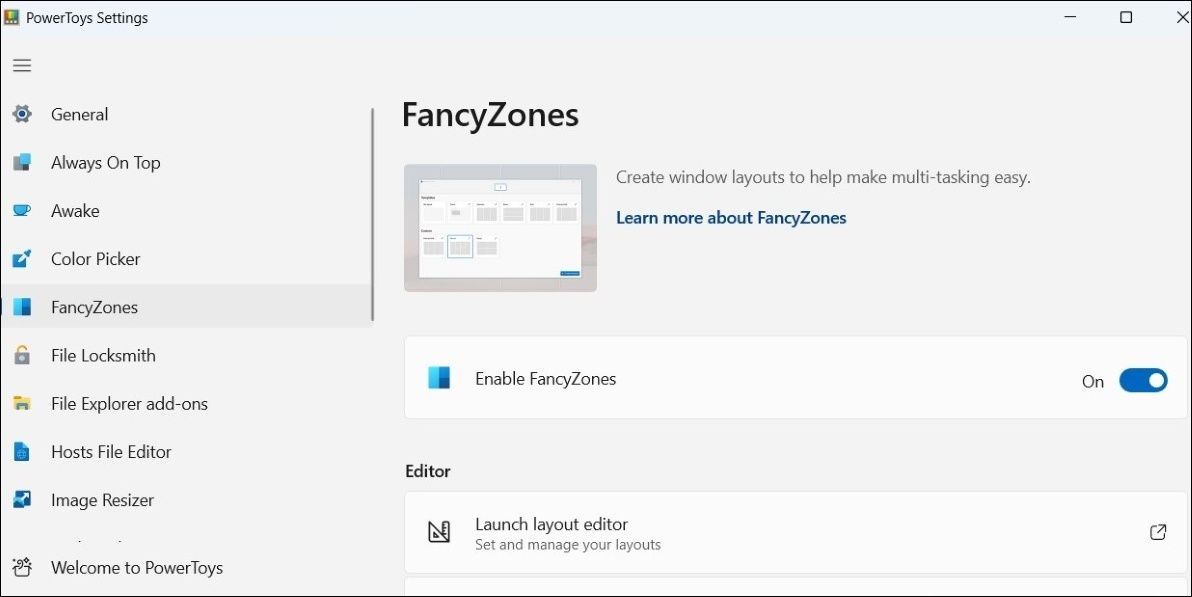
- Select theFancyZones tab from the left sidebar.
- Turn on the toggle next toEnable FancyZones .

- Click theLaunch layout editor option.
- Select the monitor for which you want to design layouts.
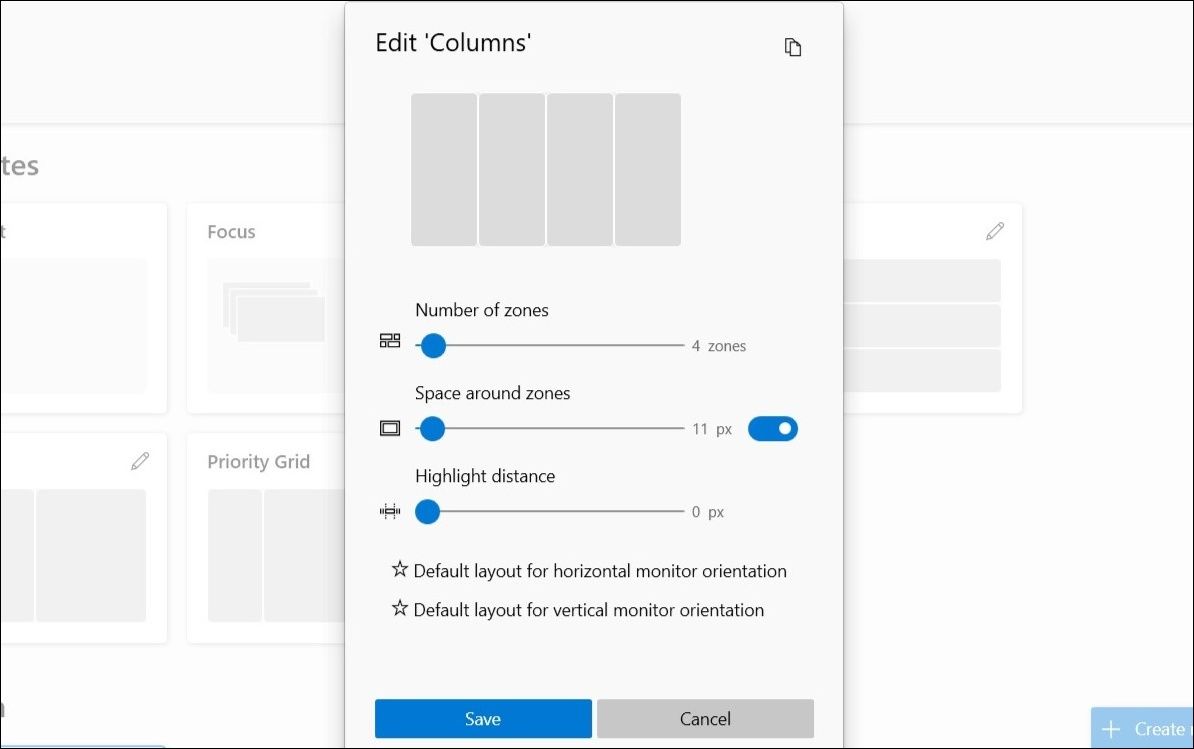
- Click thepencil icon next to one of the layout templates to edit it.
- In the following window, use the sliders to change the number of zones, spaces around zones, and highlight distance.
- Click theSave button to save your changes.

If the existing layout templates aren’t enough for you, PowerToys also gives you the option to create new snap layouts from scratch. Here’s how to create one.
- In the PowerToys app, navigate to theFancyZones tab.
- Click theCreate new layout button.
- Enter a suitable name for your custom layout and select your preferred layout type.
- Click theCreate button.
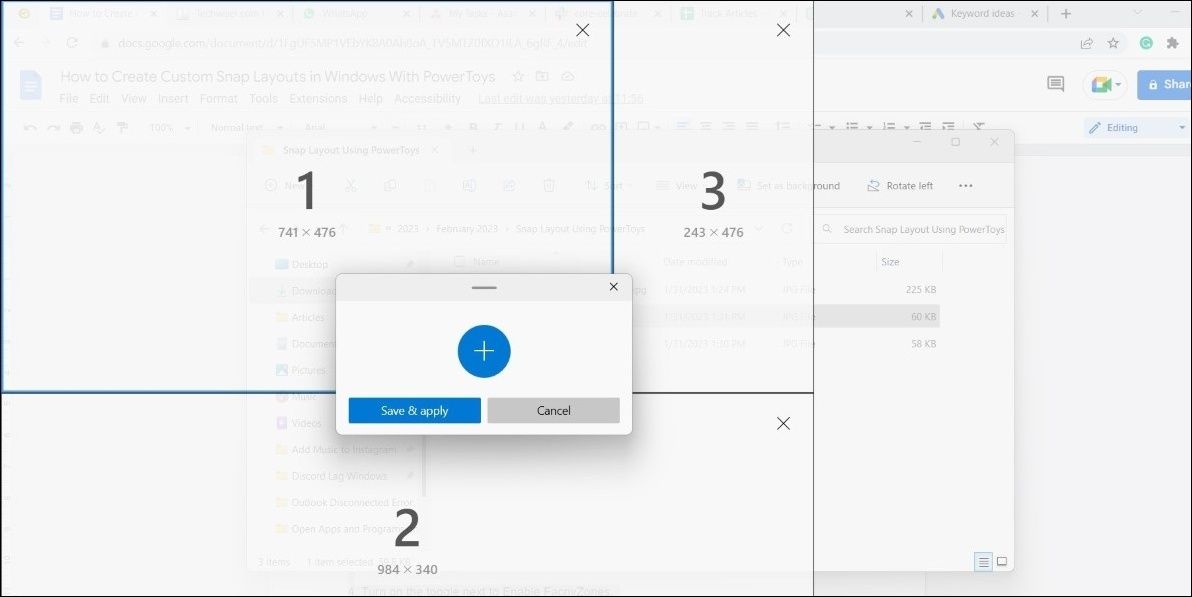
- Click theplus icon to add new zones and resize them as desired.
- After creating your snap layout, click theSave & apply button.

You can repeat the above steps to create as many custom layouts as you want.
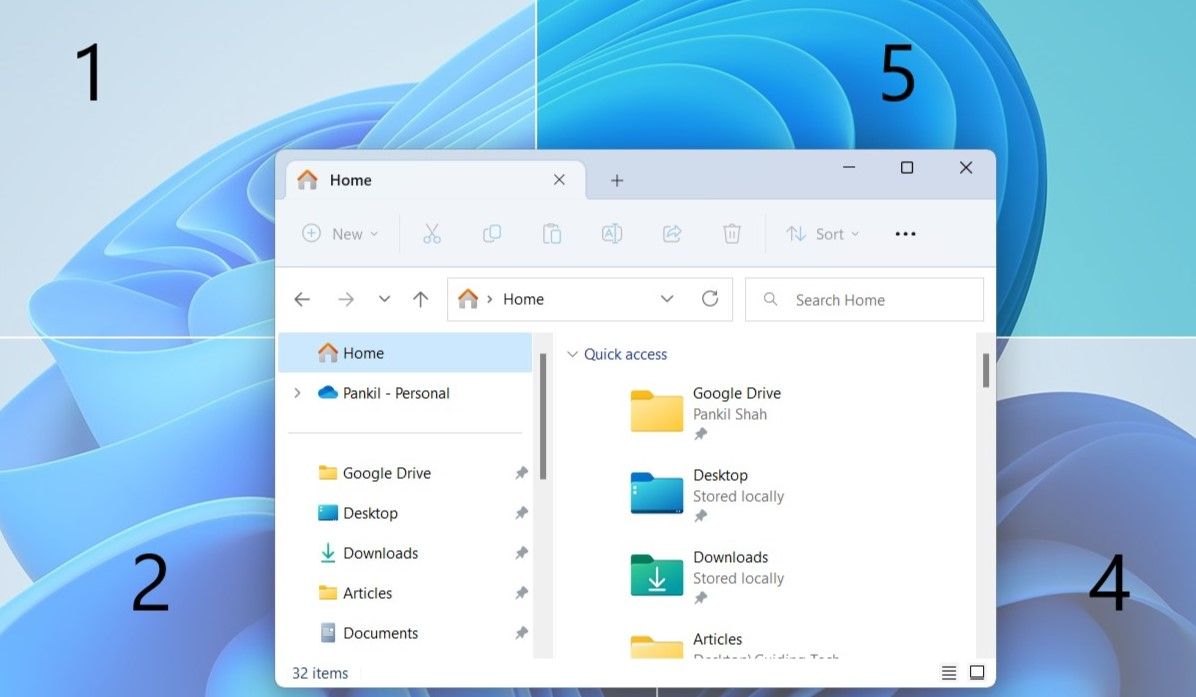
By default, apps and programs on your computer will utilizeWindows 11’s snap layouts when you move the mouse cursor over the maximize button or drag the window into a corner. To use your custom snap layout created with PowerToys, you’ll need to hold theShift key and then drag the window to one of your zones.
How to Customize FancyZones Settings in PowerToys
In addition to creating personalized snap layouts,PowerToys offers multiple options to customize zone appearance, modify window behavior, exclude specific apps, and more. Let’s see how to use them.
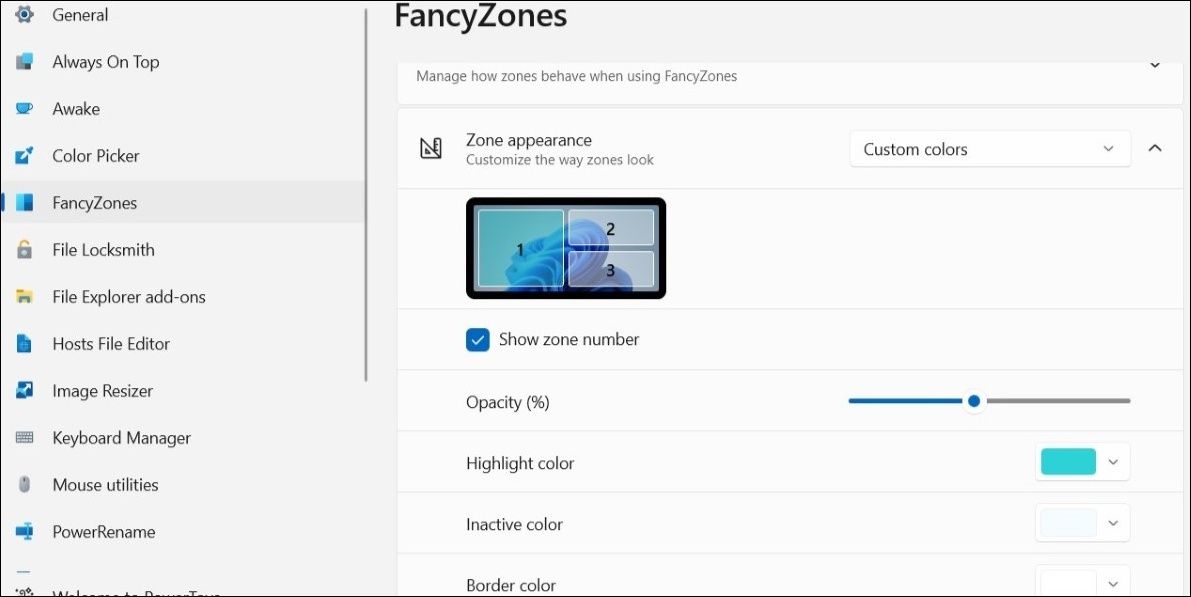
Open PowerToys and navigate to theFancyZones tab. In theZone appearance section, you can customize the look of zones by adjusting colors, opacity, and other aspects.
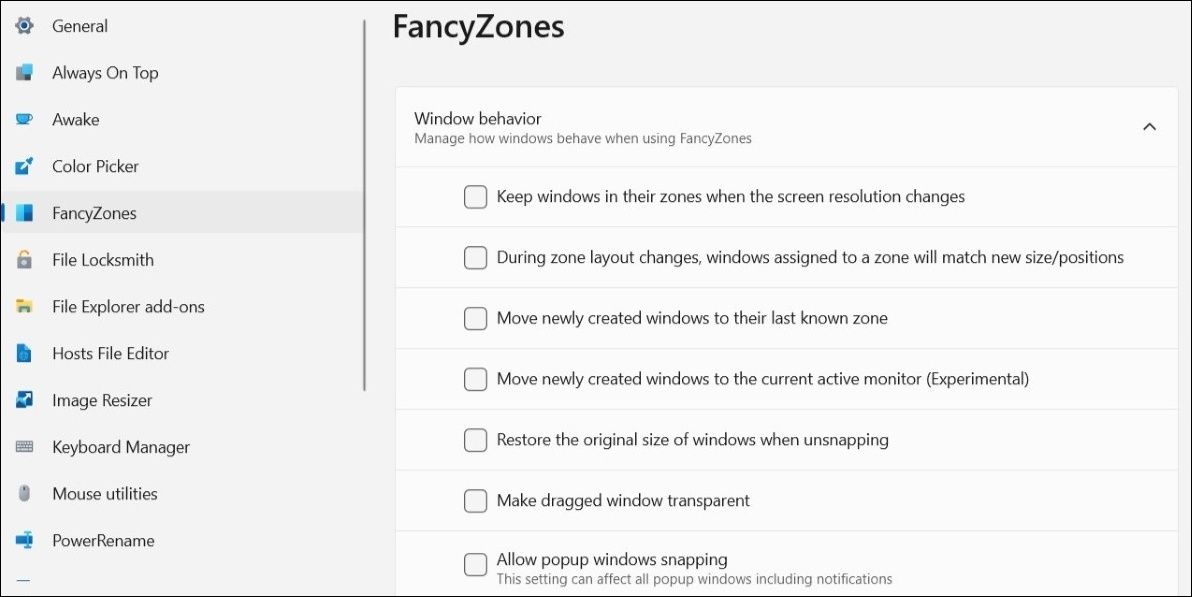
Similarly, in theWindow behavior section, you can use the checkboxes to specify how windows should behave when you use FancyZones. You can, for example, configure windows to revert to their original size when unsnapped using theRestore the original size of windows when unsnapping checkbox.
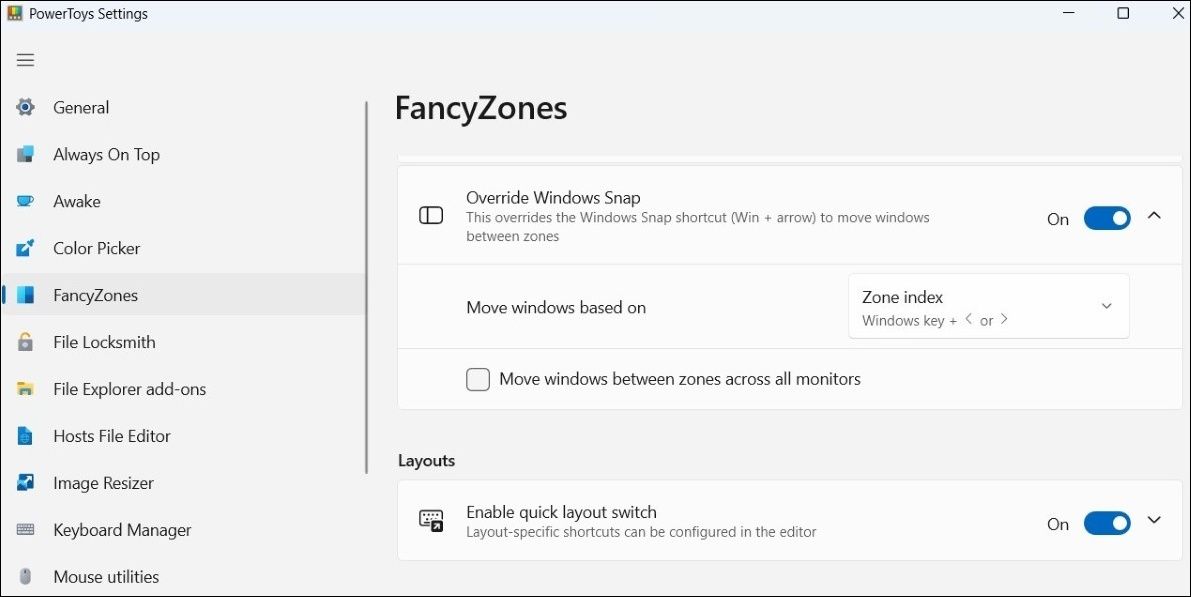
If you’re accustomed to usingWin + arrow key shortcut to snap windows on your computer, you can configure PowerToys to override Windows Snap. For that, enable the toggle next toOverride Windows Snap and then use the Win + arrow keys to arrange your windows.
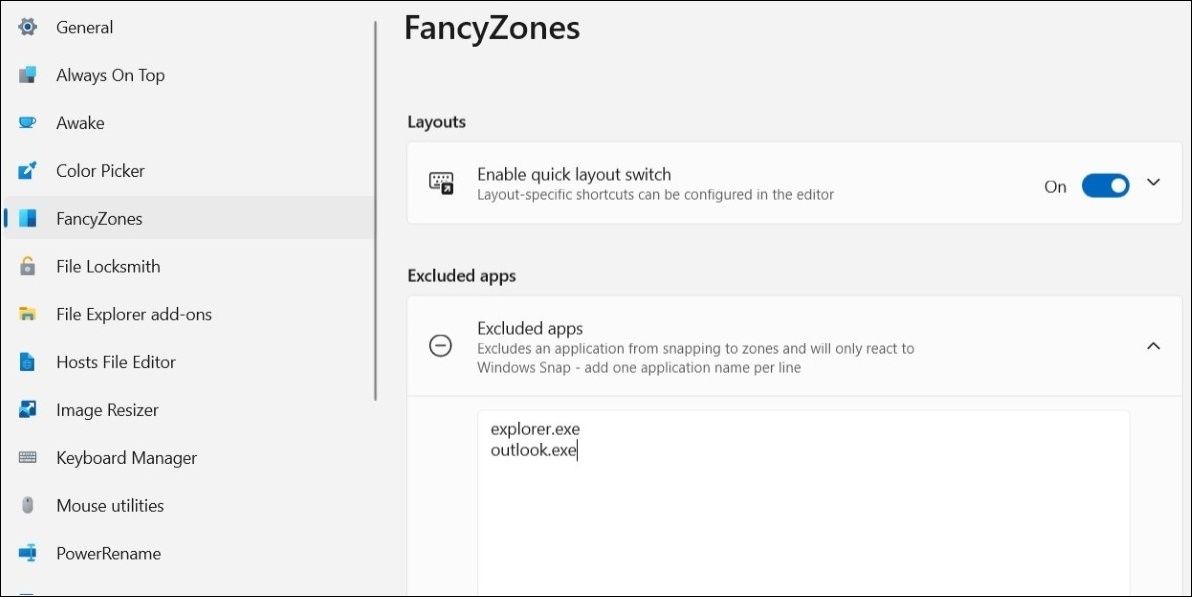
With FancyZones, you can prevent specific apps and programs from snapping to zones. To do so, scroll down to theExcluded apps section in the FancyZones tab. Then, type in the name of the app you want to exclude. For instance, if you wanted to prevent File Explorer from snapping to zones, you’d typeexplorer.exe in the text field.
Multitask Better With Custom Snap Layouts on Windows 11
If the default snap layout options do not meet your needs, you can always use PowerToys to create custom snap layouts. However, that is not the only thing you can do with PowerToys. You can use it to rename files, resize images in bulk, keep your computer awake, and do a variety of other things.
Also read:
- [New] Reduce Audio Noise in Video Recording [Free and Paid] for 2024
- [Updated] 2024 Approved Unveiling the Premier Monitors Photo Editing's Future
- [Updated] Flipped Frames Understanding Instagram Video Orientation
- Clearing Up Windows' Sonic Conflicts
- Configuring Your Internet Connection for Maximum Privacy on Win 11
- Enhance Mobile Browsing with Bing's New AI-Enhanced Feature for Android & iOS
- Essential Windows Timekeepers For Pomodoro Lovers
- Guidelines for Controlling Chrome's Autonomous Tabs
- How to Downgrade iPhone 15 to an Older Version? | Dr.fone
- In 2024, 6 Ways To Transfer Contacts From Tecno Camon 20 Pro 5G to iPhone | Dr.fone
- Master the Art of Hyper-V Enablement in Win11
- Rebuilding Connected Elements in Windows Explorer
- Step Up Your Speaking Game - Access Free, User-Friendly Audio Alteration Tools for 2024
- The Proper Way to Link Zoom and Your Gmail Accounts
- Troubleshooting Tips: Stop Elite Dangerous From Crashing on Windows or Mac OS
- Unleash Potential with Kali Integration in Windows
- Title: Step-by-Step Guide: Personalized Window Snaps in Windows
- Author: Richard
- Created at : 2024-11-30 01:31:59
- Updated at : 2024-12-07 01:55:31
- Link: https://win11-tips.techidaily.com/step-by-step-guide-personalized-window-snaps-in-windows/
- License: This work is licensed under CC BY-NC-SA 4.0.
