Step-By-Step Guide to Print Again in Win11
Step-By-Step Guide to Print Again in Win11
Microsoft may have jumped the barrel with Windows 11, which launched with a slew of faults and flaws. Some of these were resolved in the later versions, but others are still present today–printer errors being one of them.
Even after months of tinkering by the Microsoft team, if this issue is keeping you from printing important documents, you might want to look at this compilation of some tried and tested methods known to fix it.
Perform Basic Checks and Fixes
Apply the following preliminary checks and fixes first, as they may resolve the issue right away:
- Turn off your printer and turn it back on again.
- Unplug the printer from its power source and reconnect it.
- If you have a wired printer, make sure it’s properly connected and that the cable connecting it to your device is in good condition.
- Connect the printer to a different USB port to rule out possible port issues. If a USB port issue turns out to be the root cause of the problem, follow the instructions in our guide on how to diagnose and fix USB port issues .
- If you have a wireless printer, ensure it is properly paired with your device. You can also disconnect it once and repair it again to make sure there are no temporary glitches.
- If you have multiple printers connected to your device, unplug them all except the one you intend to use.
- If your office printer isn’t working correctly, make sure it isn’t already connected to more devices than it’s allowed to.
- Reload the printer tray if it has run out of paper.
- Ensure your printer hasn’t run out of ink or toner.
If none of the aforementioned basic checks and fixes resolves the issue, you can start applying the remaining fixes.

Key features:
• Import from any devices and cams, including GoPro and drones. All formats supported. Сurrently the only free video editor that allows users to export in a new H265/HEVC codec, something essential for those working with 4K and HD.
• Everything for hassle-free basic editing: cut, crop and merge files, add titles and favorite music
• Visual effects, advanced color correction and trendy Instagram-like filters
• All multimedia processing done from one app: video editing capabilities reinforced by a video converter, a screen capture, a video capture, a disc burner and a YouTube uploader
• Non-linear editing: edit several files with simultaneously
• Easy export to social networks: special profiles for YouTube, Facebook, Vimeo, Twitter and Instagram
• High quality export – no conversion quality loss, double export speed even of HD files due to hardware acceleration
• Stabilization tool will turn shaky or jittery footage into a more stable video automatically.
• Essential toolset for professional video editing: blending modes, Mask tool, advanced multiple-color Chroma Key
1. Run the Printer Troubleshooter
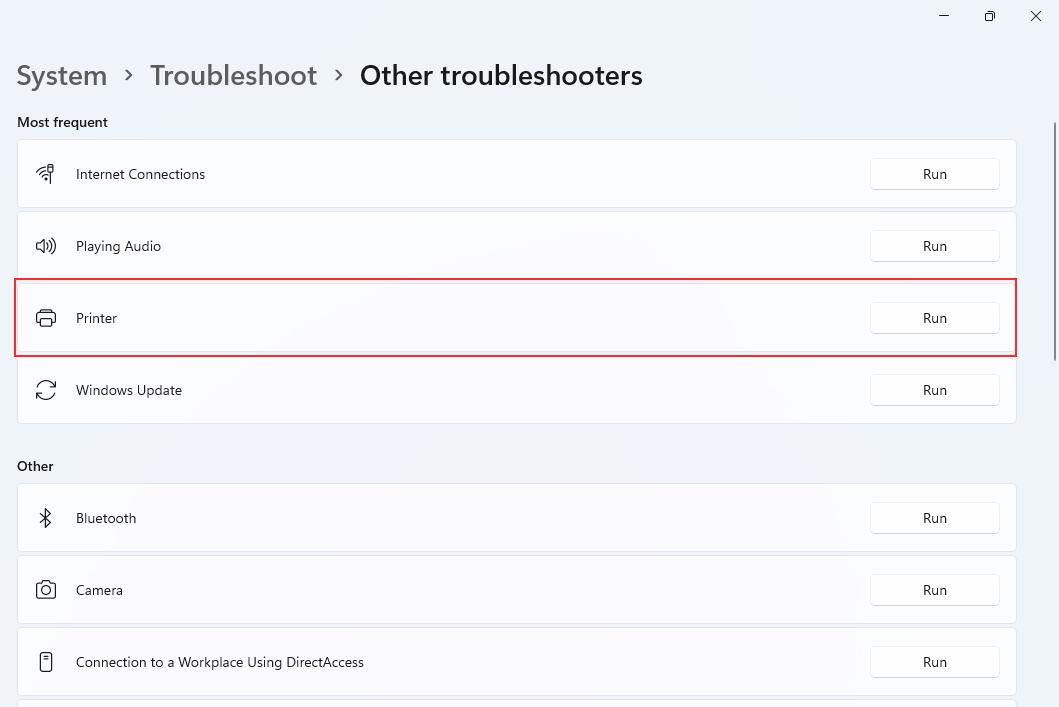
Start investigating the problem by running the Printer troubleshooter. It’s a built-in utility in Windows that helps users diagnose issues with their printers and provides suggestions for fixing them.
To run the troubleshooter, open Settings > System > Troubleshoot > Other troubleshooters . Here, you will find thePrinter troubleshooter among the list of Windows troubleshooters. Click on theRun button next to it to activate it.
 SwifDoo PDF Perpetual (2-PC) Free upgrade. No monthly fees ever.
After that, follow the on-screen instructions to assist the troubleshooter in diagnosing the printer’s problem. If there are any software issues impeding your printing process, the troubleshooter will likely show you how to fix them.

2. Update the Relevant Drivers
Running the troubleshooter should be your go-to step whenever an error or issue arises. However, it is highly rare for it to diagnose, let alone solve, the problem. For this reason, your next reasonable step should be to check for driver updates and ensure the drivers are up-to-date. Here’s how to go about it:
- Right-click theStart Menu button and selectDevice Manager from the list.
- Scroll down and expand thePrint Queues category.
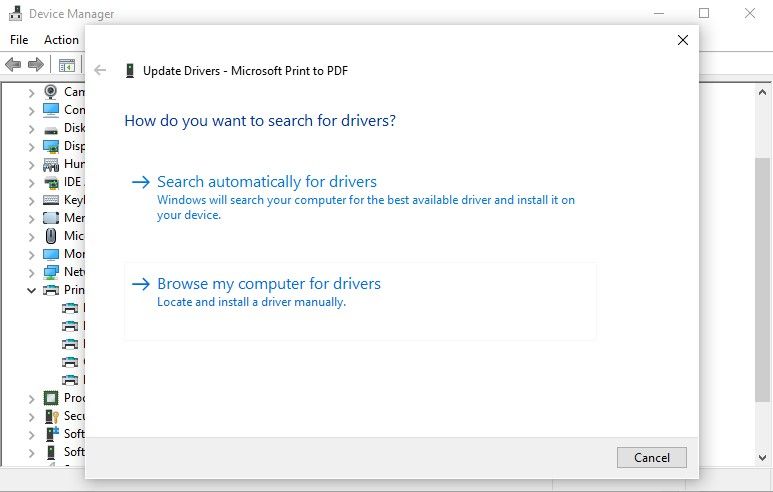
- Right-click onMicrosoft Print to PDF and selectUpdate driver .
- SelectingSearch automatically for updated driver software in Windows 11 runs a check through your PC for updates.

If it shows the best device driver already installed, you can still give the manual option a try. To do this:
- Right-clickMicrosoft Print to PDF and selectProperties from the drop-down menu.
- Go to theDetails panel.
- SelectDevice instance path from the drop-down list underProperty and then copy theValue that appears.
- Go to the DriverPack database .
- Paste the copied value in the search box, download a suitable driver and then install it.
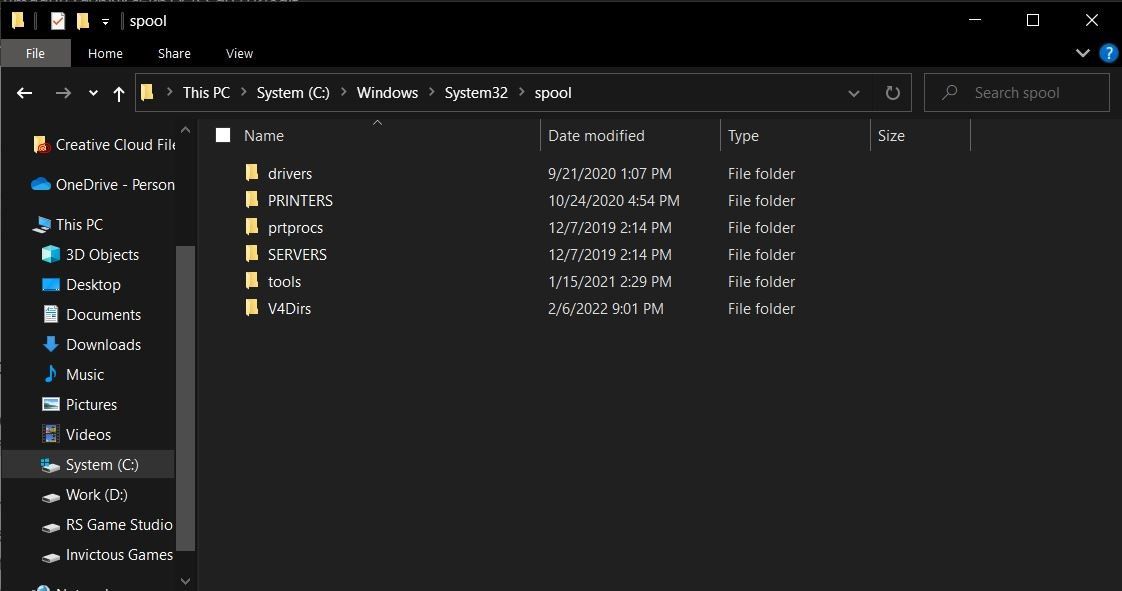
3. Restart the Print Spooler Service
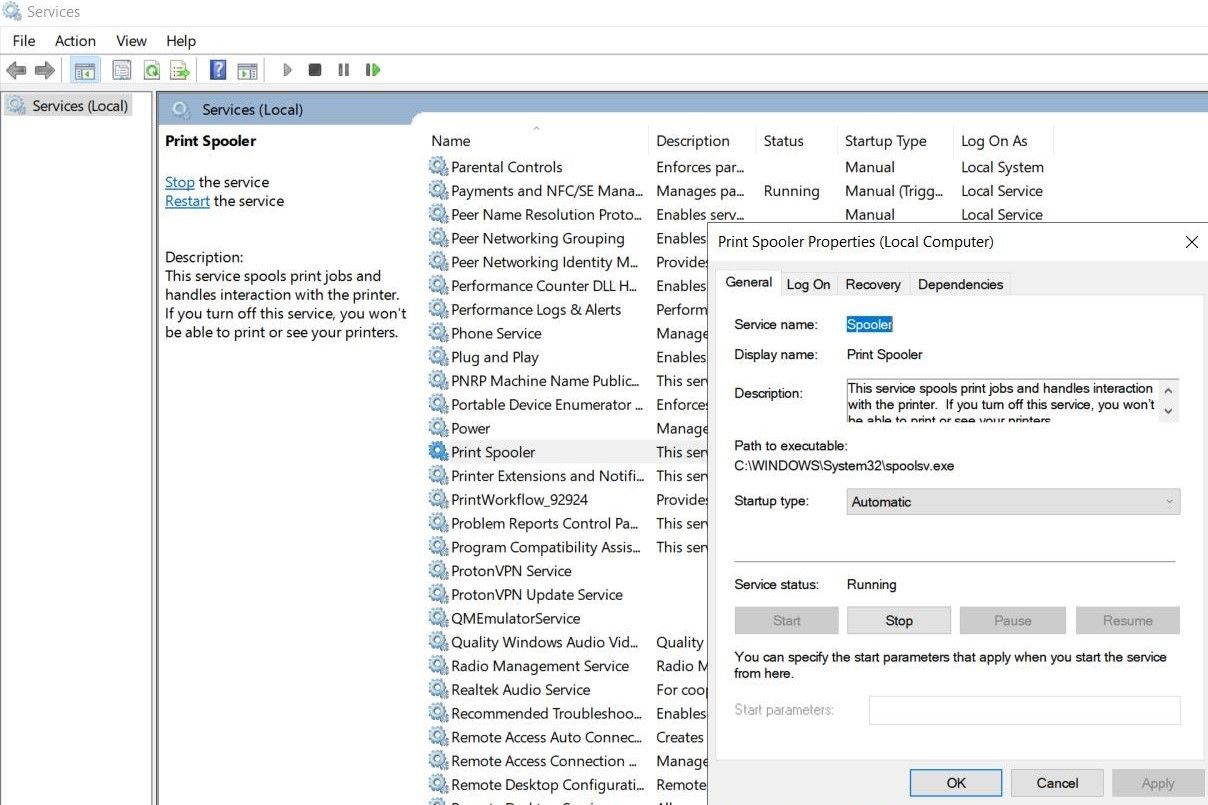
If updating the printer drivers does not fix the problem, you should check whether the print spooler service is running. The printer spooler service handles your operating system’s interactions with the printer. If this service is turned off, or its files get corrupted, your device may not even detect the printer.
So, you should restart the service and rebuild all of its files. Follow these steps to do that:
- PressWin + R to launch the Run dialogue box.
- Type “services.msc “ and press enter.
- In services, findPrint spooler and double-click on it.
- Proceed by clicking onStop .
- Then follow the pathC:\Windows\system32\spoolsv.exe and delete all the files present in the folder.
- Now, all you have to do is go back toServices and manually start the print spooler service again.
- Restart your PC.

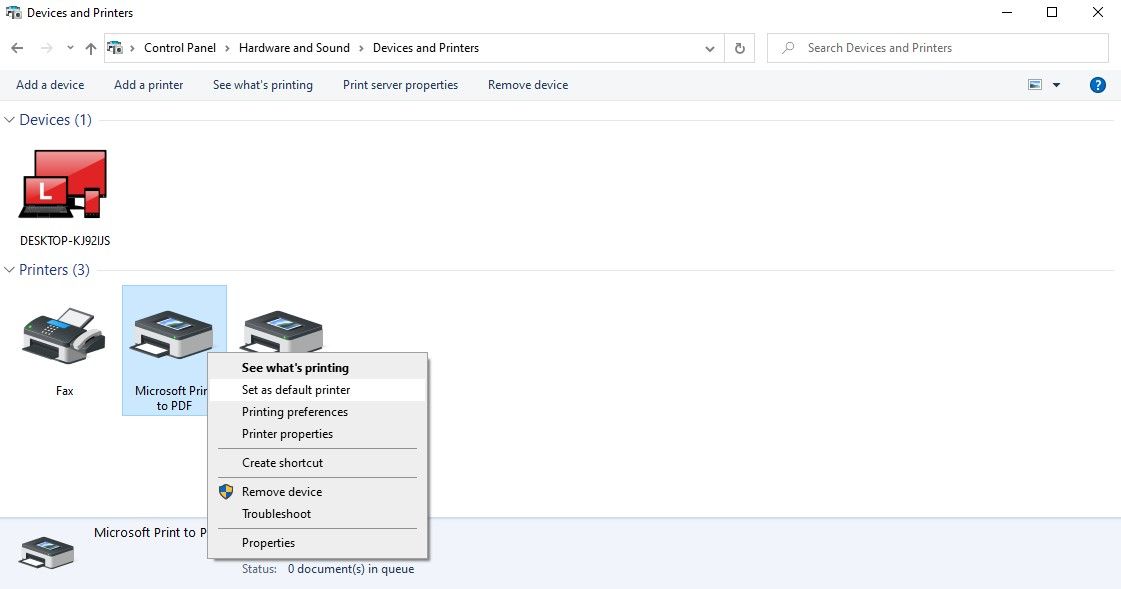
4. Recheck Your Default Printer
Often, improper printer and scanner setup is the leading cause of printing issues. The most common reason why you face printer issues is that you didn’t choose your PDF printer as your default printing device or that you configured it to the incorrect port. It can simply be solved by:
- OpenControl Panel through your Windows search menu
- ClickView devices and printers underHardware and Sound .
- Under thePrinters panel, right-click on your PDF printer and selectSet as default.
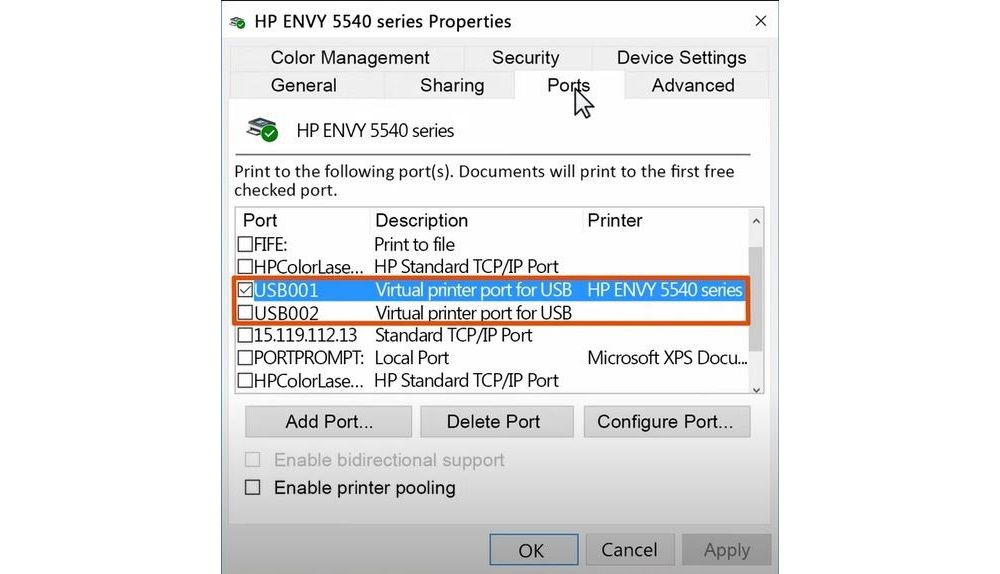
- Then, head over toProperties > Ports .
- Scroll through the list and select the port type that matches your connection.
- SelectConfigure Port > Apply > OK .
 Simple and intuitive video editing
5. Disable the Windows Defender Firewall
If your problem is still not solved the most probable culprit could be the Windows Defender firewall. It’s possible that your firewall has been configured too strictly, preventing the printer from interacting properly. So, turning off the firewall could fix the probem.
If you have never disabled the firewall before, check out our guide on how to temporarily disable the Microsoft Defender firewall .
6. Check for New Windows Updates
Windows releases updates periodically to fix existing bugs within the operating system. If you keep the updates paused or don’t let them install on time, you’re likely to run into unforeseen issues. To ensure that’s not the case, see if there is a new update available. If there is, you should install it immediately.
Here’s how you can check that:
- Press theWin key and click on theSettings icon.
- Head over toWindows Update
- Click onCheck for Updates .
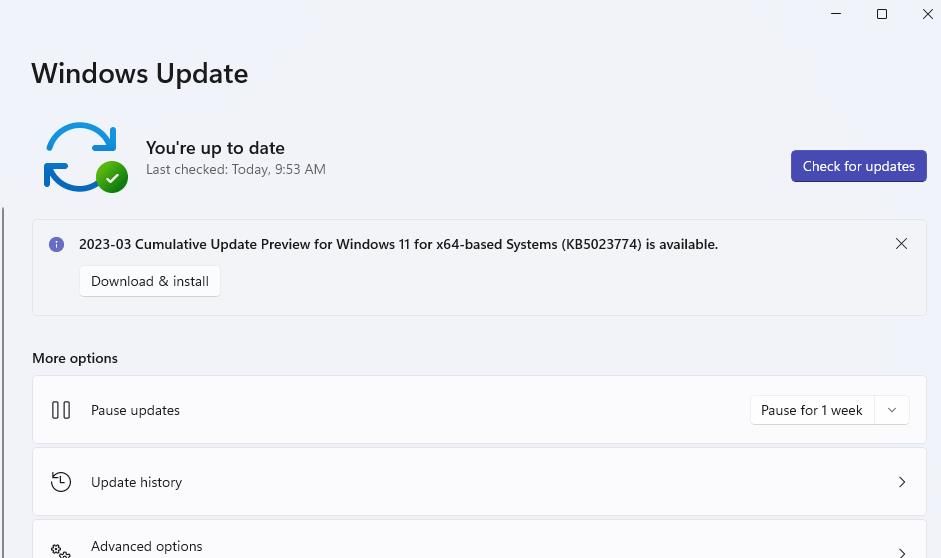
Windows will automatically search for updates, and if any new version is available, it will be installed, thus resolving your printer error.
7. Remove Your Last Windows 11 Update
Ironically, a new Windows update can also invite bugs that render your printer useless. If you noticed your printer stopped working right after a recent Windows update, you will need to delete the update from your computer.
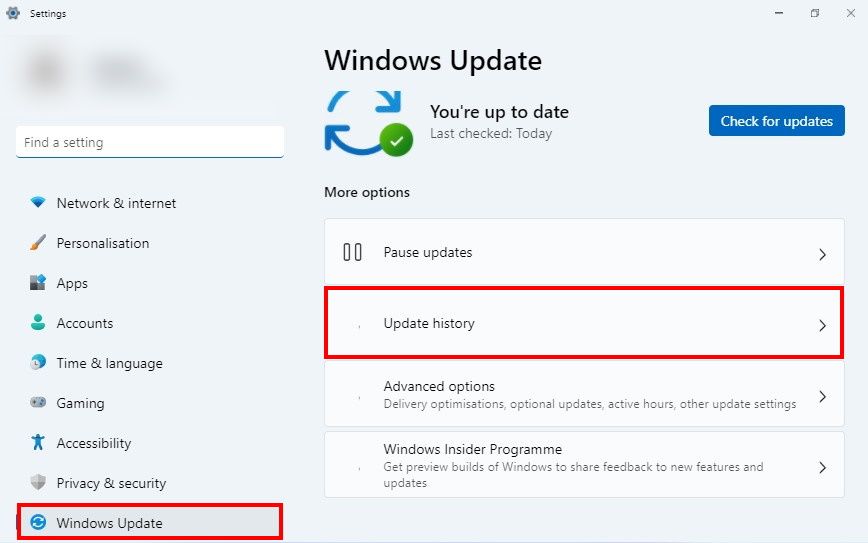
For this, head over toSettings > Windows Update > Update history. Here, scroll down and go toUninstall updates located underRelated settings . This action will prompt open a list of Windows updates where you must select the latest one and click onUninstall .
If the latest Windows 11 update was the culprit, reversing it should do the trick and kickstart the printer once again.
8. Run System Restore
If the problem began as soon as you upgraded to Windows 11, and you’ve exhausted all other alternatives, there’s one final solution–the Windows System Restore. Using this method restores Windows to a previous restore point where you know your printer was functional without any error.
To go back to a restore point:
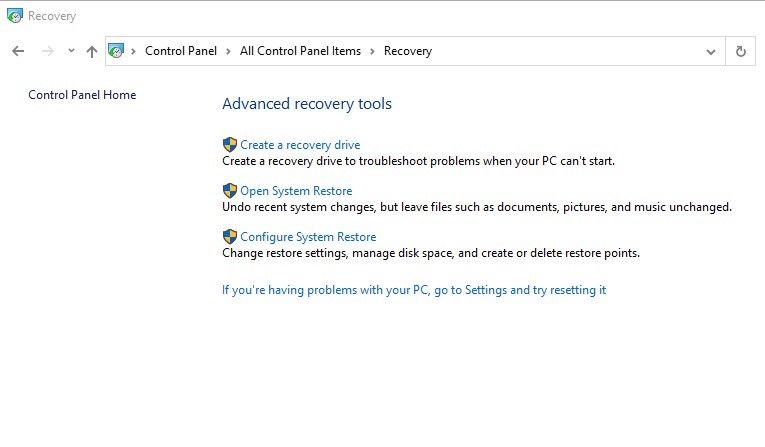
- Press theWindows key and typeControl Panel .
- Open the Control panel by clicking on its icon.
- Type**”Recovery”** in the Control Panel’s search box, and go to the Recovery settings.
- SelectO pen System Restore .
- The System Restore dialogue box will launch open. Click onNext to proceed forward.
- Select the restore point to restore your computer back to when your printer was functioning without a hitch.
- Again, click onNext and thenFinish to confirm your restore point.
- It will confirm one last time if you wish to proceed with the system restore process. Move your cursor toYes and click.
Your PC will restart while it resets your Windows 11 to its last restore point.
Printer’s Fixed and Running—What’s Next?
Whether the printer’s malfunctioning due to troubles with your operating system or general hardware issues, it can be a frustrating experience. But hopefully, now that your printer is up and running smoothly again with the aid of these fixes mentioned above. Feel free to delve into how you can make the most of your home and office printers.
- Title: Step-By-Step Guide to Print Again in Win11
- Author: Richard
- Created at : 2024-08-16 01:58:16
- Updated at : 2024-08-17 01:58:16
- Link: https://win11-tips.techidaily.com/step-by-step-guide-to-print-again-in-win11/
- License: This work is licensed under CC BY-NC-SA 4.0.