Steps to Reactivate Inactive Windows Firewall Defense

Steps to Reactivate Inactive Windows Firewall Defense
Windows Firewall is crucial to ensure the security of your computer and protect it from potential threats. However, sometimes you may encounter issues while enabling it.
Below, we explore the different solutions you can try to fix this issue for good.
Disclaimer: This post includes affiliate links
If you click on a link and make a purchase, I may receive a commission at no extra cost to you.
1. Run the Firewall Troubleshooter
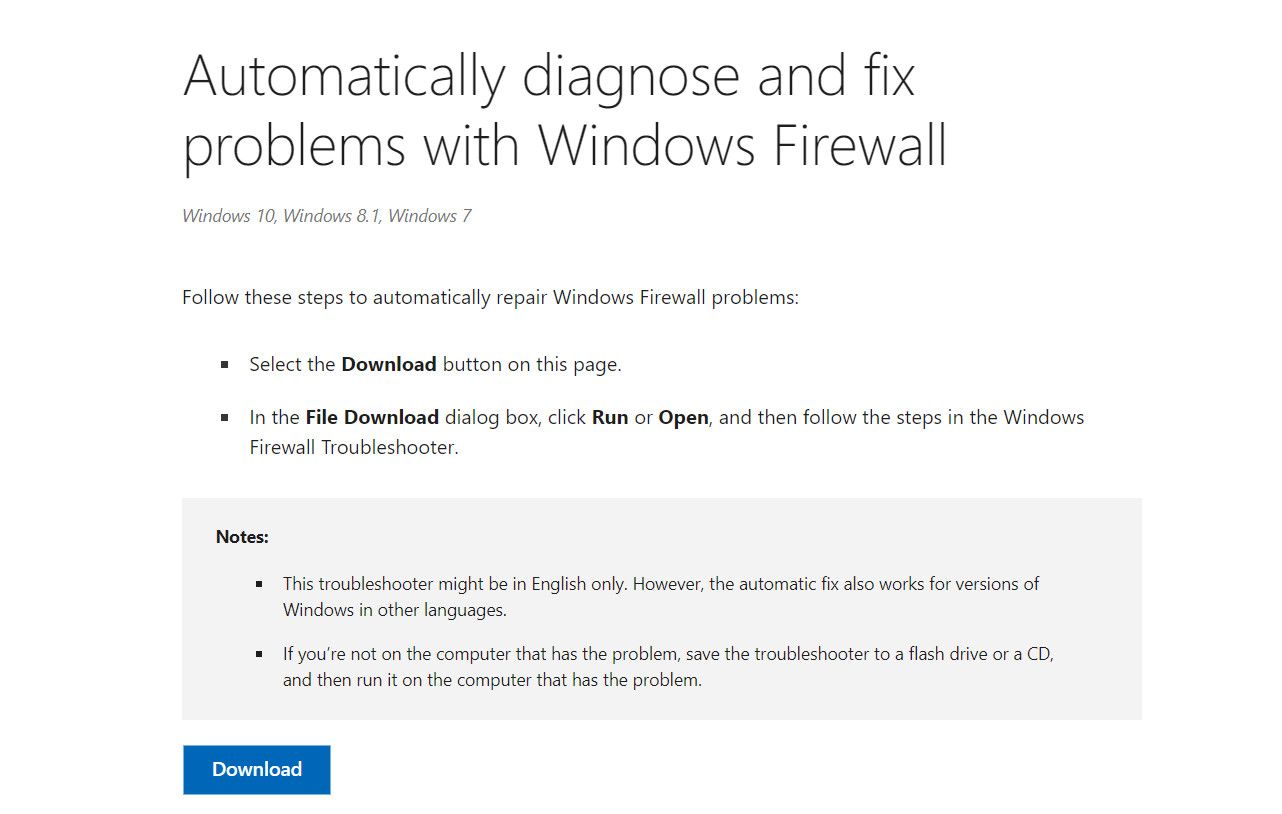
If you are having trouble enabling Firewall in Windows, it is a good idea to start troubleshooting using the official Firewall troubleshooter released by Microsoft Automated Troubleshooting Services.
This utility will scan your system for underlying problems that might be preventing Firewall from functioning. If an issue is identified, it will suggest relevant fixes that you can either apply manually or from within the troubleshooter.
Here is how you can run the troubleshooter:
- Head over to the official Microsoft page for the troubleshooter and download it.

- Click on the downloaded file and proceed with the on-screen instructions to start the scan.
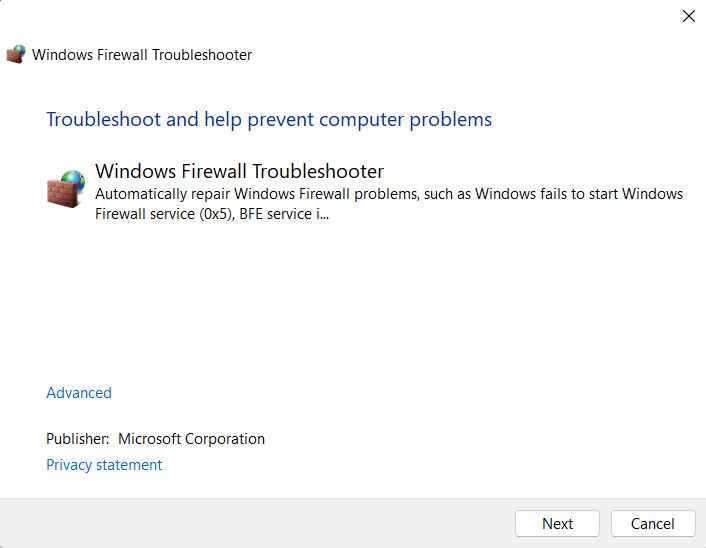
3. Once the scan completes, check the results and apply the solutions suggested by the troubleshooter.
You can now close the troubleshooter and check if the issue is resolved.
2. Check if Another Security Software Is Active
Are you using a third-party security program on your computer? If so, there is a good chance that it is conflicting with Windows Firewall and stopping it from working. As such, if you have installed another antivirus app recently, we recommend temporarily disabling or uninstalling the third-party security program and then enabling Windows Firewall.
Disabling the third-party antivirus software may vary depending on the program you have installed. However, a common approach is to right-click on the antivirus icon located in the taskbar. From the context menu that appears, you should find an option to disable the antivirus temporarily until you restart your computer.
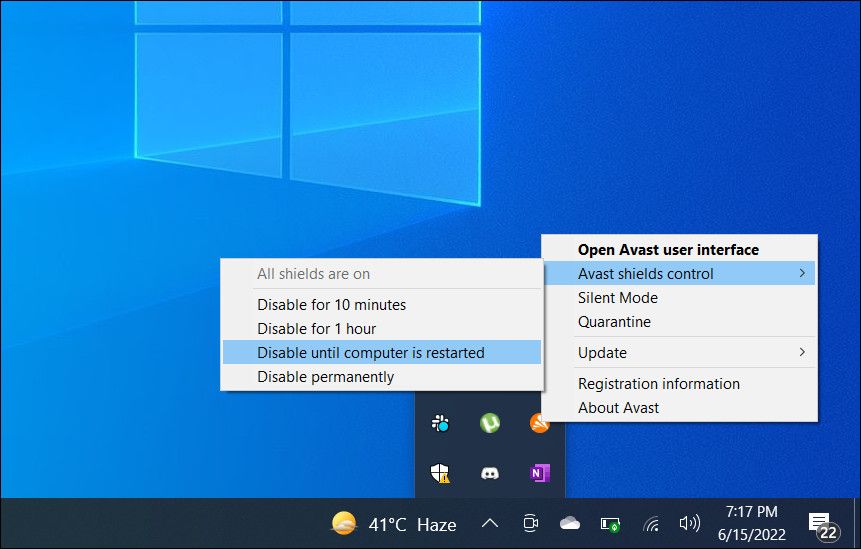
After disabling the antivirus, try enabling the Windows Firewall and check if it functions properly now.
3. Reset the Windows Firewall settings
The issue might also be with the Firewall settings. You can fix any such issues by resetting Windows Firewall settings, as it will restore the firewall configuration to its default state, undoing any customizations or changes that might be causing conflicts.
Here is how you can proceed:
- Press the Win + R keys together to open Run.
- Type “control” in Run and click Enter.
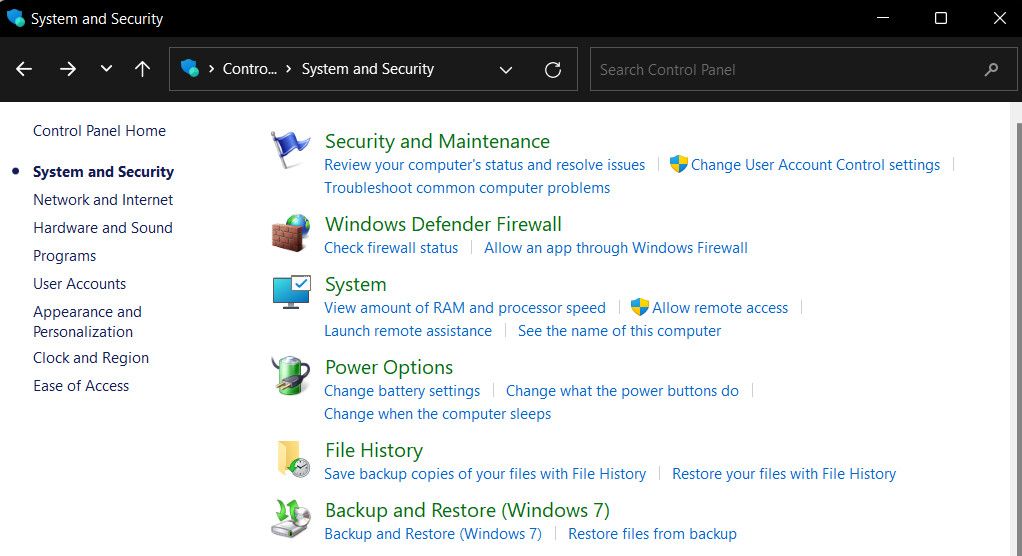
- In the Control Panel, expand the View by option and choose Category.
- Click on System and Security > Windows Defender Firewall.

- Head over to the left pane and choose Restore defaults.
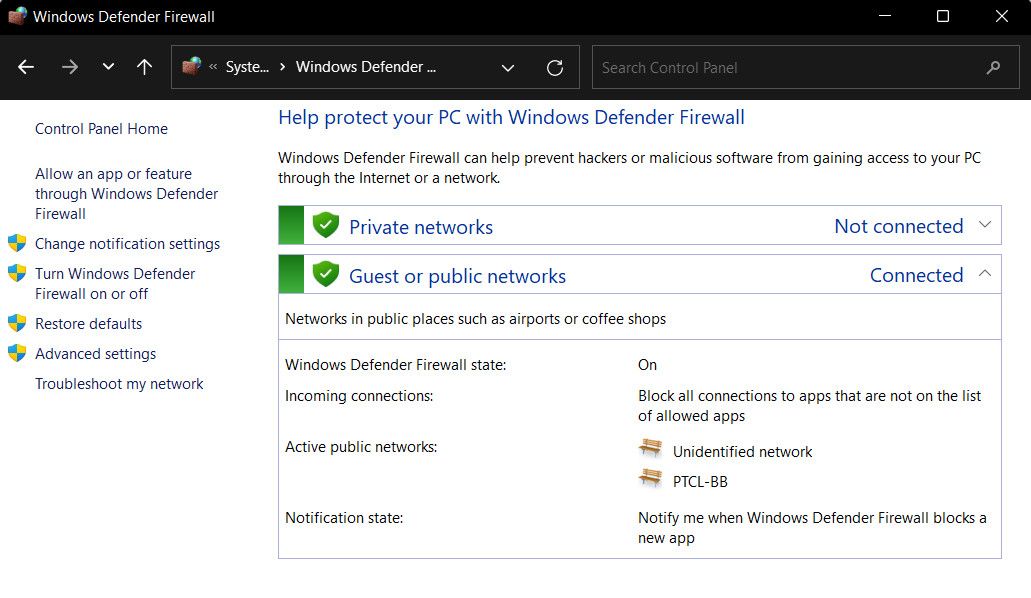
- Confirm the action in the following prompt and proceed with the on-screen instructions to proceed.
- Once done, open Run again.
- Type “cmd” in the text field and press Ctrl + Shift + Enter keys together. This will open Command Prompt with administrator privileges.
- Click Yes in the User Account Control prompt.
- Once you are inside the Command Prompt window, type the command mentioned below and click Enter to execute it. This will force enable the Firewall component.
netsh firewall set opmode mode=ENABLE exceptions=enable - Wait for the command to execute and then restart your computer. Check if the problem is now fixed.
4. Modify the Registry Editor
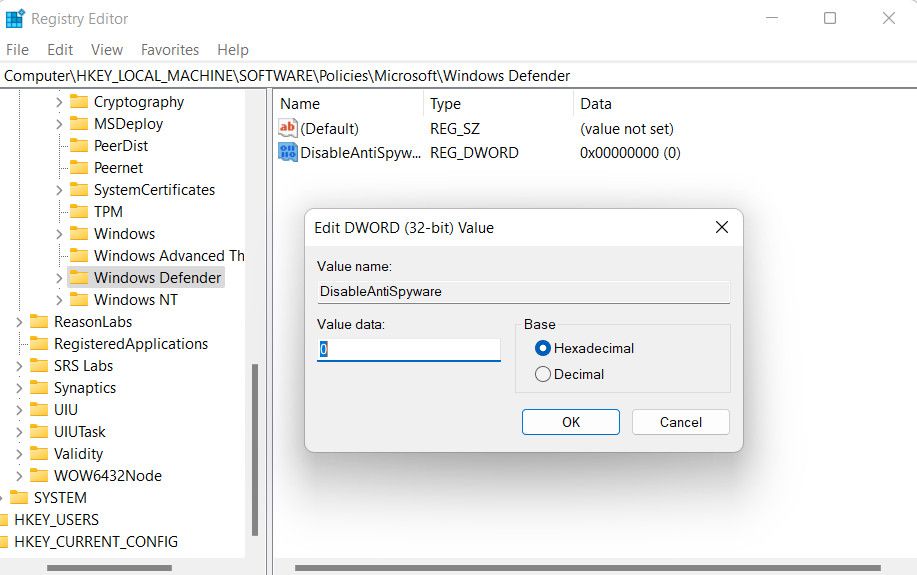
There is also a chance that a Registry key DisableAntiSpyware is enabled, which is preventing you from enabling Firewall on your computer.
To check if this is the case in your situation, you can access the Registry Editor and check the status of the DisableAntiSpyware key.
However, before you proceed, we highly recommend creating a Registry backup , just to be safe.
Once that is done, proceed with the steps below:
Press the Win + R keys together to open Run.
Type “regedit” in Run and click Enter.
Click Yes in the User Account Control prompt.
In the Registry Editor, navigate to the location below.
HKEY_LOCAL_MACHINE\SOFTWARE\Policies\Microsoft\Windows DefenderMove to the right side and look for the DisableAntiSpyware key. If you locate it, delete it. You can also double-click on it and change its value to 0 if you do not want to delete it.

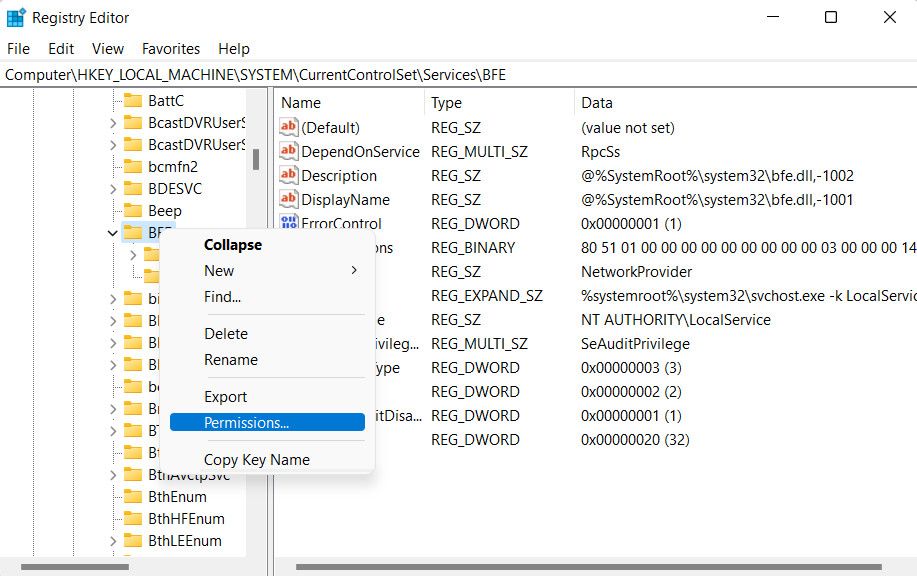
Once done, head over to the following location:
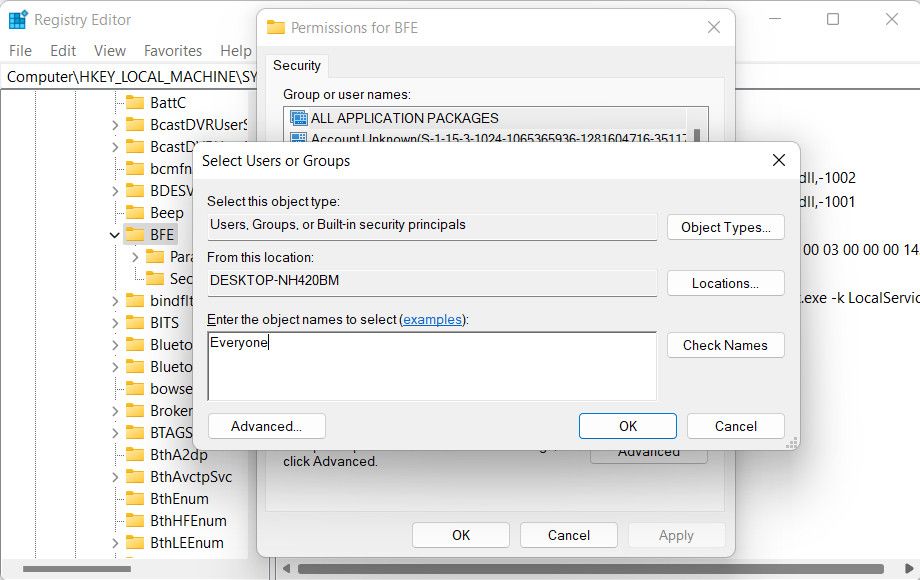
HKEY_LOCAL_MACHINE/SYSTEM/CurrentControlSet/Services/BFERight-click on the BFE key and choose Permissions from the context menu.

Under “Group or user names”, click on Add.
Type “Everyone” in the “Enter the object names to select” and click OK.

Now, head over to the “Permissions for Everyone” section and checkmark the box associated with Full Control under Allow.
Click Apply to save the changes and check if the issue is now resolved.
Additional Generic Fixes to Try
Apart from the fixes we have listed above, here are some additional solutions that you can try to fix the Firewall problem.
- Ensure relevant services are running: Windows Firewall relies on several services to function properly. Ensure that the Windows Defender Firewall, Windows Defender Advanced Threat Protection, Windows Defender Antivirus Network Inspection, and Windows Defender Antivirus services are working fine in the Windows Services utility.
- Scan with SFC: You can also scan the system for underlying corruption errors that might be leading to the problem using the System File Checker . You can run it via Command Prompt and analyze the results to find the culprit.
- Clean install Windows: If nothing works and it is essential for you to enable Firewall, you can perform a clean install of Windows. It will wipe the existing installation and download a new one without any underlying problems.
Protect Your System With Windows Firewall
The steps above should help you fix issues with Windows Firewall easily. If the error persists and you do not want to clean install the system yet, you can report the issue to Microsoft and wait for them to suggest a fix.
Below, we explore the different solutions you can try to fix this issue for good.
Also read:
- [New] 2024 Approved Leading Tech Mac's Finest Video Recording Software
- [New] In 2024, The Ultimate Guide to Free, Accurate YouTube Transcript Creation
- [Updated] Top-Ten Video Cards Selection Guide for YouTube Aficionados
- 2024 Approved Unveiling 5 Cutting-Edge HMDs for Drone Masters
- Easy Steps to Revert Settings After System Restart
- Effizienteste Tools Zum Kopieren Ihrer Datenträger (HDD/SSD) Unter Windows 10 - Kostenlos & Benutzerfreundlich
- Expert Tips for Fixing a Malfunctioned Microphone on the Runmus Gaming Headset
- How to Optimally Utilize a Creative Commons License
- In 2024, How to Transfer Data from Infinix Zero 30 5G to Other Android Devices? | Dr.fone
- Overcoming Hidden Windows Bar when Window Is Full Screen
- Quick Guide to Addressing LSA Deactivation Issue
- Remedy Unrecognized Razers by Synapse in Latest Windows OS
- Removing Autostart of Discord From Windows Operating System
- Shaping the Future of Windows 11 with AI Assistance
- Sticking with the Classic: Top 7 Factors Favoring Windows 10
- Understanding Windows Update Classification
- Updated Drivers for Your Epson WF-3620 - Download & Install on Windows 10, 8 or 7
- Windows Deep Dive: Mastery of Activating Concealed Character Profile Tool
- コンピュータで動画ファイルを音声ファイルに転換する手順
- Title: Steps to Reactivate Inactive Windows Firewall Defense
- Author: Richard
- Created at : 2024-12-05 21:29:41
- Updated at : 2024-12-06 16:43:29
- Link: https://win11-tips.techidaily.com/steps-to-reactivate-inactive-windows-firewall-defense/
- License: This work is licensed under CC BY-NC-SA 4.0.
