Steps to Rectify Network Adapter Error 31 on Windows

Steps to Rectify Network Adapter Error 31 on Windows
Are you encountering an error message on Windows that reads “network adapter error code 31: this device is not working properly”? This error often occurs due to a corrupted or incorrect version of the network adapter driver installed on your PC.
As such, let’s explore all the ways to fix the network adapter error code 31 on Windows.
Disclaimer: This post includes affiliate links
If you click on a link and make a purchase, I may receive a commission at no extra cost to you.
1. Check for Any Pending Network Driver Updates
First off, check to see if your network driver has any pending updates. While you can update the drivers for the device connected to your computer using Device Manager, we don’t recommend it, as Device Manager often fails to find the most recent updates for the driver.
You will most likely find the latest network driver on your computer manufacturer’s website, so check who made your PC and visit their website for details. If you use an external network adapter, visit the adapter manufacturer’s website instead.
Additionally, you can also find new drivers using your manufacturer’s proprietary system management tool. For example, with Lenovo and HP computers, you can use the Lenovo Vantage and HP Support Assistant utility to find and install new drivers for your network adapter and other devices.
2. Perform a Driver Roll Back
If you believe a recent driver update is causing the error, you can use theRoll Back Driver option to perform a rollback and reinstall the previous version of the network adapter driver.
To perform a network driver rollback:
- PressWin + R to open Run.
- Typedevmgmt .msc and clickOK to open Device Manager.
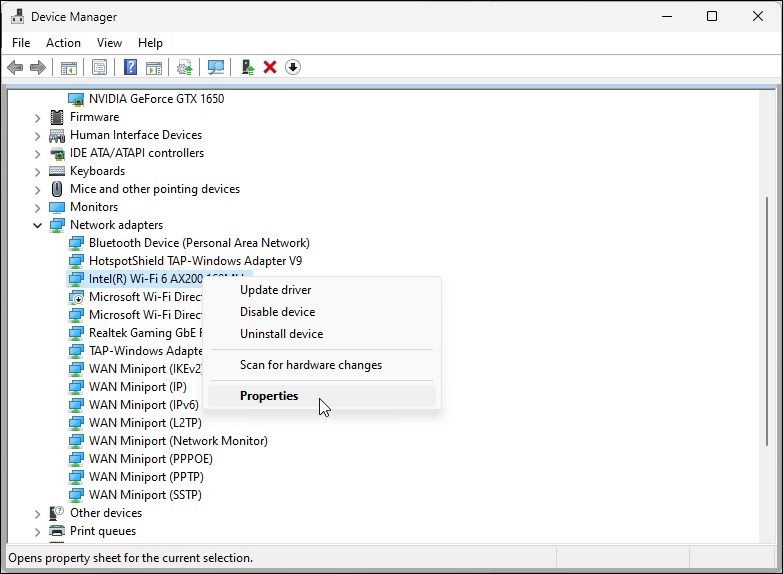
- In Device Manager, expand theNetwork Adapters section.

- Right-click on your network device and selectProperties .
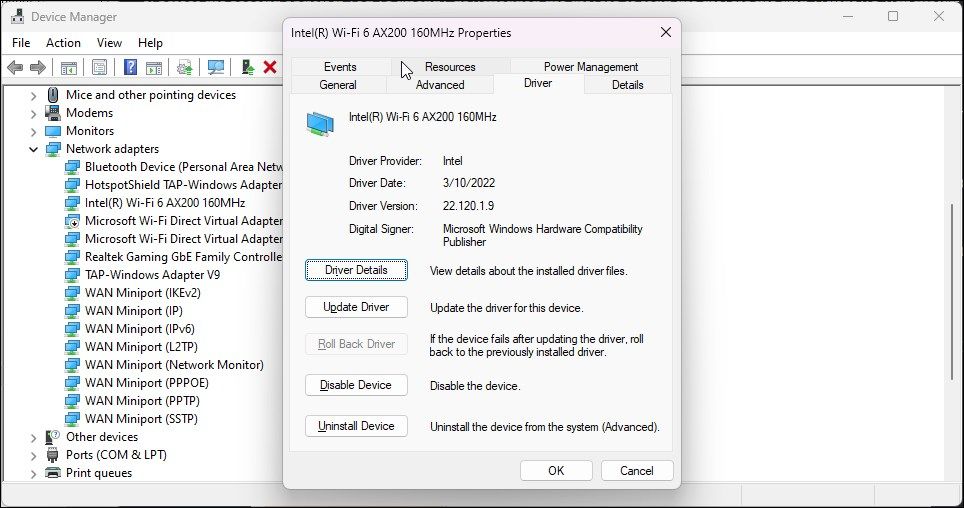
- In theProperties dialog, open theDriver tab.

- Click theRoll Back Driver button. If the option isgreyed out , your computer doesn’t have an older driver to perform a rollback. Check your manufacturer’s website to see if they have older drivers in an archive.
- Next, in the confirmation dialog, give a reason and clickYes .
- Once the driver rollback is complete, check if the problem is resolved. If not, check if you can perform another rollback for the network device driver to see if that helps.
3. Perform a Network Reset
Windows 10 and 11 feature a “network reset” option. This will remove and reinstall the network drivers and other networking components to their factory defaults to help you fix network adapter issues on your computer.
To perform a network reset:
- PressWin + I to openSettings .
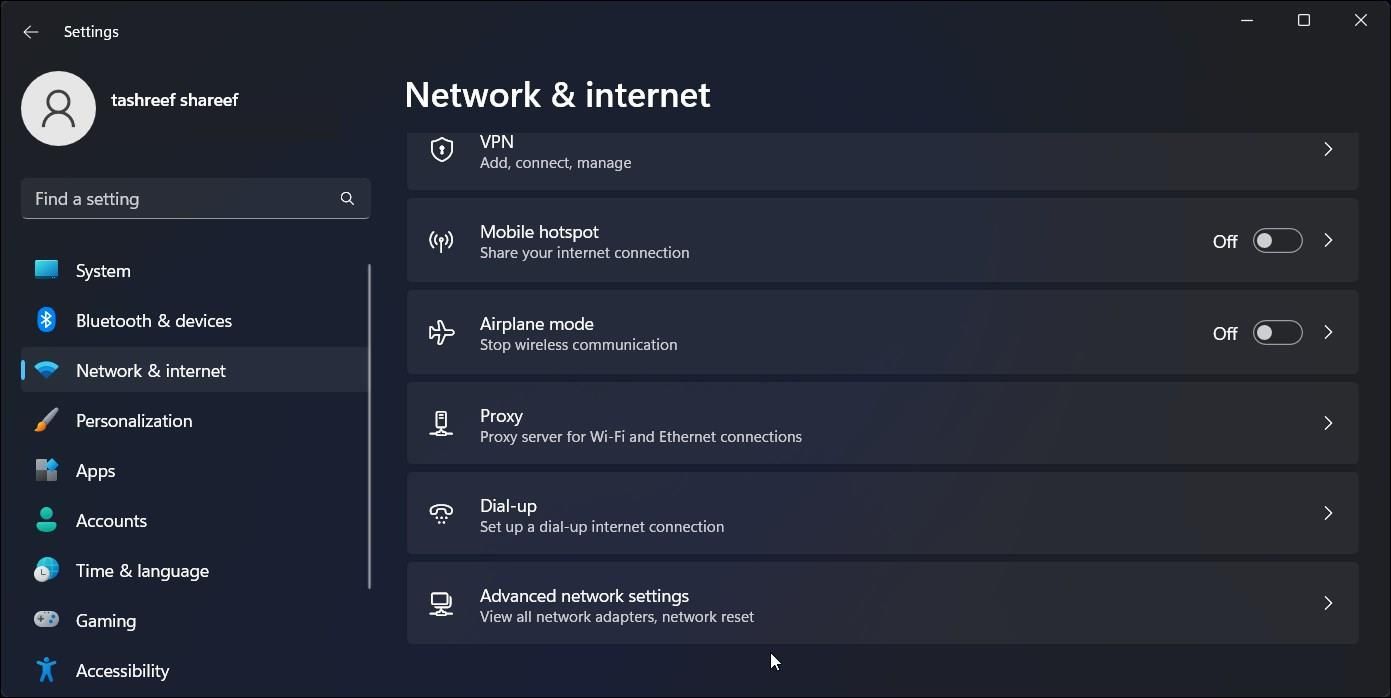
- Open theNetwork & internet tab in the left pane.
- Click onAdvanced network settings .

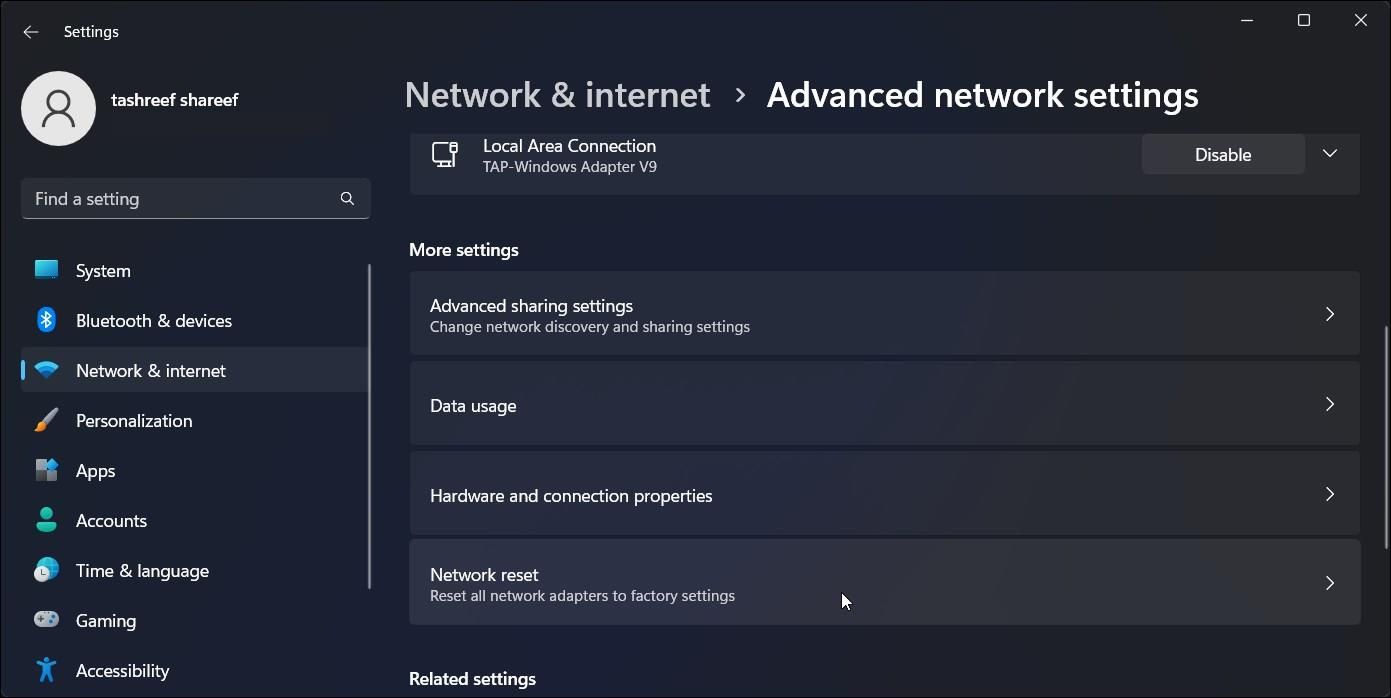
Next, click onNetwork reset .

Click onReset now and clickYes to rest your network settings.
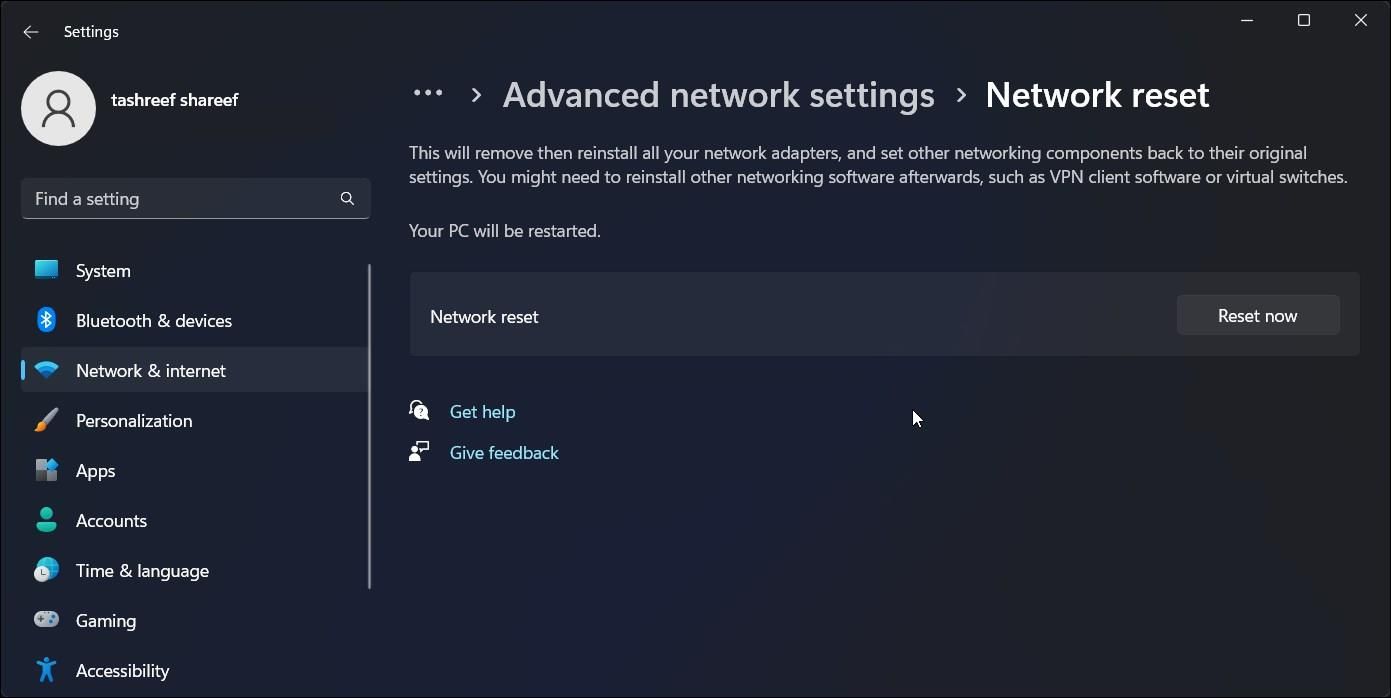
6. Your PC will restart during the process.
3. Delete the Corrupted Network Config File on Older Machines
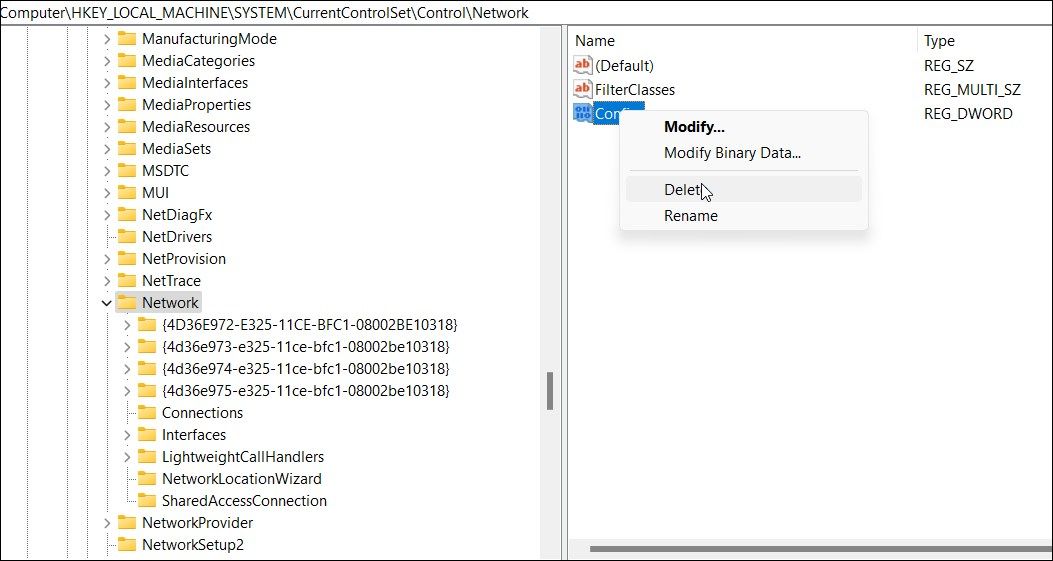
On an older Windows Vista or XP computer, you can resolve the issue by tweaking a registry entry. You need to delete a corrupt config key in Registry Editor and then uninstall the device from Device Manager to fix the error.
The following steps only apply to a Windows computer running Vista or XP.
- PressWin + R to openRun .
- Typeregedit and clickOK to openRegistry Editor .
- In Registry Editor, navigate to the following path:
Computer\HKEY_LOCAL_MACHINE\SYSTEM\CurrentControlSet\Control\Network\ - In the right pane, locate theConfig value.
- Next, right-click on theConfig value and selectDelete .
- ClickYes to confirm the action.
Once the key is deleted, you’ll need to remove and reinstall the network driver. You can do it using Device Manager, as shown in the step below.
Note that modifications to some registry entries may fail due to insufficient permission issues. If you get an error when deleting the Config value, take full ownership of the registry key and then try again. Our guide onhow to take full ownership of registry keys on Windows 10 will work on older systems too.
4. Reinstall Your Network Adapter Driver
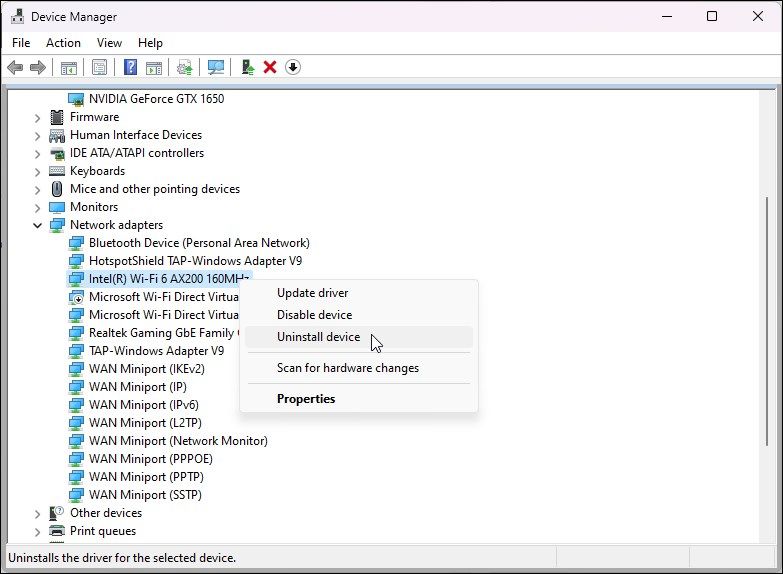
You can manually uninstall your network adapter device and driver to perform a network reset on older Windows versions. You can use the reliable Device Manager to uninstall your network devices.
- Open Device Manager (seehow to open Device Manager for detailed steps).
- Next, expand theNetwork Adapters section.
- Right-click on the network adapter and selectUninstall Device.

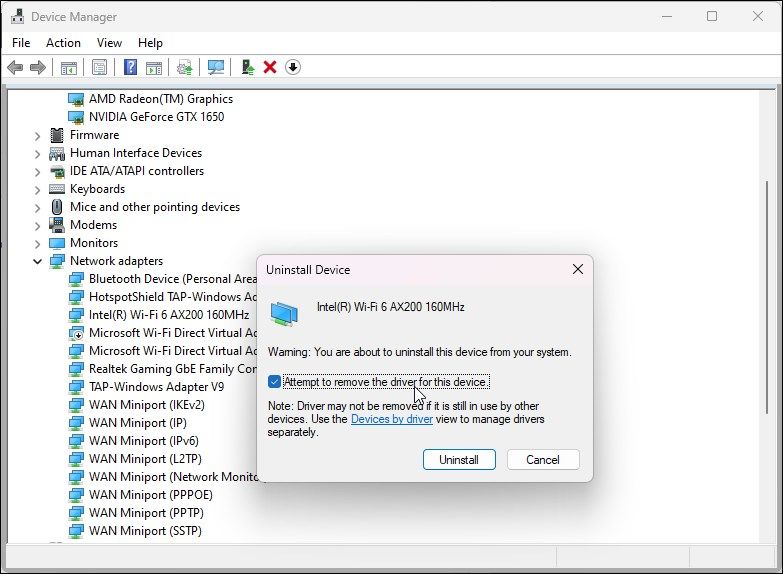
- In the confirmation dialog, check theAttempt to remove the driver for this device option.

- ClickUninstall to confirm the action.
Once uninstalled, restart your PC. After the restart, Windows will automatically detect connected but unrecognized devices and install the necessary drivers.
If Windows fails to install the driver, openDevice Manager , right-click on your network adapter and selectUpdate driver . You can also download the latest drivers from your computer manufacturer’s website, as shown in step one.
6. Perform a System Restore
This error can occur if Windows modifies your network adapter settings during an update. You can use a restore point to undo the changes and restore the computer to its earlier state. Since Windows automatically creates a new restore point before installing an update, you should be able to find a recent restore point to undo the changes.
To perform a restore point:
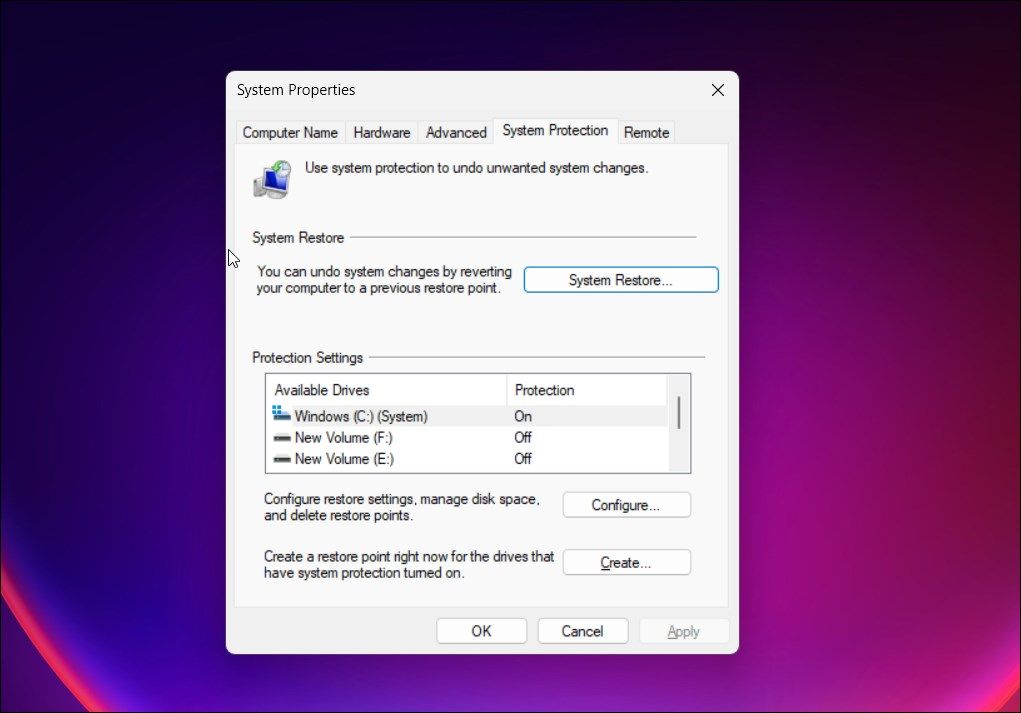
- Press theWin key and typerestore point.
- Click onCreate a restore point from the search result.
- In theSystem Protection dialog, click theSystem Restore button.

- In theSystem Restore dialog, clickNext to view all the available restore points. Additionally, check theShow more restore points option to view older restore points.
- Select the most recent restore point and clickNext .

- Confirm your restore point and read the description to understand what apps and data on your PC are affected.
- ClickFinish to initialize the system restore process. Your PC will restart and may take some time to finish. Your PC will restart and show a system restore success or failure message.
If the restore process fails, try it again. At times, it may take more than one attempt to get it right. If the computer is restored, it should hopefully restore the old network driver configuration and fix the error.
Fix the Network Adapter Code 31 Error on Windows
Network adapter code 31 is one of the many errors that can cause your network adapter to malfunction. To fix the error, check if you have the latest network adapter driver installed. If necessary, perform a driver rollback, clean up corrupt registry value or perform a system restore.
Also read:
- [New] Filmmaker's Checklist On-the-Go Gear Guide for 2024
- [Updated] Customizing AE Title Designs for 2024
- 2024 Approved Top Steadicams for Exceptional Aerial Shots with Drones
- Camera Excellence The Top 10 4K-Ready Shoulder Rigs for 2024
- Conquer Stuttering Challenges: Enhancing Warhammer 40K Experience
- Ensuring File Security: Avoid Common Pitfalls in Microsoft OneDrive
- God of War Game Fixes 'Insufficient Memory Error' Problem
- How to Fix My Samsung Galaxy S24 Location Is Wrong | Dr.fone
- In 2024, Elite Ringtones Selection High-Quality Sites
- Mending Errors: A Guide to FS Repair in Win11
- Navigate Past Chrome Hiccups: Fixes for W11 Users
- Revamping Memory Use on Win 11 OS
- Top-Rated Video Capture Solutions
- Title: Steps to Rectify Network Adapter Error 31 on Windows
- Author: Richard
- Created at : 2024-10-03 02:25:05
- Updated at : 2024-10-08 22:52:28
- Link: https://win11-tips.techidaily.com/steps-to-rectify-network-adapter-error-31-on-windows/
- License: This work is licensed under CC BY-NC-SA 4.0.
