
Stifling Windows Restart Requests
Stifling Windows Restart Requests
Microsoft regularly releases patch updates to enhance your device’s performance and security. When you download this update, Windows often replaces the usual Shut Down and Restart buttons with “Update and shut down” to remind you not to miss the update.
However, you may sometimes encounter the same message prompting even after performing these actions. Read this guide to resolve this issue and stop getting such annoying notifications.
1. Restart the Computer From Settings
If restarting your computer with the power button does not work, do it via the Settings Menu. This trick has worked for many users who encountered the same issue. Try it and see if that helps.
- Open the Settings menu .
- Click Windows Update in the left sidebar.
- Under Windows Update, you will find the Restart now option.
- Select this option to restart your computer and install the pending updates.

2. Install Pending Updates
If your computer keeps reminding you to update and shuts down, check for pending updates. It is possible that the updates were not installed properly and Windows is now asking you to complete them.
To check for pending updates, follow these steps.
- Press Win + I on your keyboard to open the Settings menu.
- From the left sidebar, click on the Windows Update tab.
- Select the Check for updates option from the right pane.
This will search for available updates and install them if there are any. If you see no updates, continue to the next solution.
3. Run the Windows Update Troubleshooter
Windows operating system comes with troubleshooting tools specific to each problem. To solve update-related issues, use the Windows Update troubleshooter. This tool detects corrupted, or faulty files associated with updates and fixes them automatically.
To run the Windows Update Troubleshooter, follow these steps:
- Right-click on Start and select Settings from the menu list.
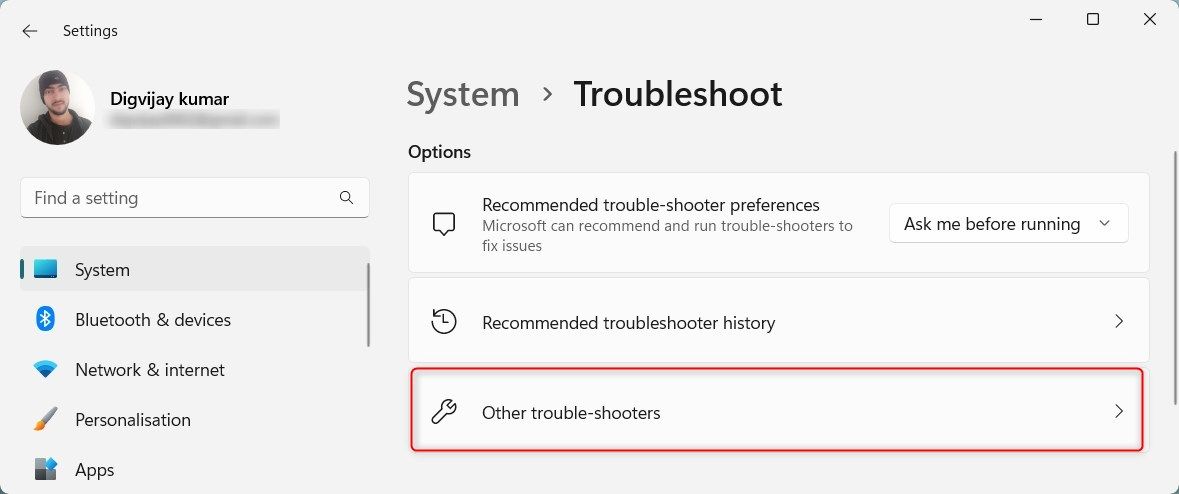
- Select Windows Update in the left sidebar, then click Troubleshoot.
- On the next page, click Other trouble-shooters.
- Look for Windows Update and click Run next to it.

Follow the instructions on the screen to let Windows Update Troubleshooter detect and fix problems. After running the troubleshooter, restart your computer and check if it solves the issue.
4. Clear the Software Distribution Folder
The Software Distribution folder contains downloaded updates and installation files. If these files become corrupted, it could lead to this issue. To fix it, clear the Software Distribution directory and check if that solves the problem.
- Open the Start menu and type CMD in the search bar.
- Press Ctrl + Shift + Enter on your keyboard. This will open the Command Prompt as an administrator.
- If a User Account Control window appears, click Yes to grant administrative privileges.
- In the command prompt window, type the following commands in the order given and press Enter after each command:
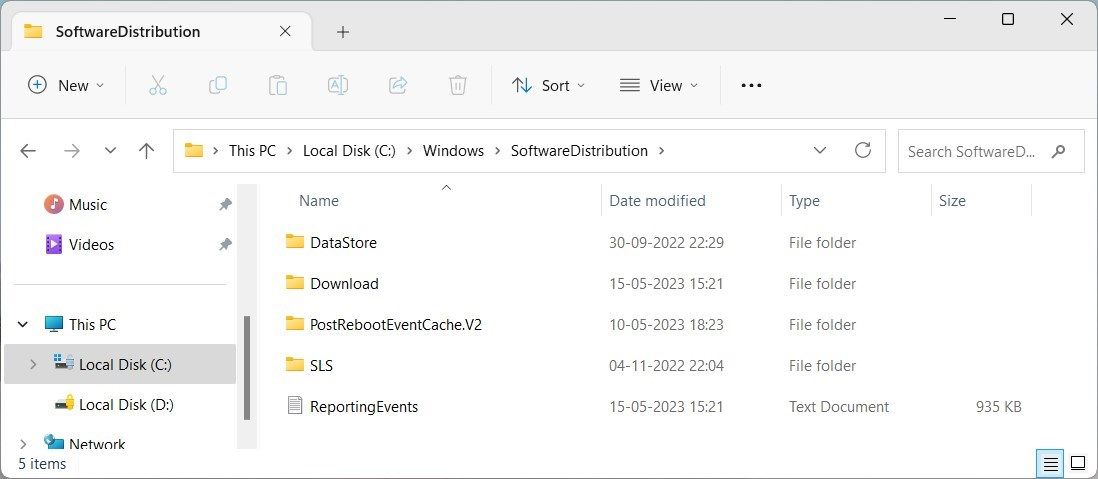
net stop wuauserv net stop bits net stop cryptSvc net stop msiserver - After that, open File Explorer and navigate to this path:
C:\Windows\SoftwareDistribution - In the SoftwareDistribution folder, select all the files and delete them permanently.
OtsAV DJ Pro
- When a permissions pop-up appears, select the checkbox and click Continue.
- After you delete the Software Distribution folder, you must restart the services you stopped. To do so, go back to the Command Prompt window and run the following command:
net start wuauserv net start bits net start cryptSvc net start msiserver
 OtsAV DJ Pro
Now exit the Command Prompt window and restart your computer. After running these commands, check if the issue is solved.
 Easy GIF Animator is a powerful animated GIF editor and the top tool for creating animated pictures, banners, buttons and GIF videos. You get extensive animation editing features, animation effects, unmatched image quality and optimization for the web. No other GIF animation software matches our features and ease of use, that’s why Easy GIF Animator is so popular.
5. Disable Windows Update
If you keep encountering the issue, disable the Windows Update service. This will stop Windows from automatically downloading updates and showing the message.
To disable Windows Update, follow these steps:
- Press Win + R on your keyboard to open the Run command window.
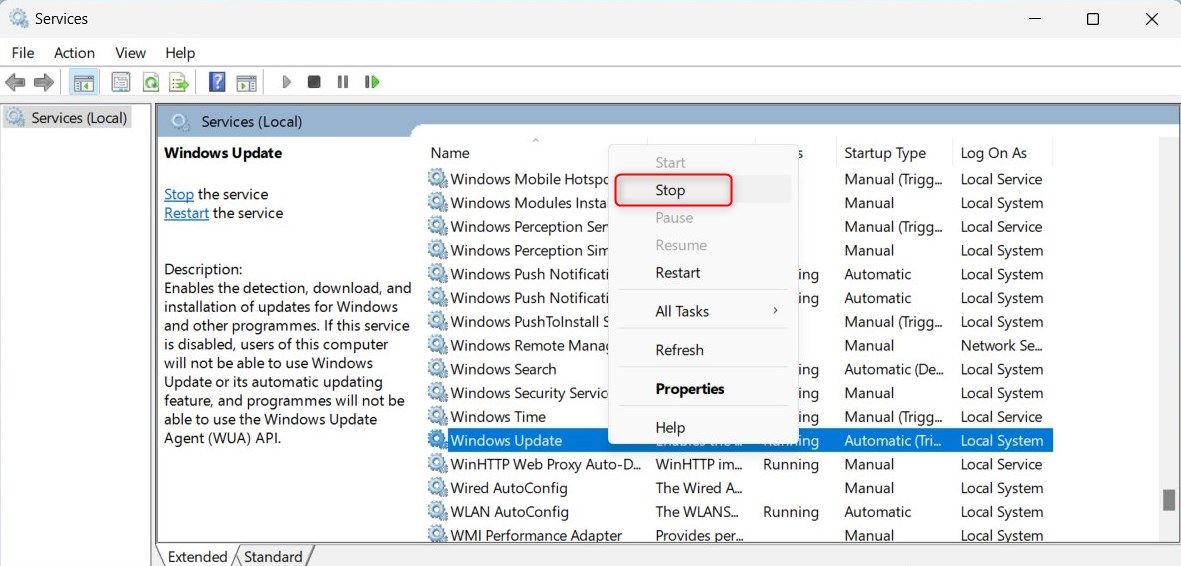
- Type services.msc in the dialog box and press Enter. This will open the Services console.
- Search for Windows Update, right-click on it, and select Stop.
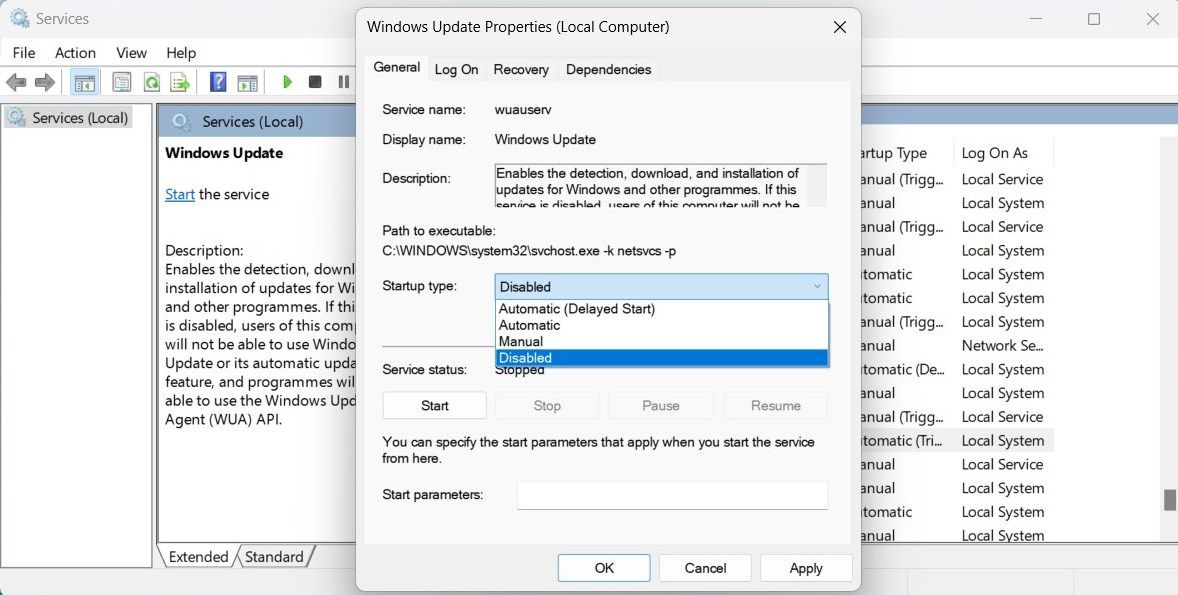
- Now double-click on Windows Update to open the Properties window.
- On the General tab, click the Startup type drop-down and select Disabled.
- Click Apply > OK to save the changes.
- Now close the window and restart your computer.
Sometimes you may not see the Restart option in the Start menu. In that case, run the command prompt as an administrator . Now type shutdown -s -t 0 in the command prompt and hit Enter. This will restart your computer immediately.
Here 0 is the time in seconds. If you want to delay the restart, use a higher number. For example, shutdown -s -t 10 will delay the restart by 10 seconds.
After restarting, you should no longer see the “Update and Restart” or “Update and Shut Down” message.
6. Reset the Windows Update Components
If none of the solutions above work, reset Windows Update components. It deletes all the temporary download files and resets the registry keys containing information about Windows Update. This process also clears any corrupted files associated with updates and allows Windows to download the updates again.
To reset the Windows Update components, follow these steps:
- Open the Notepad application .
- Copy the following commands and paste them into the Notepad window.
net stop bits net stop wuauserv net stop appidsvc net stop cryptsvc Del "%ALLUSERSPROFILE%\Application Data\Microsoft\Network\Downloader\*.*" rmdir %systemroot%\SoftwareDistribution /S /Q rmdir %systemroot% system32\catroot2 /S /Q sc.exe sdset bits D:(A;;CCLCSWRPWPDTLOCRRC;;;SY)(A;;CCDCLCSWRPWPDTLOCRSDRCWDWO;;;BA)(A;;CCLCSWLOCRRC;;;AU)(A;;CCLCSWRPWPDTLOCRRC;;;PU) sc.exe sdset wuauserv D:(A;;CCLCSWRPWPDTLOCRRC;;;SY)(A;;CCDCLCSWRPWPDTLOCRSDRCWDWO;;;BA)(A;;CCLCSWLOCRRC;;;AU)(A;;CCLCSWRPWPDTLOCRRC;;;PU) cd /d %windir% system32 regsvr32.exe /s atl.dll regsvr32.exe /s urlmon.dll regsvr32.exe /s mshtml.dll regsvr32.exe /s shdocvw.dll regsvr32.exe /s browseui.dll regsvr32.exe /s jscript.dll regsvr32.exe /s vbscript.dll regsvr32.exe /s scrrun.dll regsvr32.exe /s msxml.dll regsvr32.exe /s msxml3.dll regsvr32.exe /s msxml6.dll regsvr32.exe /s actxprxy.dll regsvr32.exe /s softpub.dll regsvr32.exe /s wintrust.dll regsvr32.exe /s dssenh.dll regsvr32.exe /s rsaenh.dll regsvr32.exe /s gpkcsp.dll regsvr32.exe /s sccbase.dll regsvr32.exe /s slbcsp.dll regsvr32.exe /s cryptdlg.dll regsvr32.exe /s oleaut32.dll regsvr32.exe /s ole32.dll regsvr32.exe /s shell32.dll regsvr32.exe /s initpki.dll regsvr32.exe /s wuapi.dll regsvr32.exe /s wuaueng.dll regsvr32.exe /s wuaueng1.dll regsvr32.exe /s wucltui.dll regsvr32.exe /s wups.dll regsvr32.exe /s wups2.dll regsvr32.exe /s wuweb.dll regsvr32.exe /s qmgr.dll regsvr32.exe /s qmgrprxy.dll regsvr32.exe /s wucltux.dll regsvr32.exe /s muweb.dll regsvr32.exe /s wuwebv.dll netsh winsock reset netsh winsock reset proxy net start bits net start wuauserv net start appidsvc net start cryptsvc - Click File and select Save as from the menu list.
- In the dialog box, select All Files from the Save as type drop-down menu.
- Save the file as ResetWindowsUpdate.bat and close Notepad.
KoolReport Pro is an advanced solution for creating data reports and dashboards in PHP. Equipped with all extended packages , KoolReport Pro is able to connect to various datasources, perform advanced data analysis, construct stunning charts and graphs and export your beautiful work to PDF, Excel, JPG or other formats. Plus, it includes powerful built-in reports such as pivot report and drill-down report which will save your time in building ones.

 KoolReport Pro is an advanced solution for creating data reports and dashboards in PHP. Equipped with all extended packages , KoolReport Pro is able to connect to various datasources, perform advanced data analysis, construct stunning charts and graphs and export your beautiful work to PDF, Excel, JPG or other formats. Plus, it includes powerful built-in reports such as pivot report and drill-down report which will save your time in building ones.
It will help you to write dynamic data reports easily, to construct intuitive dashboards or to build a whole business intelligence cockpit.
KoolReport Pro package goes with Full Source Code, Royal Free, ONE (1) Year Priority Support, ONE (1) Year Free Upgrade and 30-Days Money Back Guarantee.
Developer License allows Single Developer to create Unlimited Reports, deploy on Unlimited Servers and able deliver the work to Unlimited Clients.
- Now right-click on the .bat file and select Run as administrator.
- When the UAC window appears, select Yes to continue.
The script will start resetting the Windows Update components and may take a few minutes to complete. Once done, restart your computer and this should solve the issue.
Resolving Incorrect Notifications for Updates and Restarts
Now that you know how to fix incorrect notifications for updates and restarts, you can avoid this issue in the future. Make sure Windows Update is configured correctly and reset components. Also, keep your computer updated with the latest security patches. Doing this will also ensure smooth system operation.
However, you may sometimes encounter the same message prompting even after performing these actions. Read this guide to resolve this issue and stop getting such annoying notifications.
- Title: Stifling Windows Restart Requests
- Author: Richard
- Created at : 2024-08-16 02:25:58
- Updated at : 2024-08-17 02:25:58
- Link: https://win11-tips.techidaily.com/stifling-windows-restart-requests/
- License: This work is licensed under CC BY-NC-SA 4.0.