
Strategies for Reducing System Resource Utilization by Services
Strategies for Reducing System Resource Utilization by Services
On every Windows startup, the Connected Devices Platform User service uploads the necessary data that connected devices on your computer need. It also authenticates and facilitates communication between them.
When it consumes too much RAM, it means something could be wrong with the process or your connected devices. Below, we’ll show you how to stop Connected Devices Platform User Service from hogging your physical memory.
1. Disable Connected Devices Platform User Service
The simplest way to stop Connected Devices Platform User Service from using too much RAM is to disable it. However, this might cause some unexpected behavior on your computer. And if that happens, you can always enable it again.
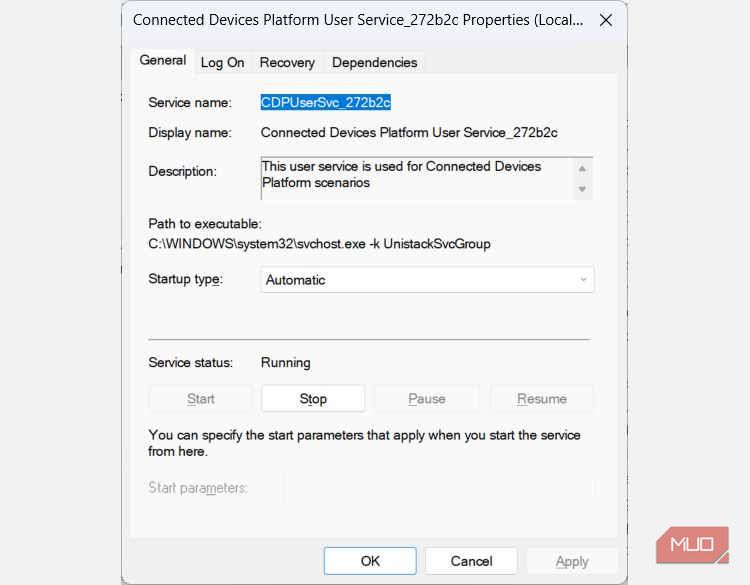
To disable Connected Devices Platform User Service, press Win + R to bring up Windows Run. Enter services.msc in the text box and then press the Enter key on your keyboard.

Find the Disable Connected Devices Platform User Service in the list of services and double-click on it. Click on the Startup type dropdown and select Disabled. Then, under Service status in the same window, click on Stop.
Now, check Task Manager to see if the service is still consuming too much RAM.
 PDF application, powered by AI-based OCR, for unified workflows with both digital and scanned documents.
 2. Remove the ActivitiesCache.db file
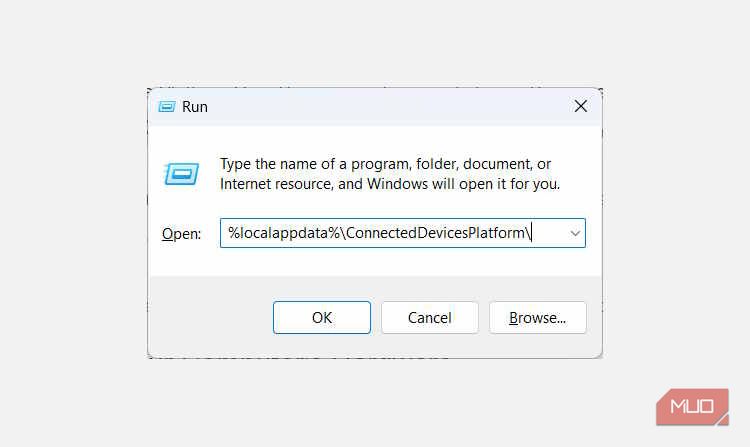
Some users have reported that deleting the ActivitiesCache.db file on their computer has helped solve the problem. To delete it, start by disabling the Connected Devices Platform User Service, as discussed above. Then, press Win + R to open Windows Run, copy and paste %localappdata%\ConnectedDevicesPlatform\ in the text, and then hit the Enter key.

This will open the ConnectedDevicesPlatform folder. You’ll see several files and folders in there, so open each of the folders and delete the ActivitiesCache.db file in all of them.
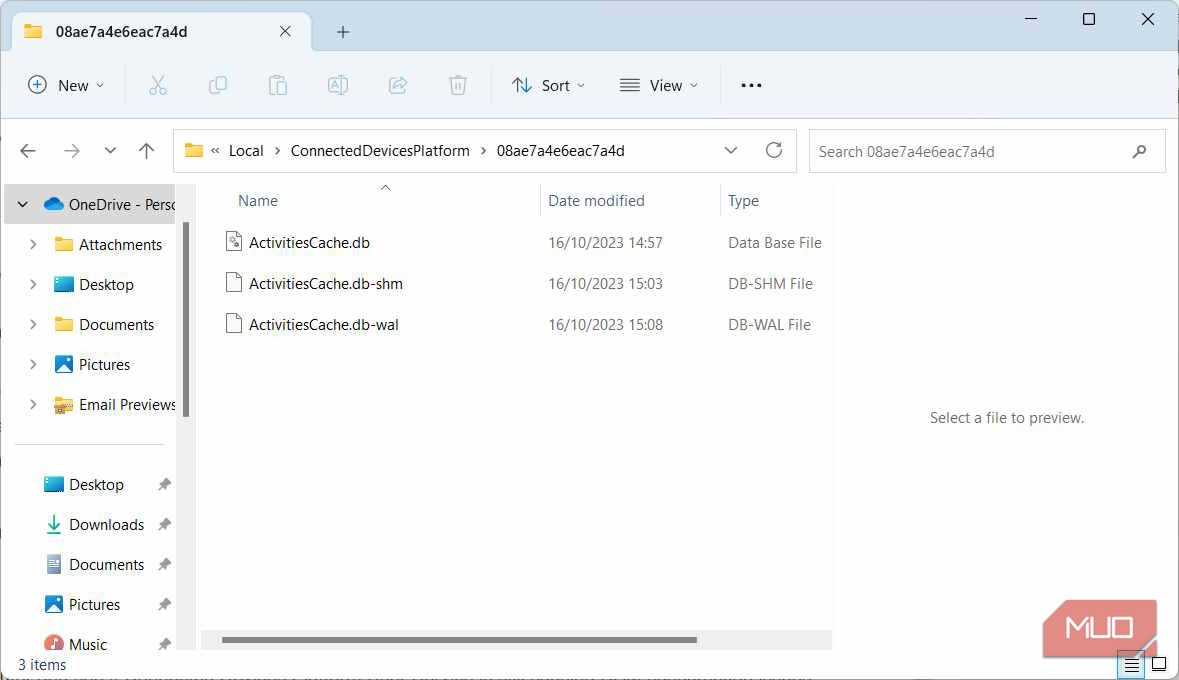
Once you do, restart your computer and see if Connected Devices Platform User Service is still causing RAM consumption issues.
3. Check for Issues With Your Computer’s Hardware
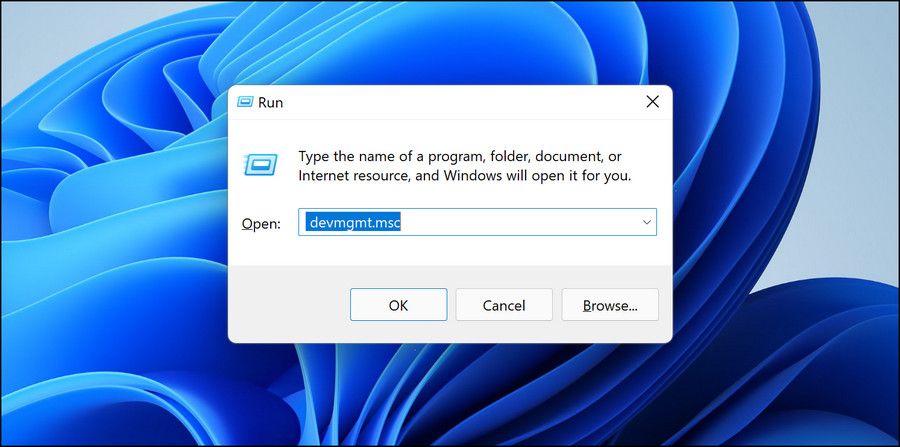
Sometimes, the problem could arise due to one of your connected devices experiencing a problem. To check if your connected devices are functioning properly, open Device Manager by pressing Win + R, enter devmgmt.msc in the text box, and then hit the Enter key on your keyboard.

In Device Manager, double-click the device you suspect is causing issues. This will open its properties window.
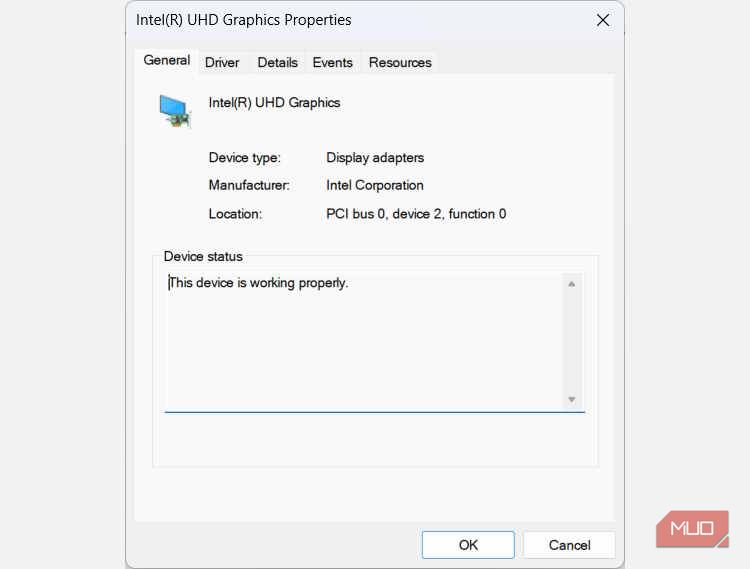
In the General tab of the Properties window, make sure it says This device is working properly under Device status.
If it doesn’t, you will see an error message and a code. Take note of both so you can start troubleshooting the problem. You can start by using one of the troubleshooters on Windows to check for and fix the hardware problem you’re seeing.
If all the steps above don’t work then you might need to use a system restore point that you created before it started using too much RAM. And if that doesn’t work as well, you might have to reset your Windows computer

Free Your RAM From Connected Devices Platform User Service
No process is entitled to consume too much RAM on your computer. And if you find that Connected Devices Platform User Service is doing just that, you can disable it, delete the ActivitiesCache.db file, or see if there’s something wrong with your hardware. Hopefully, one of those things will help stop the process hogging the RAM.
When it consumes too much RAM, it means something could be wrong with the process or your connected devices. Below, we’ll show you how to stop Connected Devices Platform User Service from hogging your physical memory.
- Title: Strategies for Reducing System Resource Utilization by Services
- Author: Richard
- Created at : 2024-08-16 02:18:43
- Updated at : 2024-08-17 02:18:43
- Link: https://win11-tips.techidaily.com/strategies-for-reducing-system-resource-utilization-by-services/
- License: This work is licensed under CC BY-NC-SA 4.0.