System Debugging Made Easy: Locating and Resolving Error Codes via the Power of Command Prompt

System Debugging Made Easy: Locating and Resolving Error Codes via the Power of Command Prompt
Encountering random errors and crashes while using the operating system without an explanation can be frustrating. It also makes it harder to find the appropriate solutions, because you have no clue what caused the problem in the first place.
In this guide, we will show you how you can use the Command Prompt utility to identify potential culprits behind annoying Windows errors. We will also discuss how you fix the issue using CMD as well.
How to Diagnose Windows Errors in the Command Prompt
To solve a problem in Windows, such as an update error or a Blue Screen of Death, it’s important to identify the potential causes of the issue. Windows comes with several utilities that can help you with this, one of which is Command Prompt.
Below, we have discussed different ways of using Command Prompt to look up Windows error codes.
1. Use the NET HELPMSG Command
The NET HELPMSG command helps convert error codes into strings, which you can use to find relevant solutions for the problem. However, this command can only help you with system error codes, which are specific numerical values. This means you cannot use it for BSOD errors like the INACCESSIBLE_BOOT_DEVICE error.
Moreover, the numerical value of the error code must also be precise.
Here is how you can use this command:
- Press theWin + R keys together to open a Run dialog.
- Type “cmd” in Run and press theCtrl + Shift + Enter keys together to open Command Prompt with administrative privileges.
- ClickYes in the User Account Control prompt.
- Once you are inside the Command Prompt window, type the command mentioned below and hitEnter to execute it. Replace
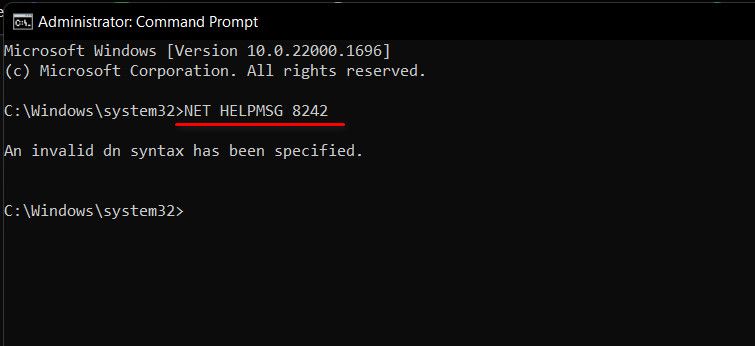
with the numerical value of the code. NET HELPMSG <error code> - For instance, if the error code you want lookup is 8242, your command will be:
NET HELPMSG 8242
Once you have the details on the error code, you can either look for solutions online or jump to the solutions listed later in this guide.
2. Use the CertUtil Command
Another easy way to look up error descriptions using the Command Prompt is by using the CertUtil command. This command is typically used for managing certificates and certificate services, but can also be a helpful tool in finding short explanations for the error codes.
Here is how you can use it:
- Open Command Prompt using the steps we have described above.
- In the Command Prompt window, execute the command below. Replace
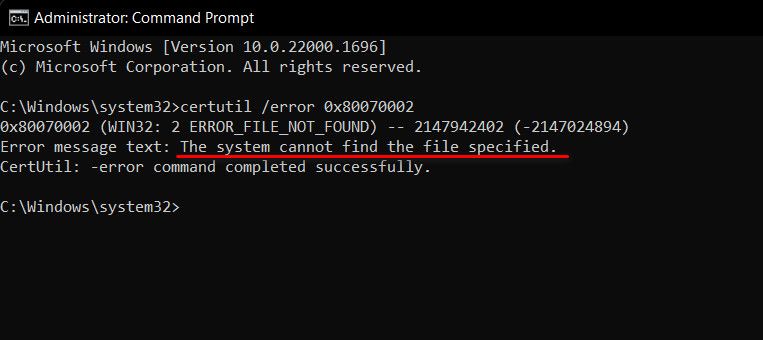
with the error code you are encountering: CertUtil /error <error code> - So for instance, if you are encountering the update error 0x80070002, your command will be:
CertUtil /error 0x80070002
You should now be presented with a description of the error message. You can use this detail to identify the culprit and eliminate it.
3. Access the Event Viewer
When you encounter an error on Windows, a log file for the error is created in the Event Viewer. This log file contains the details of the event, including the time and date it occurred, the error code associated with it, and the source of the event.
You canaccess the Event Viewer using the Command Prompt to identify the culprit behind the error, and then proceed with the relevant solutions to fix the problem.
How to Resolve the Problem Using the Command Prompt
Once you have identified the problem, you can use the Command Prompt utility to fix it as well. Windows comes with a set of troubleshooting utilities that can you can run via this command-line interface to resolve system issues once and for all.
Here are some common ways you can use the Command Prompt to diagnose and resolve various issues with your Windows operating system.
1. Fix Any Corruption Errors
There are a number of problems that may result from corruption errors and bugs within the operating system, such as frequent crashes and freezes, boot problems, data loss, and slow performance.
The easiest way to fix such issues is byrunning the built-in SFC and DISM tools via Command Prompt.
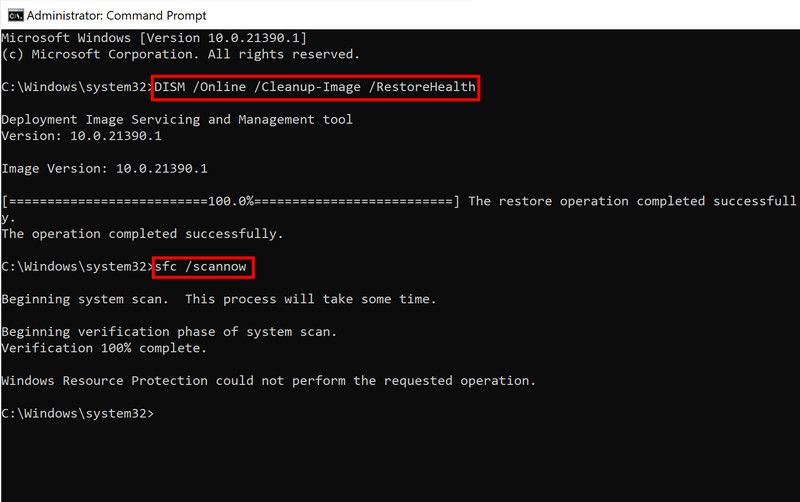
SFC or the System File Checker works by scanning the protected system files to check their integrity. It will compare the files to a stable version stored in the Windows component store or the installation media. If a problem with the file is identified, the utility will automatically replace the file with its healthier counterpart and generate a report based on it.
DISM, on the other hand, can be used to repair a wide range of issues, including system files, problematic drivers, and a corrupt Windows image. It is considered to be more advanced and powerful than SFC.
Once you have completed an SFC scan, you can check the log file for more detailed information as well. Simply execute this command:
findstr /c:"[SR]" %windir%\logs\cbs\cbs.log >"%userprofile%\Desktop\sfcdetails.txt
Doing so will create a log file named sfcdetails.txt on your desktop, listing all the issues found during the scan.
2. Uninstall Windows Updates
There are times when an update you install on the system turns out to be buggy or corrupt, leading to different issues within the system.
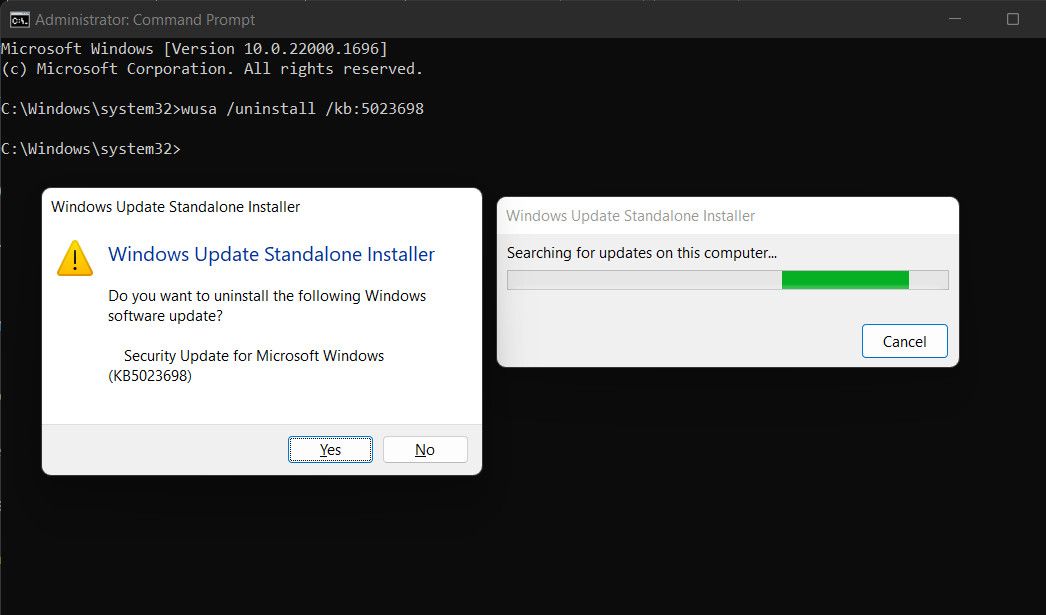
Since Windows provides you with the option to uninstall updates, you can use Command Prompt to achieve this.
Simply open Command Prompt as an administrator and execute the command listed below to view a list of installed updates:
wmic qfe list brief /format:table
To uninstall one, execute the following command. Replace
wusa /uninstall /kb:<HotFixID>
3. Fix Boot Issues
If you are having trouble booting into Windows, or the boot time is just painfully slow, the issue is likely to be related to the boot sector or boot configuration data (BCD).
You can use the bootrec command to repair these via Command Prompt.
Here is how you can do that:
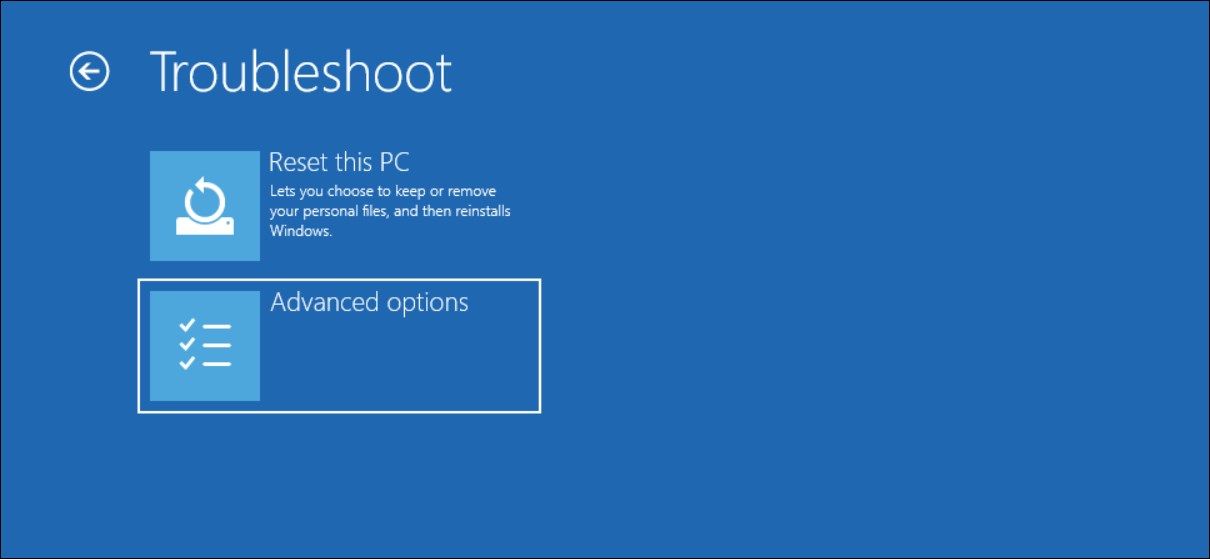
- Boot into WinRE and head over to Repair your computer.
- Navigate toTroubleshoot >Advanced options .

- ChooseCommand Prompt from the list of options available.
- Once you are in the Command Prompt window, execute the following commands:
bootrec /fixmbr bootrec /fixboot bootrec /rebuildbcd - If you are prompted with Add installation to boot list?, type Y and hit Enter.
- Once all the commands are executed, you can exit Command Prompt by typing exit and hitting Enter.
- Restart your computer, and you should be able to boot into Windows successfully!
The Command Prompt to the Rescue
Having knowledge of certain Windows tools can come in handy when dealing with various computer-related issues. One such utility that can help you find solutions is Command Prompt and knowing how to use it can save you both time and frustration.
We highly recommend backing up your essential data before making any changes to your operating system, just to be safe. With a little patience and some troubleshooting skills, you can get rid of annoying Windows errors for good.
Also read:
- [Updated] Behind the Scenes Expert Video Editing Techniques for YouTubers
- Comprehensive Overview of the Dell Inspiron 3671 Desktop - A Balanced, Standard Computing Solution
- Enhancing Folder Context Menus on Windows 10/11
- Expert Review: Why the Kooteekt Laptop Chiller Deserves a Spot on Your Desk
- In 2024, How To Use Special Features - Virtual Location On Gionee F3 Pro? | Dr.fone
- In 2024, Perfecting Bio Linking A Complete System on TikTok
- In 2024, Streamlining Co-Productions A Guide to More Followers
- In 2024, Top 10 Samsung Galaxy F54 5G Android SIM Unlock APK
- Secretele maestrului alchimist | Free Book
- Streamlining Your Windows 11'S Access to 5G Wi-Fi
- Top Strategies for a Reliable Window's 11 Search Experience
- Unfreezing Stuck Downloads: Fixing WIN11 Issues (2)
- Update HP LaserJet Amoy_driver_windows to the Newest Version - Secure Printing Solutions
- WinError Woes: Installing Oculus App Without Fails on WS11/WC10
- Title: System Debugging Made Easy: Locating and Resolving Error Codes via the Power of Command Prompt
- Author: Richard
- Created at : 2024-12-22 18:17:35
- Updated at : 2024-12-27 18:20:55
- Link: https://win11-tips.techidaily.com/system-debugging-made-easy-locating-and-resolving-error-codes-via-the-power-of-command-prompt/
- License: This work is licensed under CC BY-NC-SA 4.0.
