Tackling the Incorrect File History Options in Windows

Tackling the Incorrect File History Options in Windows
File History is a nifty feature on Windows that allows you to back up your important files and folders to an external drive. Although the feature works as expected most of the time, it can occasionally trouble you with errors like the “We found errors in your File History settings” on Windows.
Let’s see how you can resolve this error and get the File History feature to work again on Windows.
1. Restart the File History Service
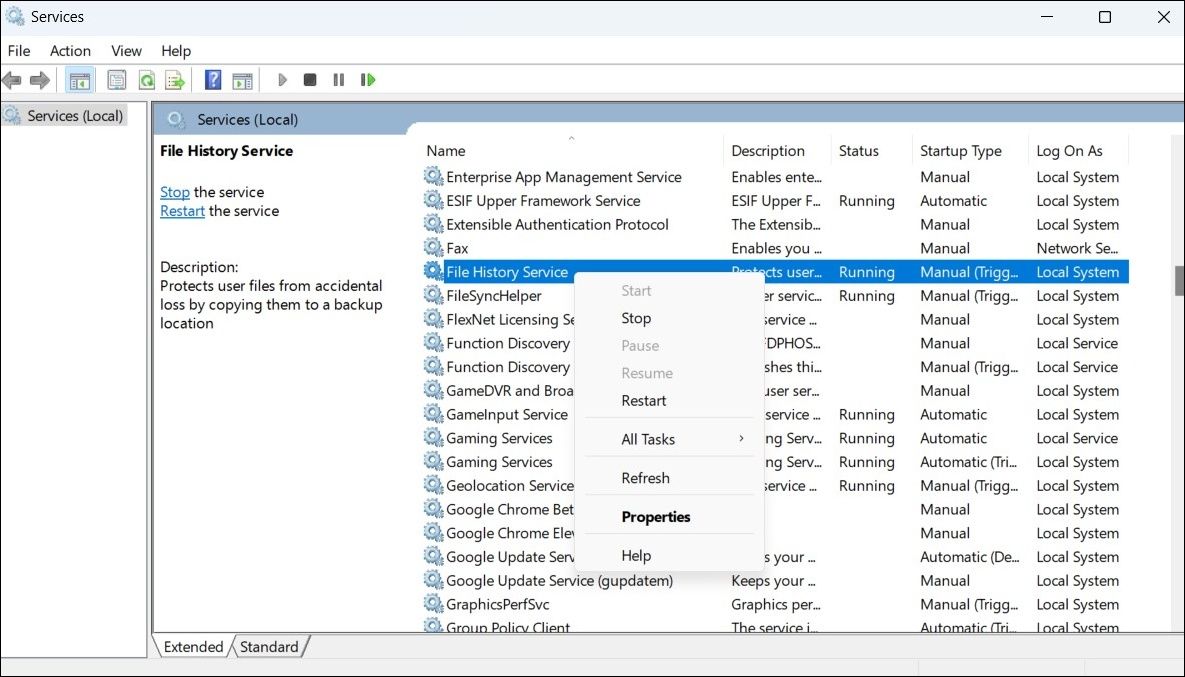
File History Service is a small program that needs to be running in the background for the File History feature to work. If this service is experiencing any problems, you could run into the “We found errors in your File History settings” error. In most cases, you can fix any temporary issues with File History Service by simply restarting it.
To restart the File History Service in Windows:
- Right-click on theStart icon and selectRun from the resulting menu.
- Typeservices.msc in the text box and pressEnter .
- In the Services windows, scroll down to locateFile History Service . Right-click on it and selectRestart . If the service is not running, selectStart .

2. Disconnect and Reconnect the Backup Drive
Connection problems with your external drive can also cause Windows to display the “We found errors in your File History settings” error. If it’s nothing major, you should be able to resolve the error by disconnecting and reconnecting your backup drive.
While you’re at it, try using a different USB port. This will help you determine if there’s aproblem with the USB port you’re using. If you suspect a port is malfunctioning, check out how to diagnose and fix a faulty USB port on Windows.
3. Re-Select the Backup Drive and Restart File History
Next, you can try re-selecting your backup drive in File History settings and see if that helps. Here are the steps for the same.
- PressWin + R or use one of themany ways to open the Run dialog box .
- Typecontrol in the box and pressEnter .
- Click theView by drop-down menu and selectLarge icons .
- SelectFile History from the Control Panel menu items.
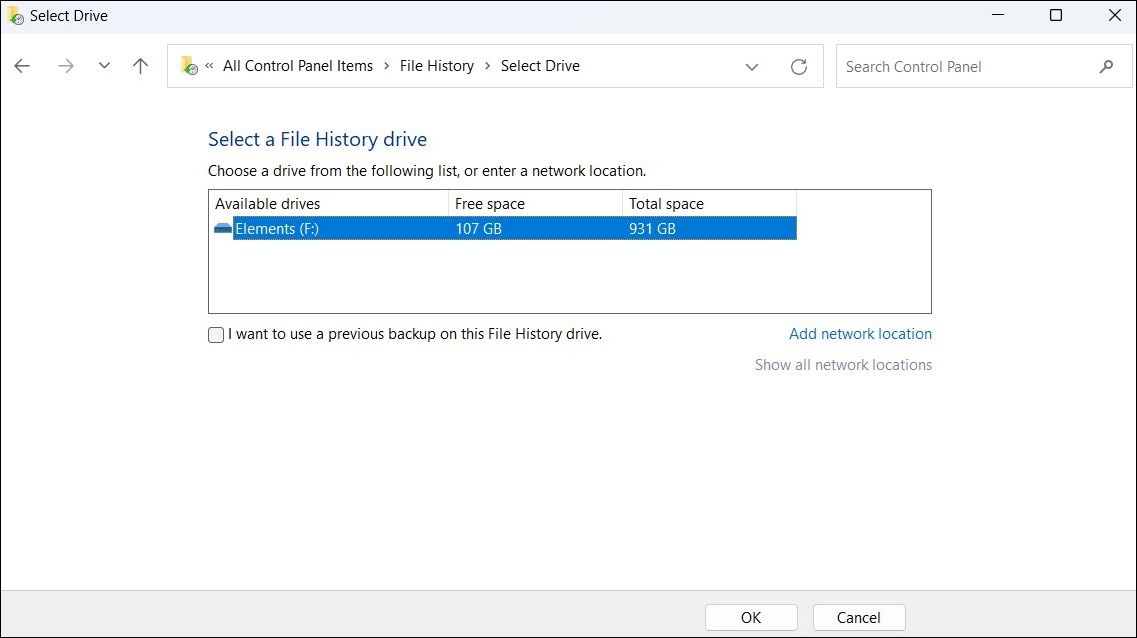
- Click theSelect drive option from the left sidebar.
- Select your preferred drive from the list and clickOK .

After selecting your preferred drive, you’ll have to restart the File History feature on Windows. To do so, use the following steps:
- Click the magnifying icon on the taskbar or use theWin + S keyboard shortcut to open the search menu.
- Typefile history in the search box and select the first result that appears.
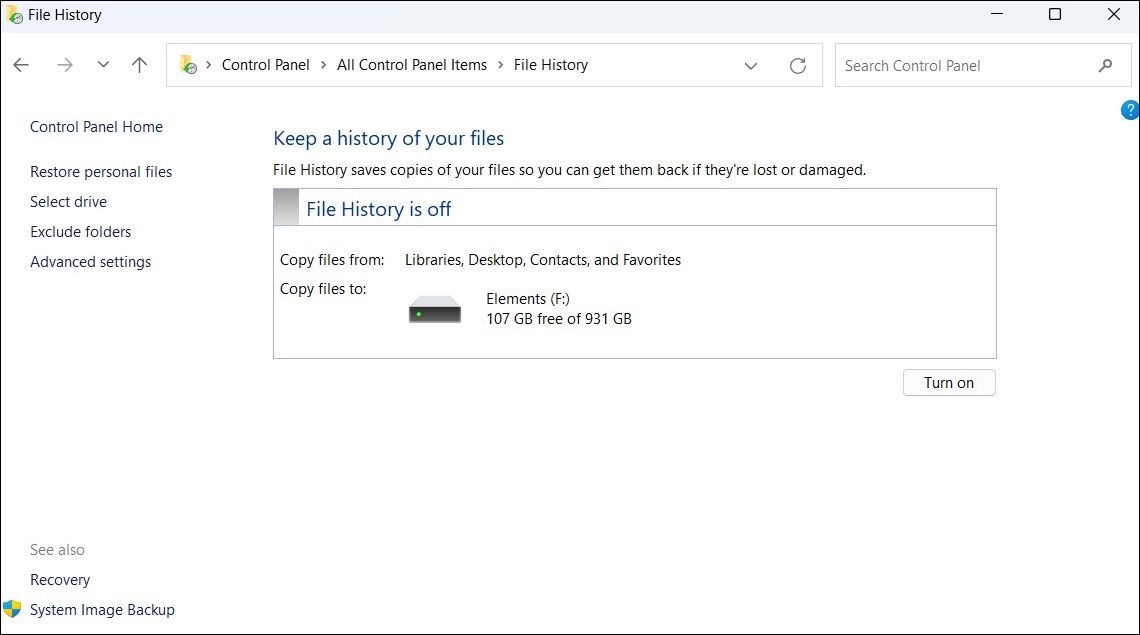
- In the Control Panel window that opens, click theTurn off button.
- Wait for a few seconds and click theTurn on button.

If the error message persists even after this, you can try using a different drive for the File History backup and see if that works.
4. Reset File History
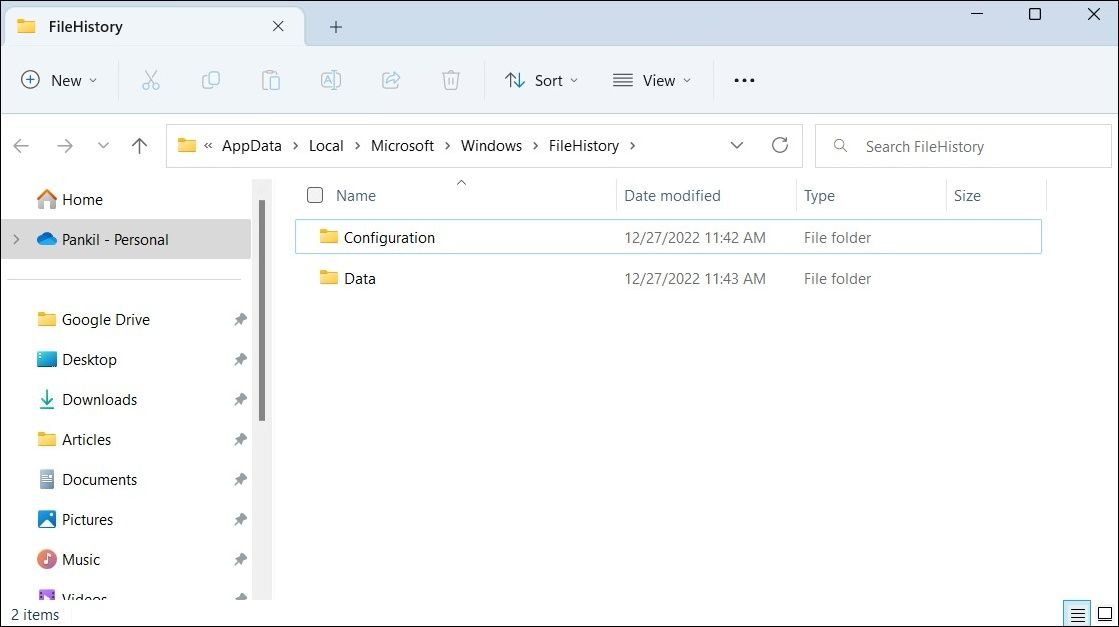
Finally, if nothing else works, resetting File History may be your only option. You can accomplish this by deleting the File History data files from your computer.
In order to delete File History data files, you’ll have to ensure that your PC is configured toshow hidden files and folders on Windows . Here’s how to check.
- Open the Windows search menu.
- TypeFile Explorer Options in the search box and pressEnter .
- Switch to theView tab and check theShow hidden files, folders, and drives option.
- HitApply followed byOK .
Now, delete the File History data from your system by following the steps below.
- PressWin + E to open File Explorer.
- Type the following path in the File Explorer’s address bar and pressEnter .
%UserProfile%\AppData\Local\Microsoft\Windows\FileHistory - PressCtrl + A to select all the folders and click thetrash icon at the top to delete them.

Fixing File History Errors on Windows
After you apply the fixes listed above, the File History error should no longer bother you.
Tired of dealing with File History errors on your Windows device? It might be a good idea to use a cloud storage service or third-party backup software to protect your important data.
Also read:
- [Updated] In 2024, Nostalgic Snapshots From Your Camera Roll on Snapchat
- 2024 Approved Crafting Minecraft Perfect Circles & Spheres Techniques
- 2024 Approved Exploring the Top 8 Collaborative, Affordable Android Video Mosaics
- 2024 Approved Guide to Premium, Zero-Fee Video Meeting Solutions
- Bring Your Videos to Life Border Magic on IG for 2024
- Concealed Command Masterclass: Windows 11’S Secret Menu
- Free Mac DVD Ripping Software: Convert DVDs to MP4/MOV with HEVC & Watch on Your iPhone!
- In 2024, Rated Recs Top Pages for Obtaining SnapAlert Tunes
- Mastering File Management: Creative Solutions when Renaming Directories Is Not Possible on Win 11
- Play the Past, Live the Future: Using DOSBox-X for PC Games
- Shop Smart: End of Year Bargain - Windows 10, Starting $6.12
- Snooze No More! Keyboard + Mouse to Wake Windows 10/11
- Swift Application Engagement in Windows 11
- The Path to Celestial Mastery in Windows 11 Installation
- Uncovering Your Instagram Engagement: A Guide to Identifying Who Saved Your Post
- Unveiling Fixes for Windows' Error 0xC00CE556
- Unveiling the Superiority of the Xbox One Elite Controller - Is It Really the Best Ever?
- Title: Tackling the Incorrect File History Options in Windows
- Author: Richard
- Created at : 2024-12-05 18:52:12
- Updated at : 2024-12-06 22:50:09
- Link: https://win11-tips.techidaily.com/tackling-the-incorrect-file-history-options-in-windows/
- License: This work is licensed under CC BY-NC-SA 4.0.


