
Tailor Your PC's Display Lock Settings
Tailor Your PC’s Display Lock Settings
The Windows lock screen usually displays images when you power on your device or wake it from sleep mode. By default, the lock screen will only appear for about a minute, and then your screen will go blank.
Meanwhile, the screen saver is an image or animation that appears when your PC has been inactive for a while. Just like the lock screen, the screen saver will also appear for about one minute.
Wondering how you can display the lock screen or screen saver for longer?
This article will show you the various ways to change the Windows lock screen and screen saver timeout settings.
1. How to Change the Lock Screen Timeout Settings
Let’s first take a look at how you can configure the Windows 10 lock screen timeout settings.

Use the Windows System Settings
The Windows system settings always come in handy in various situations. Let’s check out how you can use them to change the Windows 10 screen lock timeout settings:
- Press Win + I to open the system settings.
- Select the Personalization option from the menu items.
- Click the Lock screen option on the left-hand side pane.
- Scroll down on the right-hand side and select the Screen timeout settings option.
- Click the On battery power drop-down menu on the right-hand side pane and select your preferred option.
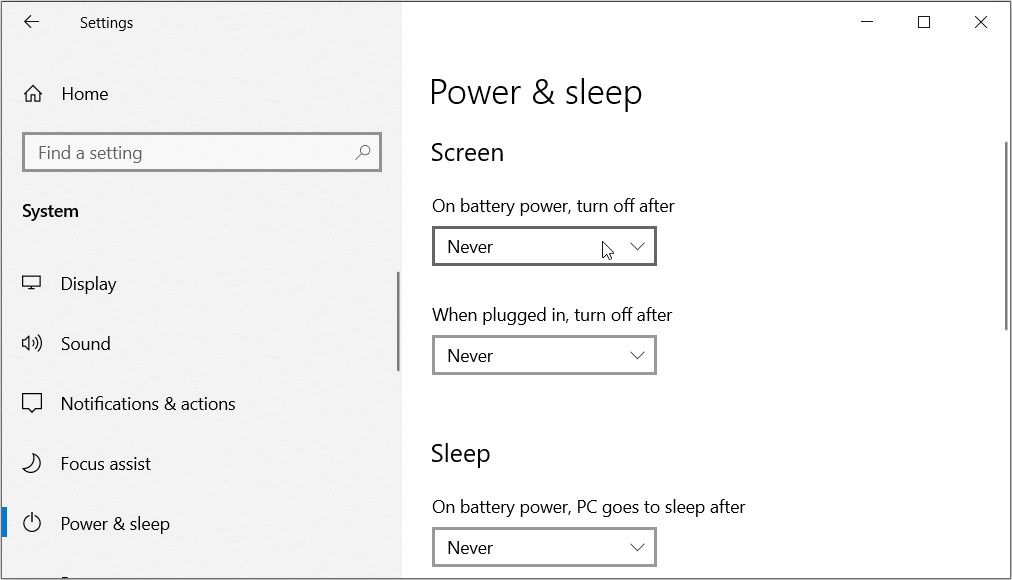

Apply the same settings for the When plugged in option on the right-hand side pane. From there, close the system settings and restart your device to save these changes.
Use the Edit Plan Settings (via the Control Panel)
The Control Panel is a reliable Windows tool that helps you configure various system settings. We’ll show you how you can use it to configure the screen saver timeout settings.
In this case, we’ll use the Control Panel to navigate to the Edit Plan settings.
Here are the steps you need to follow:
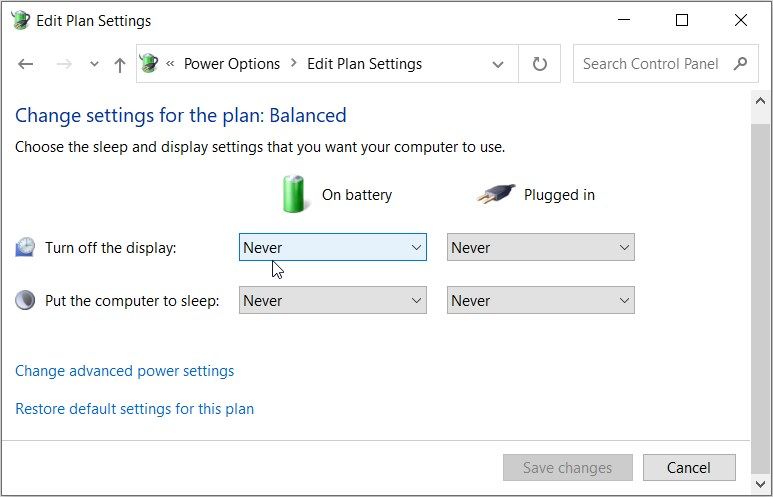
- Type Control Panel in the Start menu search bar and select the Best match.
- Click the View by drop-down menu and select Small icons.
- Select Power Options from the menu items.
- Click the Change plan settings option on the right-hand side.
- Locate the Turn off the display option. From there, select your preferred options on the On battery and When plugged in drop-down menus.
- Finally, click the Save changes button.

Use the Advanced Power Options (via the Control Panel)
You can also use the Control Panel’s advanced power settings to configure the lock screen timeout settings.
Simply follow these steps:
- Press Win + R to open the Run command dialog box.
- Type Control Panel and then press OK.
- Select Power Options from the menu items.
- Click Change plan settings. From there, select the Change advanced power settings option on the next screen.
- Scroll down and click the Display option. Next, click the Turn off display after option.
- Select the On battery option, and then configure the lock screen timeout settings using the arrow buttons. From there, apply the same settings for the Plugged in option.
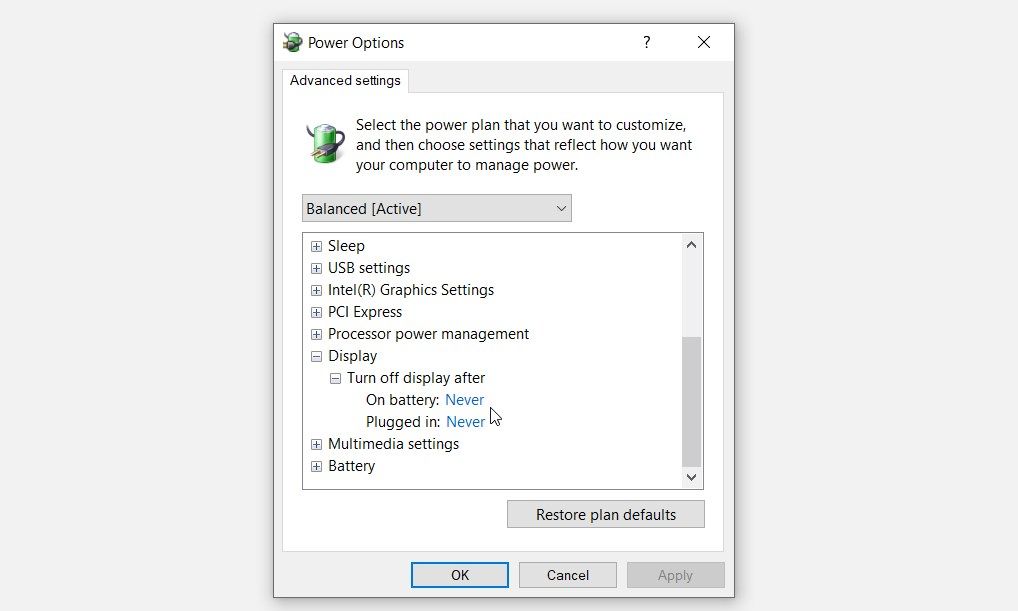
When you’re done, click Apply and then click OK. Finally, close the Control Panel and then restart your device to save these changes.
Use the Command Prompt
The Command Prompt is a reliable tool that can help you troubleshoot various Windows system issues . Interestingly, this tool can also help you configure the settings on your device.
Here’s how to configure the Windows lock screen timeout settings using the Command Prompt :
- Press Win + R to open the Run command dialog box.
- Type CMD and press Ctrl + Shift + Enter to open an elevated Command Prompt.
- Next, type the following commands—one at a time—and press Enter in each case:
powercfg.exe /setacvalueindex SCHEME_CURRENT SUB_VIDEO VIDEOIDLE 60
powercfg.exe /setacvalueindex SCHEME_CURRENT SUB_VIDEO VIDEOCONLOCK 60
The “60“ in the command indicates the duration (seconds) in which the lock screen will be displayed. If you want to increase the lock screen duration, apply the previous steps and change “60“ to a different value of your choice.
When you finish, type the following command and press Enter:
powercfg.exe /SETACTIVE SCHEME_CURRENT
Finally, restart your PC to save these changes.
How to Change the Screen Saver Timeout Settings
Now, let’s explore how you can change the screen saver timeout settings.
 The Tube Sites Submitter is a fast and efficient tool for anyone who needs to upload videos quickly, easily and automatically to hundreds of tube sites in mere minutes .
 Use the System Settings

Here’s how to change the duration of the screen saver using the system settings:
- Press Win + I to open the system settings.
- Type screen saver in the Settings search bar and select the Change screen saver option.
Bear in mind that you can change the screen saver timeout settings only if the screen saver is enabled. If the screen saver is currently disabled, click the Screen saver drop-down menu and select your preferred image.
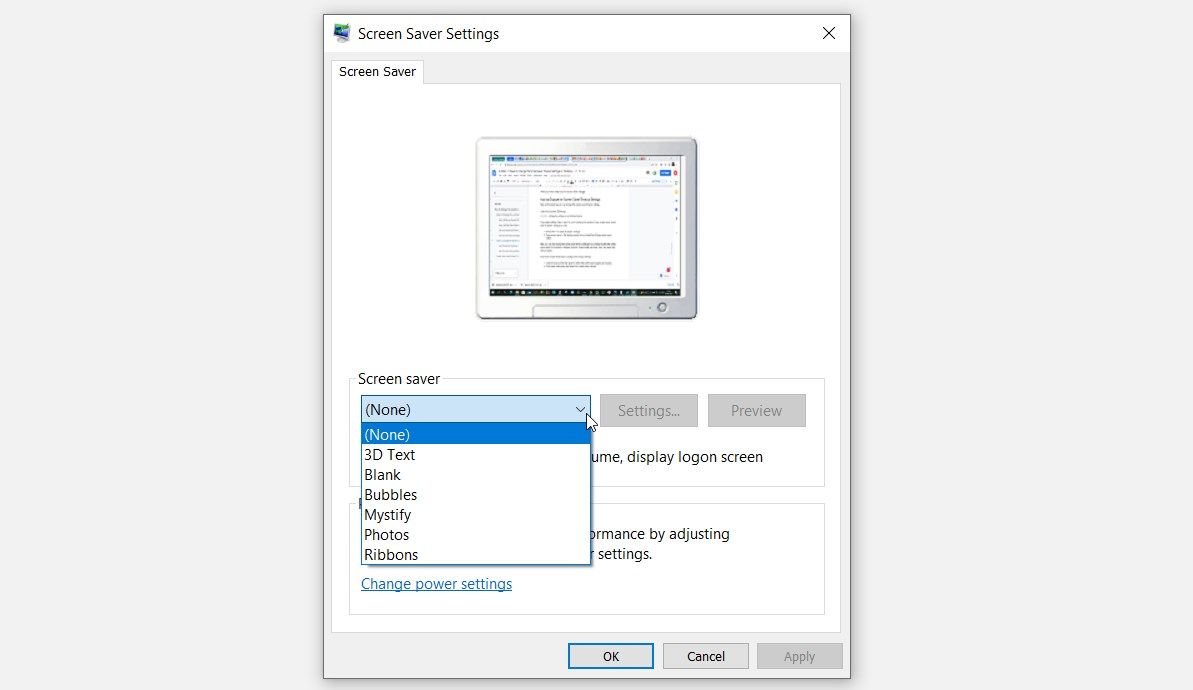
From there, follow these steps to configure the screen saver timeout settings:
- Navigate to the Wait option on the Screen Saver Settings window.
- Click the arrow buttons to select the screen saver duration (in minutes).
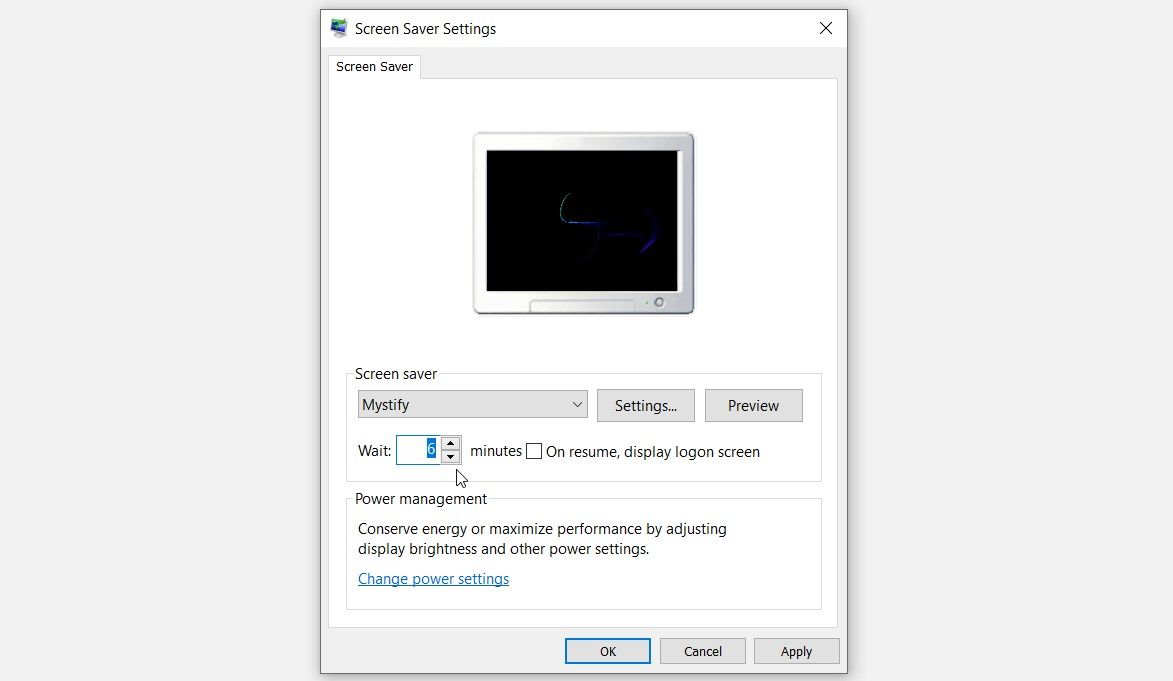

Finally, press Apply and then press OK to save these changes.
 Easy GIF Animator is a powerful animated GIF editor and the top tool for creating animated pictures, banners, buttons and GIF videos. You get extensive animation editing features, animation effects, unmatched image quality and optimization for the web. No other GIF animation software matches our features and ease of use, that’s why Easy GIF Animator is so popular.
Use the Local Group Policy Editor
The Local Group Policy Editor (LGPE) is an incredible tool that makes it easy for you to configure various system settings. Now, here’s how you can use this tool to configure the screen saver timeout settings:
- Press Win + R to open the Run command dialog box.
- Type gpedit.msc and press Enter to open the LGPE.
- Navigate to User Configuration > Administrative Templates> Control Panel > Personalization.
- Double-click the Screen saver timeout option on the right-hand side.
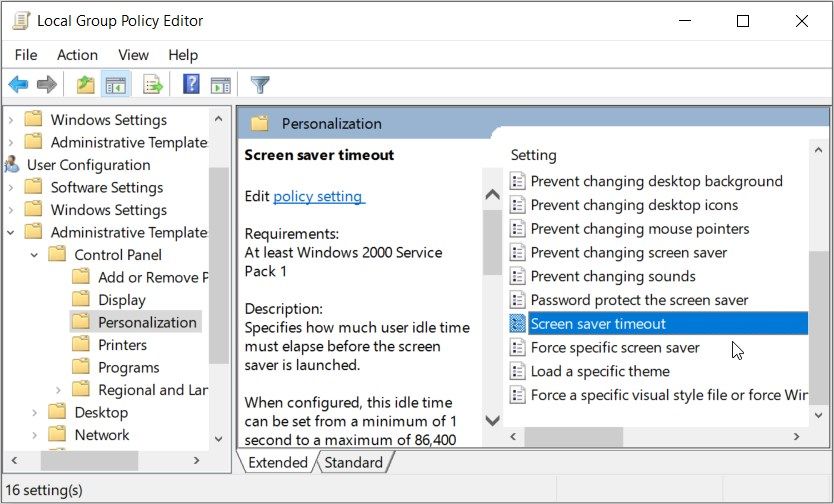

In the next window, select the Enabled option. From there, use the arrow buttons next to the Seconds box to select the duration of the screen saver.
Press Apply, press OK, and then close the LGPE. Finally, restart your device to save these changes.
If you want to disable the screen saver settings, here are the steps you need to follow:
- Navigate to the Personalization option on the LGPE as per the previous steps.
- Double-click the Screen saver timeout option and select either the Disabled or the Not Configured option.
- Finally, press Apply, press OK, and then close the LGPE.
Still looking for more tips on how to increase screen time on your laptop? We’ve got one more solution for you!
Use the Registry Editor

The Registry Editor can help you tweak the screen-saver timeout settings with ease. But it’s quite a sensitive tool, so you should consider backing up the Registry first before you proceed.
Now, here’s how to configure the screen-saver timeout settings with the Registry Editor:
- Press Win + R to open the Run command dialog box.
- Type Regedit and press OK to open the Registry Editor.
- Copy-paste the following command into the address bar:
HKEY_USERS.DEFAULT\Control Panel\Desktop
Locate the ScreenSaveTimeOut option on the right-hand side.
If the key is missing, right-click on a blank space on the right and select New > DWORD (32-bit) Value. From there, rename the value as ScreenSaveTimeOut and press Enter.
Next, double-click the ScreenSaveTimeOut value.

Now, type the screen saver timeout duration (in seconds) in the Value data box. The default option is usually 900 seconds (15 minutes), but you can enter your desired value. Finally, click OK and then restart your device to save these changes.
Tweak Your Lock Screen Timeout Settings Without a Hassle
Wondering how to increase laptop screen time? Or do you want to lock your PC and ensure that it doesn’t fully go into sleep mode?
Try increasing the lock screen and screen saver timeout settings using the solutions we’ve covered. From there, you can explore other cool things, such as how to automatically lock your Windows 11 PC when you’re away.
- Title: Tailor Your PC's Display Lock Settings
- Author: Richard
- Created at : 2024-08-16 01:57:25
- Updated at : 2024-08-17 01:57:25
- Link: https://win11-tips.techidaily.com/tailor-your-pcs-display-lock-settings/
- License: This work is licensed under CC BY-NC-SA 4.0.