Team Share Woes: Quick Windows Guide

Team Share Woes: Quick Windows Guide
The screen-sharing feature in Microsoft Teams can be useful when you need to present something during a video conference. Although the feature has been available for a while now, it is still not without its flaws.
Sometimes, when you try to share your screen in Microsoft Teams on Windows, you may get a black screen or an error message. If you encounter this problem, here are some tips that will help resolve the issue in no time.
Disclaimer: This post includes affiliate links
If you click on a link and make a purchase, I may receive a commission at no extra cost to you.
1. Start With Some Basic Fixes
It’s a good idea to start with some simple solutions before delving into more complex ones.
- Close and Reopen the App: At times, temporary glitches with the Teams app can cause it to misbehave on your Windows computer. If it’s nothing major, simply closing the app and reopening it should help solve the problem.
- Repair the App: Your Windows 10 or 11 computer includes a useful repair feature that can automatically identify and resolve minor issues with UWP apps . You can use this feature to repair the Microsoft Teams app and see if it solves your problem.
- Update Display Drivers: Outdated or corrupted display drivers can also cause screen-sharing issues in Microsoft Teams. If that’s the case, updating the display drivers on your Windows PC should fix the issue.
- Install Windows Updates: The screen sharing not working issue in Teams could be due to a bug within the current Windows build on your PC. Install any pending Windows updates and try to share the screen again.
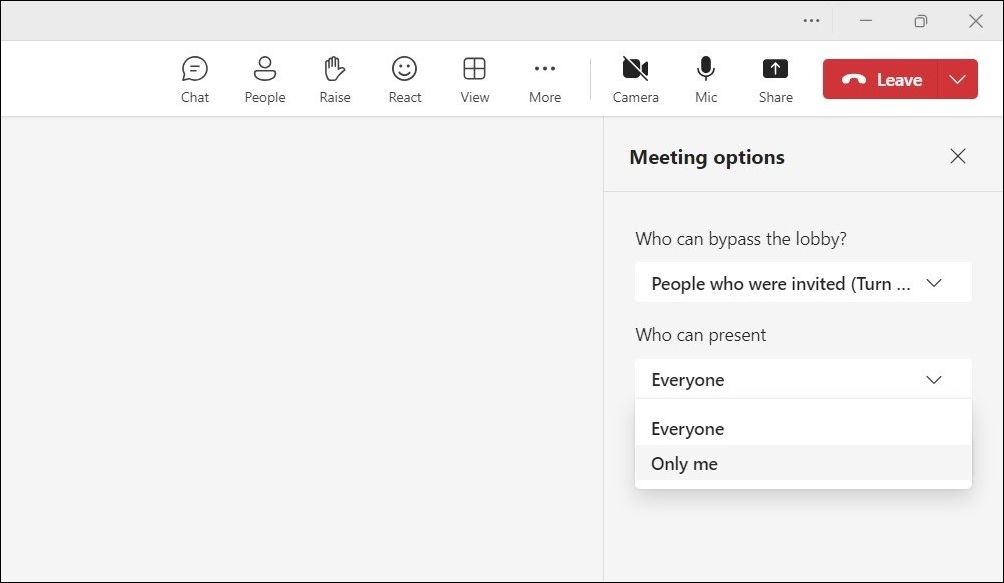
2. Make Sure Everyone Is Allowed to Present Screen
A common reason why screen-sharing may not work in Microsoft Teams is if the administrator has not enabled the presentation permission for all users.
You will need to ask the admin to enable screen-sharing permission using these steps:
- On the Microsoft Teams call screen, click the three-dot menu icon at the top.
- Select Settings > Meeting options.
- Under Who can present and select Everyone.
- Click the Save button.

3. Rule Out Issues With Your Internet Connection
If you are unable to share the screen despite having the required permissions, there may be an issue with your internet connection. As features like screen sharing necessitate a fast internet connection, you’re likely to encounter problems if your internet connection is slow or unstable.
You can visit a website like Speedtest to test your internet connection and speed . If your internet appears to be slow, switch to a different network connection and try to share the screen again.
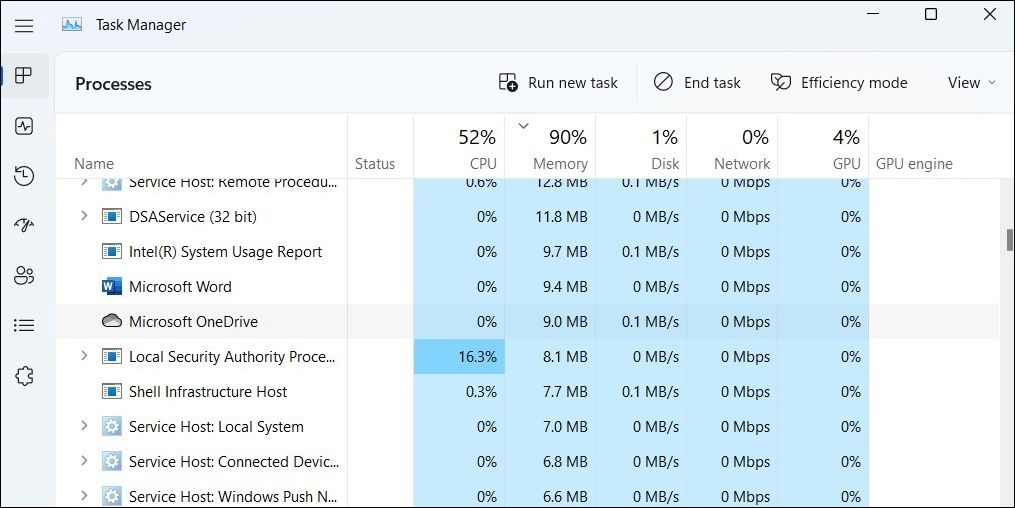
4. Close Background Apps and Programs
Even if you have a fast internet connection, you may experience problems if background apps and services on your PC are consuming a significant portion of your bandwidth. To avoid this, review the apps and programs running in the background and close the ones you don’t need.
Follow these steps to continue:
- Press Ctrl + Shift + Esc to open the Task Manager.
- In the Processes tab, go through the list to locate and select the apps and programs you aren’t using.
- Click the End task option at the top to terminate them.

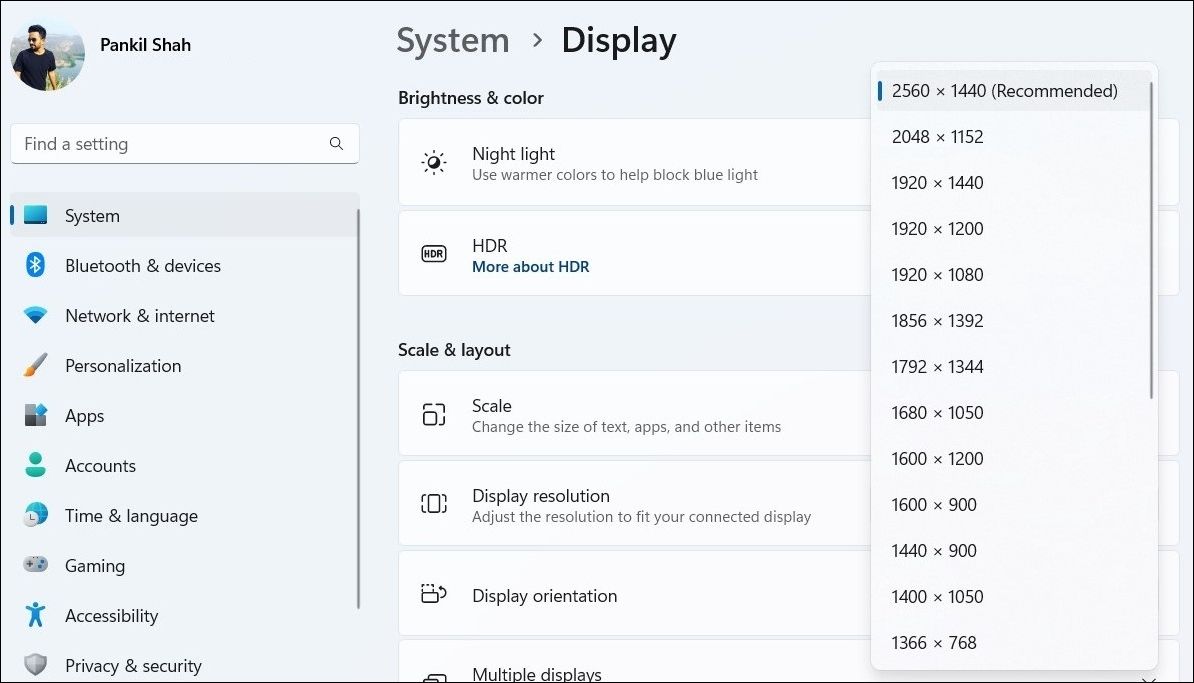
5. Try Lowering the Display Resolution
Another thing you can do is lower the display resolution while sharing the screen in Microsoft Teams. This should help reduce the amount of system resources and internet bandwidth Microsoft Teams requires for screen sharing, resulting in a smoother experience.
Follow these steps to change the screen resolution on Windows:
- Press Win + I to open the Settings app.
- Head to System > Display.
- Click the drop-down menu next to Display resolution to select a lower resolution.

After lowering the screen resolution, try to share your screen again in Teams.
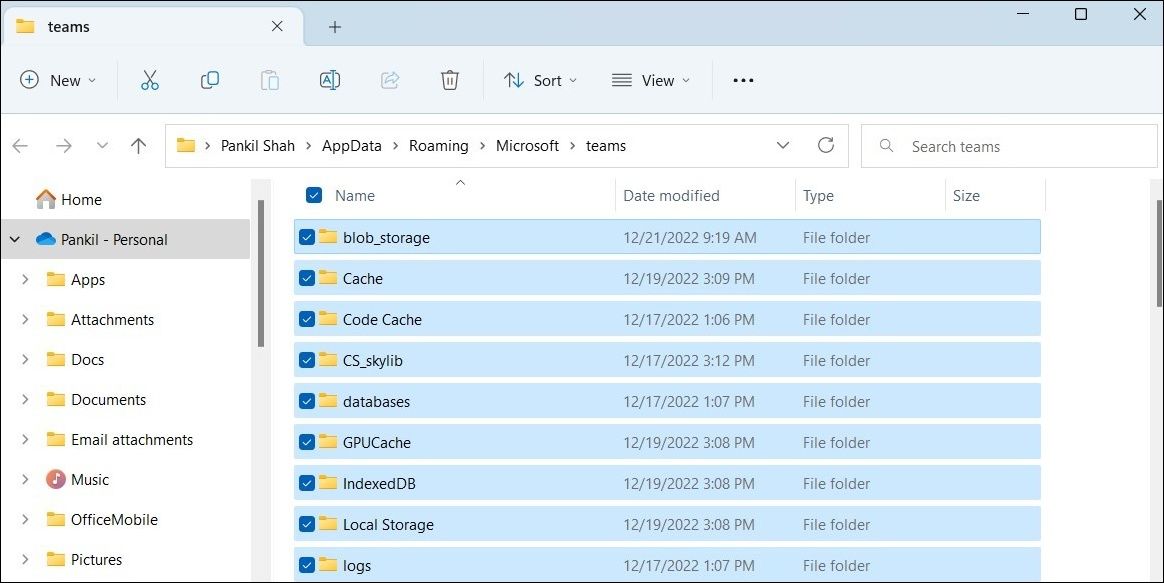
6. Clear Microsoft Teams App Cache
Microsoft Teams creates temporary files on your device to speed up loading times and enhance your overall experience. If you have been using the Teams app for a while, it may have accumulated a lot of cache data. While this data is intended to be helpful, it can end up interfering with the app’s performance if it becomes corrupted.
To fix this, you need to remove the existing cache files associated with the Teams app on your PC. Since this process doesn’t affect any of the essential app data, there’s no harm in trying it.
Follow these steps to continue:
- Press Win + R to open the Run dialog.
- Copy and paste the following path in the text box and click OK:
%appdata%\Microsoft\teams - Press Ctrl + A to select all the files and folders inside the Teams folder.
- Click the trash icon at the top to delete them.

Close File Explorer, restart the Teams app, and check if the issue is still there.
7. Update or Reinstall Microsoft Teams
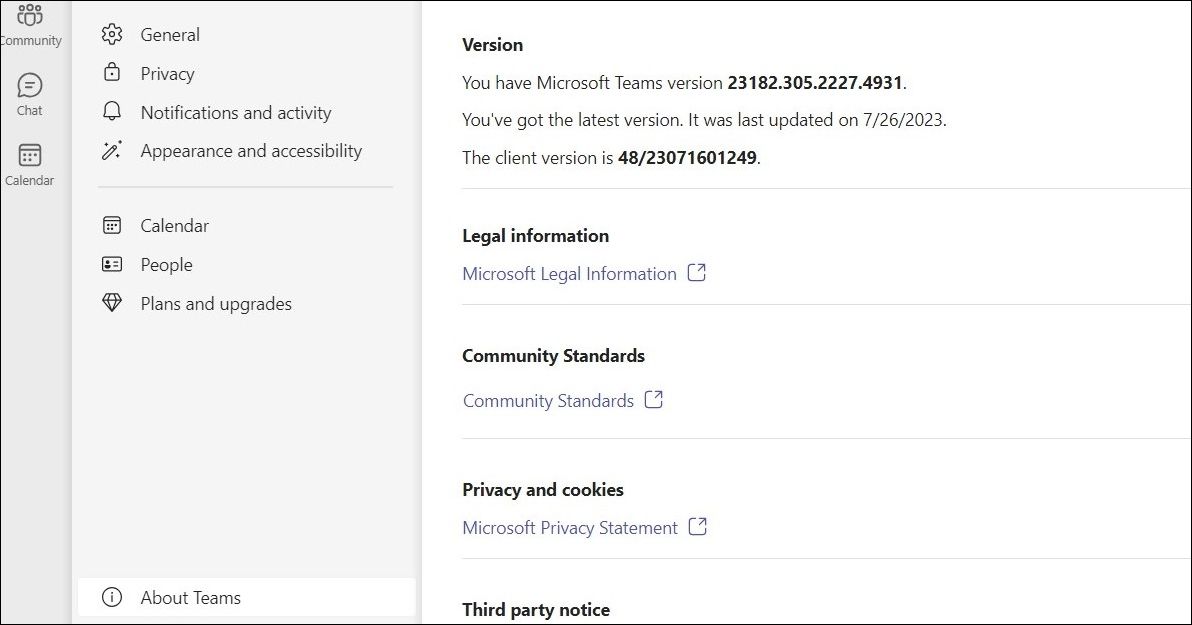
Using an outdated version of the Teams app can lead to performance issues and cause certain features to stop working. Microsoft regularly releases updates for the Teams app to improve your experience and address known issues. Hence, it is always advisable to use the most recent version of the Teams app.
In the Teams app, click the menu icon at the top and select Settings.Switch to the About Teams tab and check if a newer version is available.
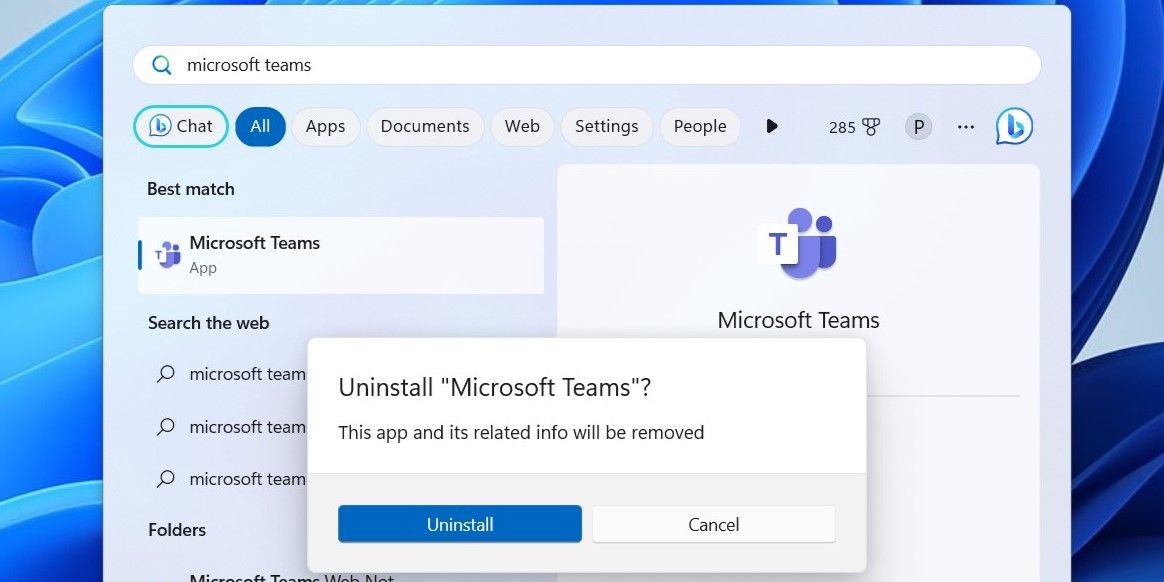
In case the issue remains, your best option is to uninstall the Teams app and install it again. To do so, press Win + S to access the search menu. Type Microsoft Teams in the search box and select the Uninstall option. Select Uninstall again to confirm.
Once removed, head over to Microsoft’s website to download and install Teams again.
8. Use Chrome or Edge While Sharing Screen in Teams for Web
Are you unable to share the screen while using Microsoft Teams in your browser? That could happen if you are using Teams in Firefox, Opera, or Brave.
Microsoft recommends using only Google Chrome or Microsoft Edge for using Teams on the web. Try switching to either of those browsers and see if you are able to share your screen after that.
Start Sharing Your Screen With Microsoft Teams
Fixing issues with Microsoft Teams’ screen-sharing feature can be as simple as granting the necessary permissions or as demanding as reinstalling the Teams app on your PC.
In any case, one of the above tips should help fix the issue for good.
Sometimes, when you try to share your screen in Microsoft Teams on Windows, you may get a black screen or an error message. If you encounter this problem, here are some tips that will help resolve the issue in no time.
Also read:
- [New] In 2024, Mastering iPhone X Secure Access Restoring Biometric Lock
- [Updated] 2024 Approved Seamless Blend Inserting Music Into FB Video Posts
- Apple's Leap Into Advanced Cybersecurity: An Inside Look at the New OS Designed for Artificial Intelligence Data Centers
- Discover the Ultimate 7 MDM Applications: Leading Software Reviews for Efficient Device Management
- How to Set up a Nintendo Network ID
- In 2024, 3 Easy Ways to Factory Reset a Locked iPhone 14 Without iTunes
- In 2024, Get Creative with Instagram Stop Motion A Comprehensive Tutorial
- In 2024, Read This Guide to Find a Reliable Alternative to Fake GPS On Realme 11 5G | Dr.fone
- Navigate Mobile Gaming to Your Desktop: Win 11 & Google Play Alliance
- Regain Entry: Quick Fixes for Microsoft Store Sign In Issues
- Solutions for Overcoming DXGI_ERROR_DEVICE_REMOVED
- Tips to Overcome 'Connect' Pairing Errors in Windows 11 OS
- Upgrade to Splendor: The Complete Guide to Altering Themes in Win11
- Title: Team Share Woes: Quick Windows Guide
- Author: Richard
- Created at : 2024-11-05 20:48:28
- Updated at : 2024-11-07 12:35:38
- Link: https://win11-tips.techidaily.com/team-share-woes-quick-windows-guide/
- License: This work is licensed under CC BY-NC-SA 4.0.
