The Ultimate Guide to Passwords and Text Files in Win OSes

The Ultimate Guide to Passwords and Text Files in Win OSes
You can use text editors to keep private notes, codes, and other confidential data. They’re simple, easy to use, and don’t take many system resources. However, if you’re keeping these kinds of data on text files, you should protect them by adding passwords and encryption.
Unfortunately, Windows’ Notepadd app doesn’t let you password-protect its text files. Thankfully, third-party Windows apps allow you to add passwords and encryption to text files. LockNote, Secure Edit, and PeaZip are three free apps to protect text files with passwords.
This is how you can use these three apps to protect the information you save on text files in Windows 11/10.
Disclaimer: This post includes affiliate links
If you click on a link and make a purchase, I may receive a commission at no extra cost to you.
How to Add Passwords to Text Files With LockNote
Steganos LockNote is a portable app that lets you create password-protected basic text files. You can also use it to apply passwords to existing text files, making it easier to protect your information.
So, this is how to use LockNote to protect your text information with a password.
Open the Steganos LockNote download page on Softpedia.
Click Download and select the Softpedia Mirror (US).
Next, open the Windows File Explorer and navigate to the folder where you downloaded the file.
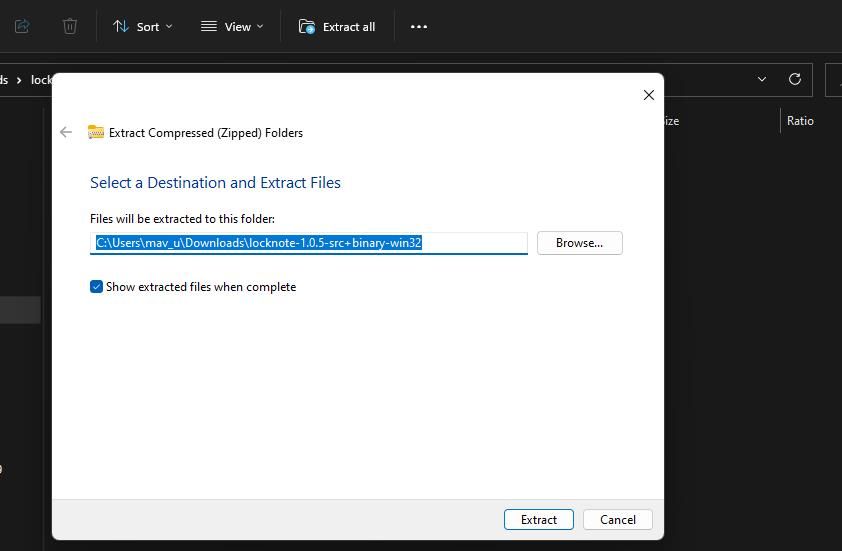
Unzip the locknote-1.0.5-src+binary-win32.zip archive. You can check out how to unzip files on Windows if you’re unsure how to do this.

Open the extracted LockNote folder.
Double-click the LockNote application (executable) file to start the app.
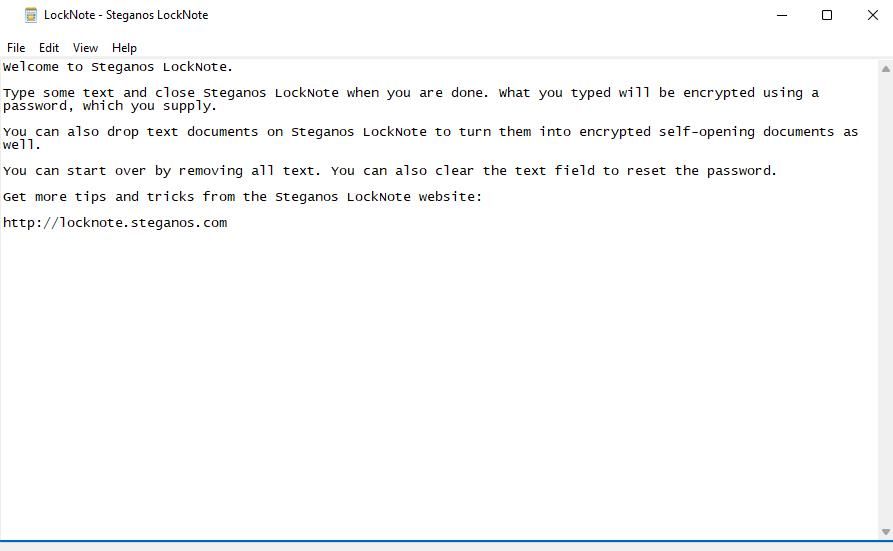
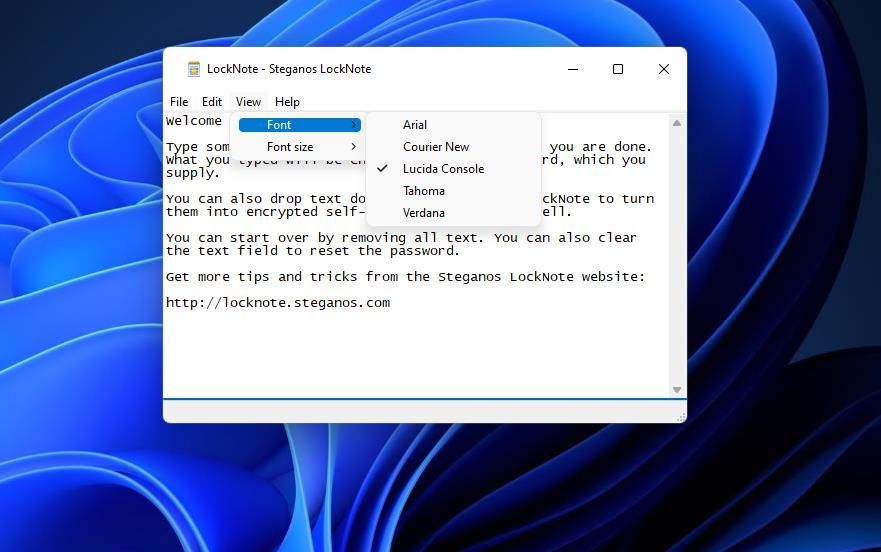
Now you’ll see the welcoming message shown below within LockNote. Erase that message and input the text or notes you want to save.

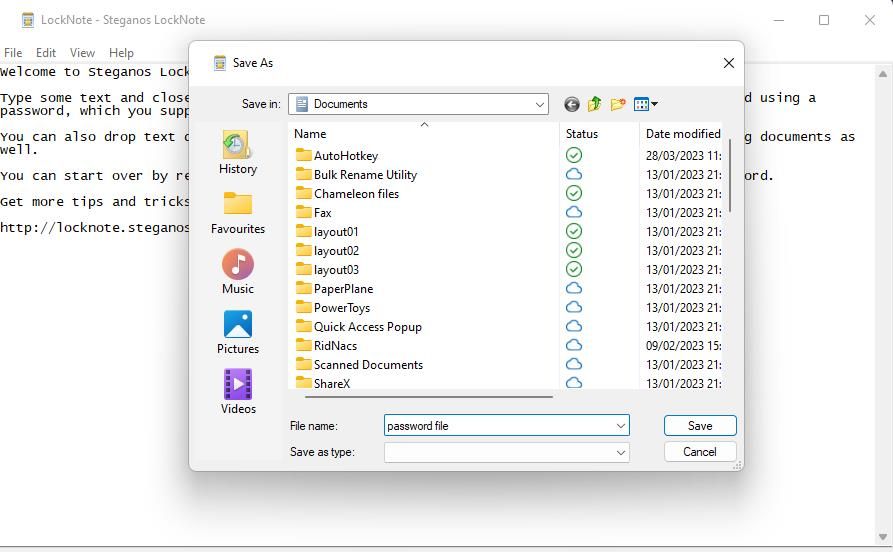
Go to File > Save As.
In the Save As window, navigate to the folder where you want to save your file.

Input a title in the File name box, then click Save.
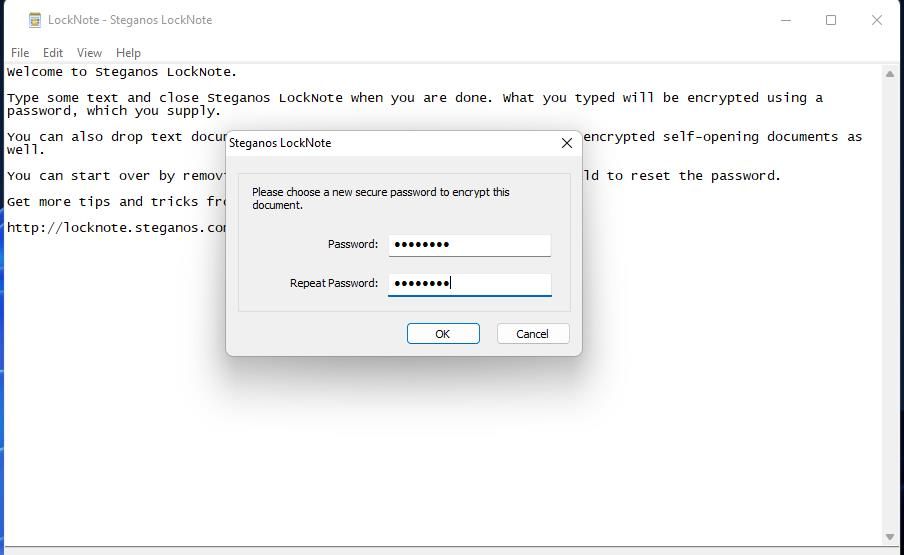
A password box will pop up. Enter matching passwords for the file in the two text boxes.

Click OK to save the file with the set password.
To open your password-protected text file, browse to the folder where you saved it and double-click the file. When you launch your file, a password box will appear; input the password you set and click OK to open it.
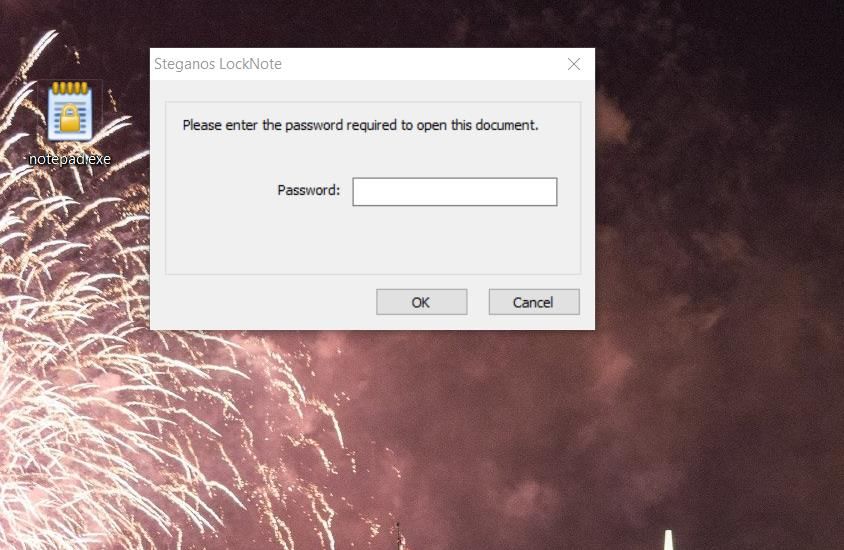
If you want to set passwords for an existing Notepad text file, open the folder that includes it, then drag and drop the Notepad file onto LockNote’s window. Select Yes on the dialog box that asks about converting files. Input a password for the file and click OK. That will save a duplicate LockNote file in the same folder as the original text file.
You’ll probably notice that the password-protected LockNote files have a .EXE file format. This means you don’t need to install the LockNote app to run your password-protected text file.
LockNote includes only limited text-editing options. However, you can at least select a few different fonts and sizes. To do so, click the View menu. Then you can click Font or Font size to choose alternative text options.
How to Add Passwords to Text Files With Secure Edit
Like LockNote, Secure Edit incorporates password and encryption features into your text file. However, it also lets you add images in PNG and BMP format. So, this is how you can add passwords to Windows text files with Secure Edit.
Open the Secure Edit Softpedia page.
Select Download Now and choose X86 or X64 to download the portable application, depending on your system. If you’re unsure, choose X86.
Open the File Explorer and navigate to the folder where you downloaded Secure Edit.
Double-click the SecureEdit64.exe file to open the text editor (no installation required).
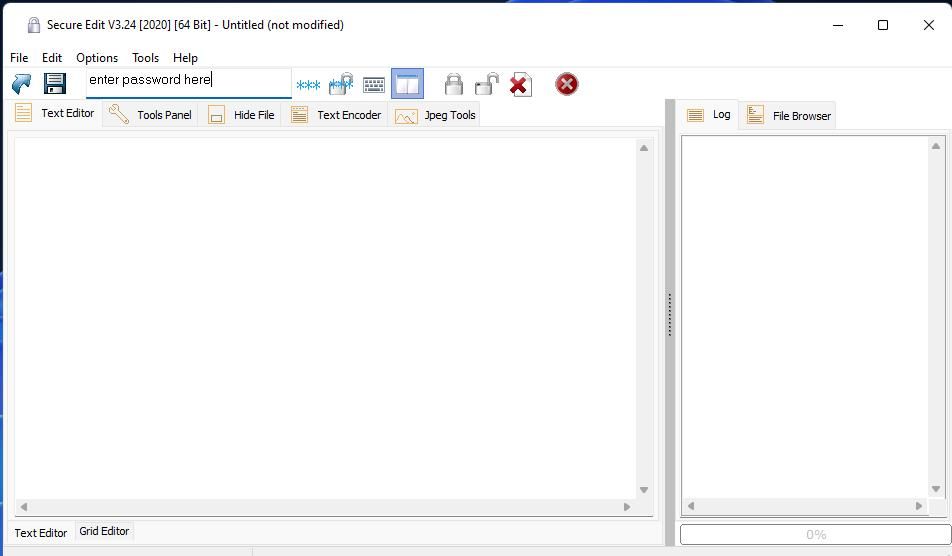
First, input a password you want to add to the text file.

Input some content within the text editor.
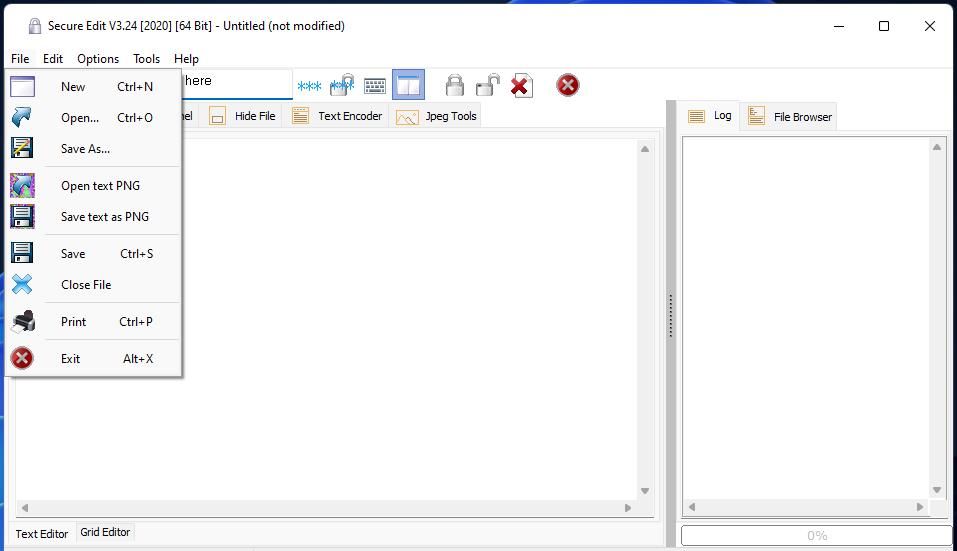
Click Secure Edit’s File menu.

Select the Save as option.
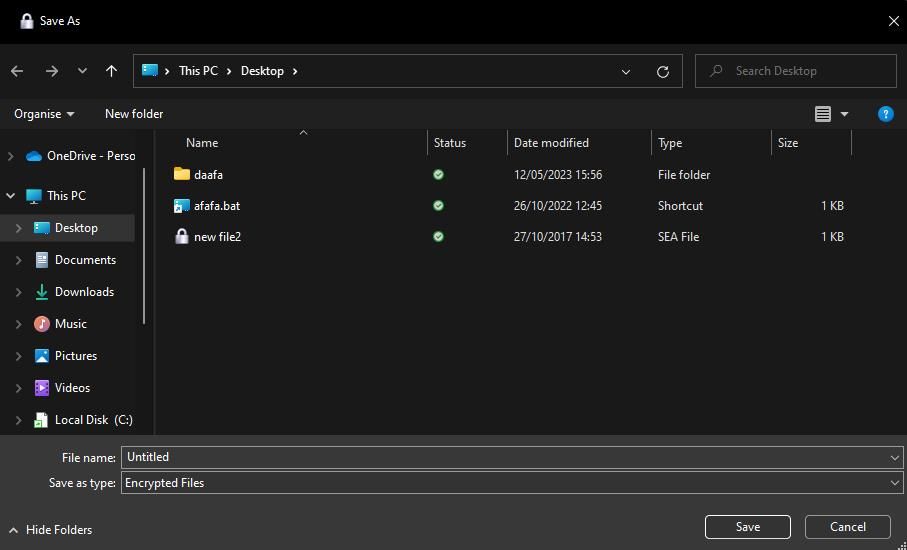
Choose the Encrypted Files format on the Save as type menu.

Fill out the File name box.
Select somewhere to save your file.
Click Save.
Close Secure Edit and open the saved file. Go to the directory that includes the file you just saved with Secure Edit and open it.
You’ll probably need to choose an app to open the file with first because Windows doesn’t recognize the format. Click the More apps > Look for another app on this PC option. Select the SecureEdit64.exe file and click Open. You can then input the file’s password to open it within Secure Edit.

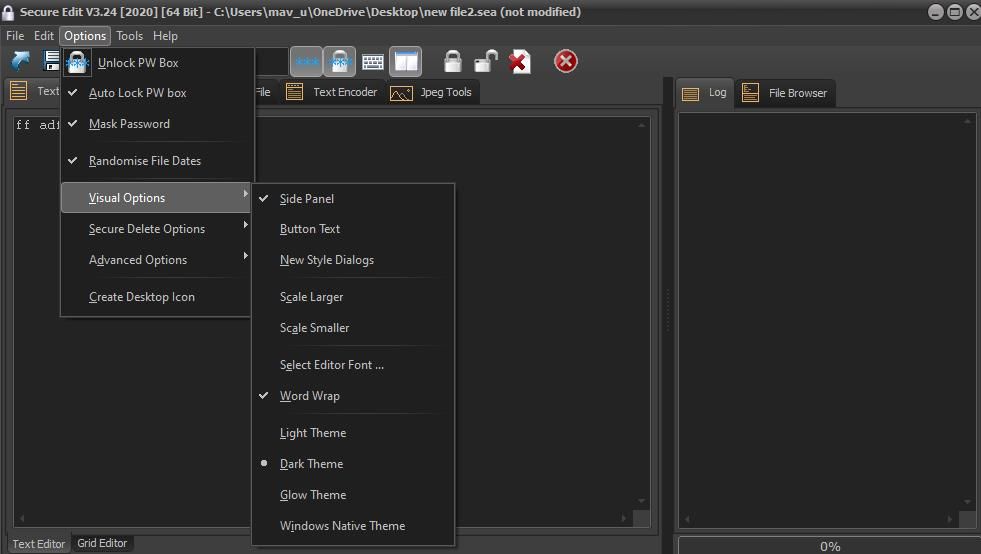
The Visual Options menu within Secure Edit includes customization options for the software. Click Options and Visual Options to access that menu. Then you can select four alternative themes from there.
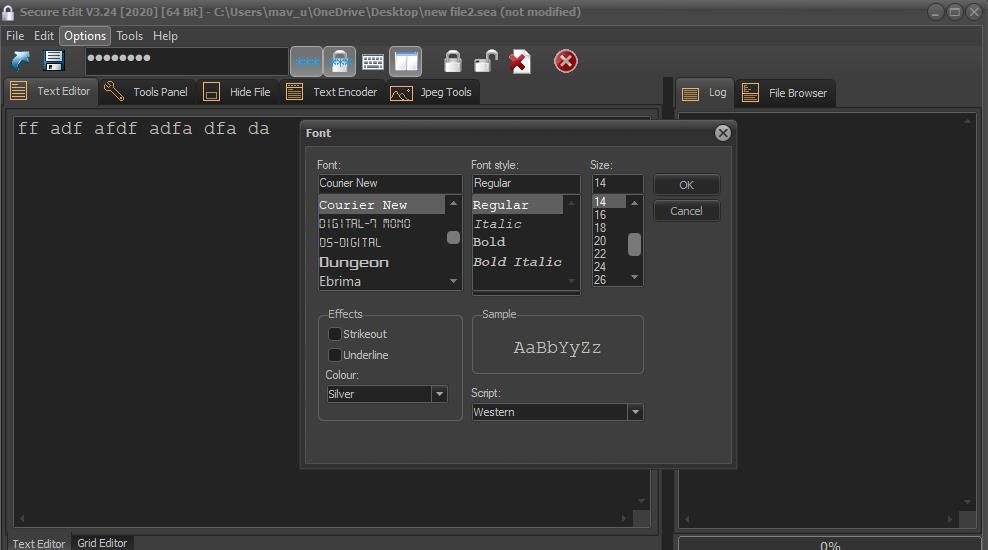
To change the text style in Secure Edit, click the Select Editor Font option. Then you can choose a different font, style, and size in the open window. The Font window also includes Strikeout, Underline, and Color options.
How to Apply Passwords to Notepad Text Files With PeaZip
PeaZip is a freeware archive utility with which you can set up password-protected archives . You can apply a password to multiple Notepad text files by adding them to a password-protected archive with PeaZip.
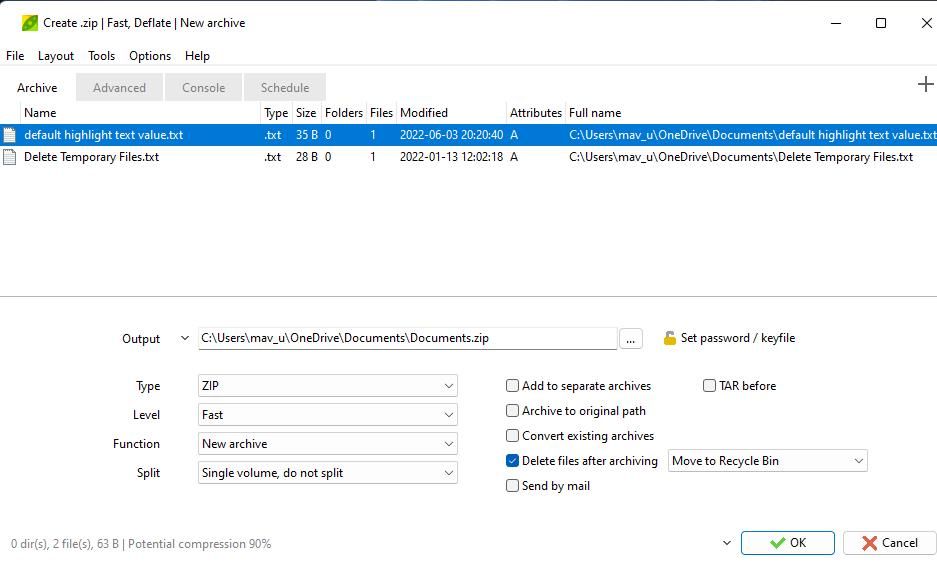
You then need to use PeaZip to open your password-protected archive. This is how you can create a password-protected ZIP file with PeaZip:
Open the Windows PeaZip page to download the app.
Click on Download PeaZip to save the installer.
Navigate to the folder containing the downloaded PeaZip setup file in Windows File Explorer.
Open PeaZip’s installer.
Select the PeaZip setup wizard’s I accept radio button.
Then keep clicking Next to install PeaZip with default settings.
Press the PeaZip setup window’s Install button.

Click Finish to exit the PeaZip setup window.
Double-click the PeaZip desktop shortcut.
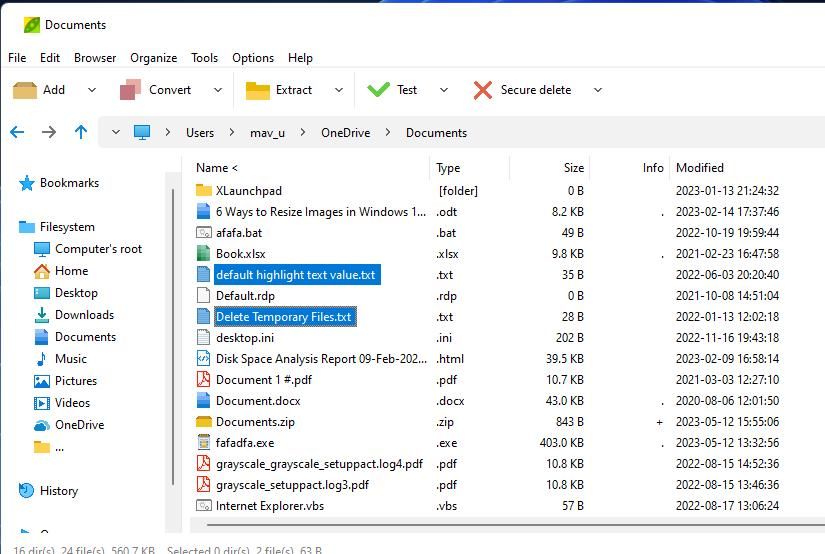
Select a folder that includes some text documents within PeaZip’s navigation sidebar.
Hold the Ctrl key and select a few Notepad text files to include within the archive.
Press the Add button.

Choose ZIP in the Type drop-down menu.
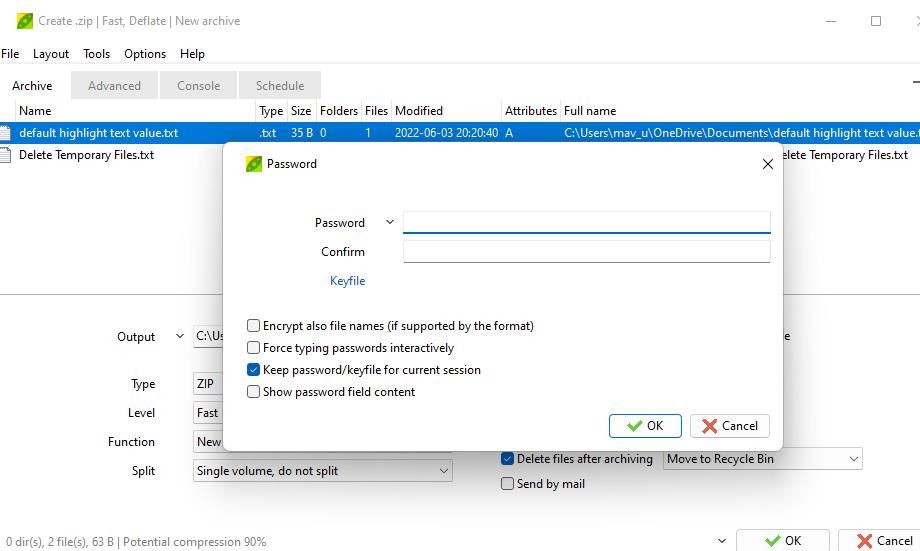
Click the Set password / keyfile option.

Enter your desired password in the Password box.
Re-enter the same password in the Confirm box.

Select OK in the Password window.
Click the three-dot button for the Output box. Choose a directory to include the archive in and select Save.
Select OK to create the password-protected archive.
The archive you’ve created will not be accessible with the Windows ZIP extraction utility. To open the files in it, bring up the directory that includes the archive; then right-click the ZIP file and select Open with > Choose another app > Look for another app. Select PeaZip in the window and click Open > OK.
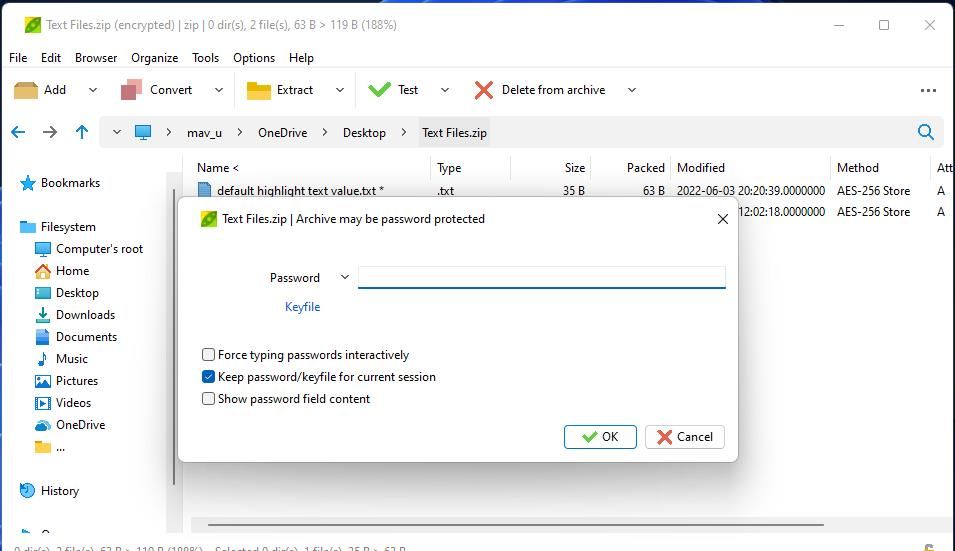
Double-click a text file within the archive. Then you’ll be prompted to input a password for it. Enter the password you set for the ZIP to open the text file in Notepad.
Secure Your Text Files in Windows 11/10
If you share a Windows PC with other users, you should set passwords for text files containing private notes and confidential details. Even if you don’t, securing your personal notes is a good idea by applying a password. So, check out LockNote, Secure Edit, or PeaZip to protect your most confidential text files in Windows.
If you’re a Windows 11/10 Pro and Enterprise user, you can also encrypt your text files with the extra security features those platform editions include. BitLocker enables you to encrypt whole drives. Or you can apply AES-256 encryption to specific files in Windows 11/10 Pro and Enterprise.
Unfortunately, Windows’ Notepadd app doesn’t let you password-protect its text files. Thankfully, third-party Windows apps allow you to add passwords and encryption to text files. LockNote, Secure Edit, and PeaZip are three free apps to protect text files with passwords.
This is how you can use these three apps to protect the information you save on text files in Windows 11/10.
Also read:
- [New] 2024 Approved Transforming Scripted Words Into Powerful Video Soundtracks
- [New] Inside Outlook What You're Missing as a Story Viewer for 2024
- [New] Insider Tips Creating Unique Podcast Names
- [New] Streamlined Process for Shaping Photos
- [Updated] Projecting Film Costs for Your Music Video
- Android Unlock Code Sim Unlock Your Motorola Phone and Remove Locked Screen
- Comprehensive Steps to Resolve 0X80071A90 Error
- Leading Clearcut Screen Capture Options (No Commercials) for 2024
- Lift Screen Limitations in Windows 11 with These Methods
- Masterclass on WinServices.exe in Windows OS
- Mastering the Art of Earning Through Vlogs for 2024
- Navigate Through Windows: Avoid Fullscreen Frustrations
- New What Is an AI Video Editor? | Wondershare Virbo Glossary for 2024
- Quick Steps to Revive WoW on a Stuck PC
- Recovering Original Directory View in Win11
- Seamless Slide Show Creation: Windows 11'S Seven-Step Methodology
- System Rejuvenation: Exploring Windows' 8 Restarts
- The Evolution of Copilot Key and Its Effect on Windows 11 Users
- Updated 2024 Approved Tailoring Auditory Experiences to Your Videos with Ease and Precision
- Title: The Ultimate Guide to Passwords and Text Files in Win OSes
- Author: Richard
- Created at : 2025-02-28 20:10:41
- Updated at : 2025-03-05 03:37:37
- Link: https://win11-tips.techidaily.com/the-ultimate-guide-to-passwords-and-text-files-in-win-oses/
- License: This work is licensed under CC BY-NC-SA 4.0.
