Transforming Window 11'S Default Search Settings

Transforming Window 11’S Default Search Settings
The Windows search tool is an indispensable function especially in locating files, apps, or folders faster and more efficiently.
Like many other features on your PC, this one is not without its perks. You can include search content from other accounts or turn on privacy options to manage content that comes up in your search.
In this article, we will explore some of the ways to help you achieve more personalized search results on your Windows 11 PC, beginning from privacy settings to managing search indexes.
1. Turn On Safe Search
Considering the amount of inappropriate content on the internet, it might be necessary to put mechanisms in place to block out any adult content in your search, especially if you have little ones around.
Turning safe search on will help you filter out explicit content, making it particularly suited for children. Usually, results from running a Windows search on your PC will include web previews relevant to your search. So, you can keep this feature turned on to exclude sensitive content from your search results.
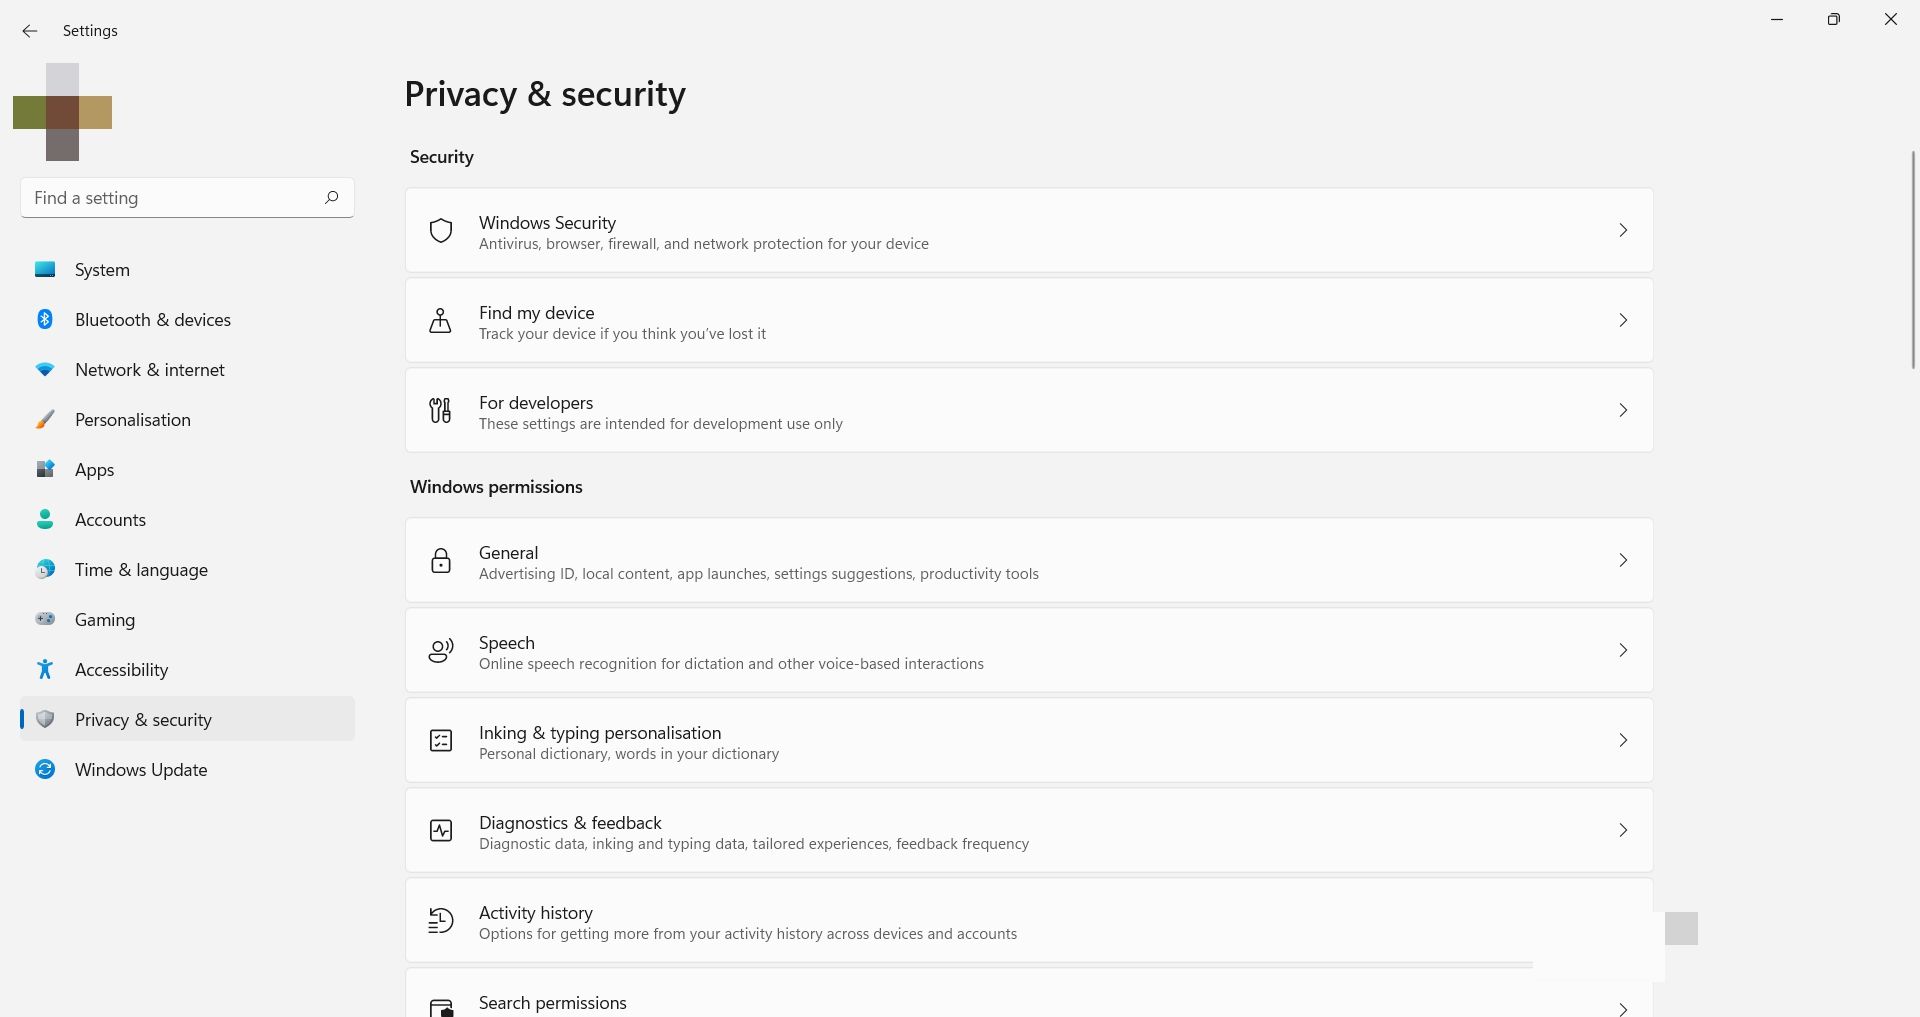
To turn Safe search on, head over to settings, either locating the settings app fromStart or pressing the shortcutWin + I on your keyboard.
- Next, click Privacy & Security.

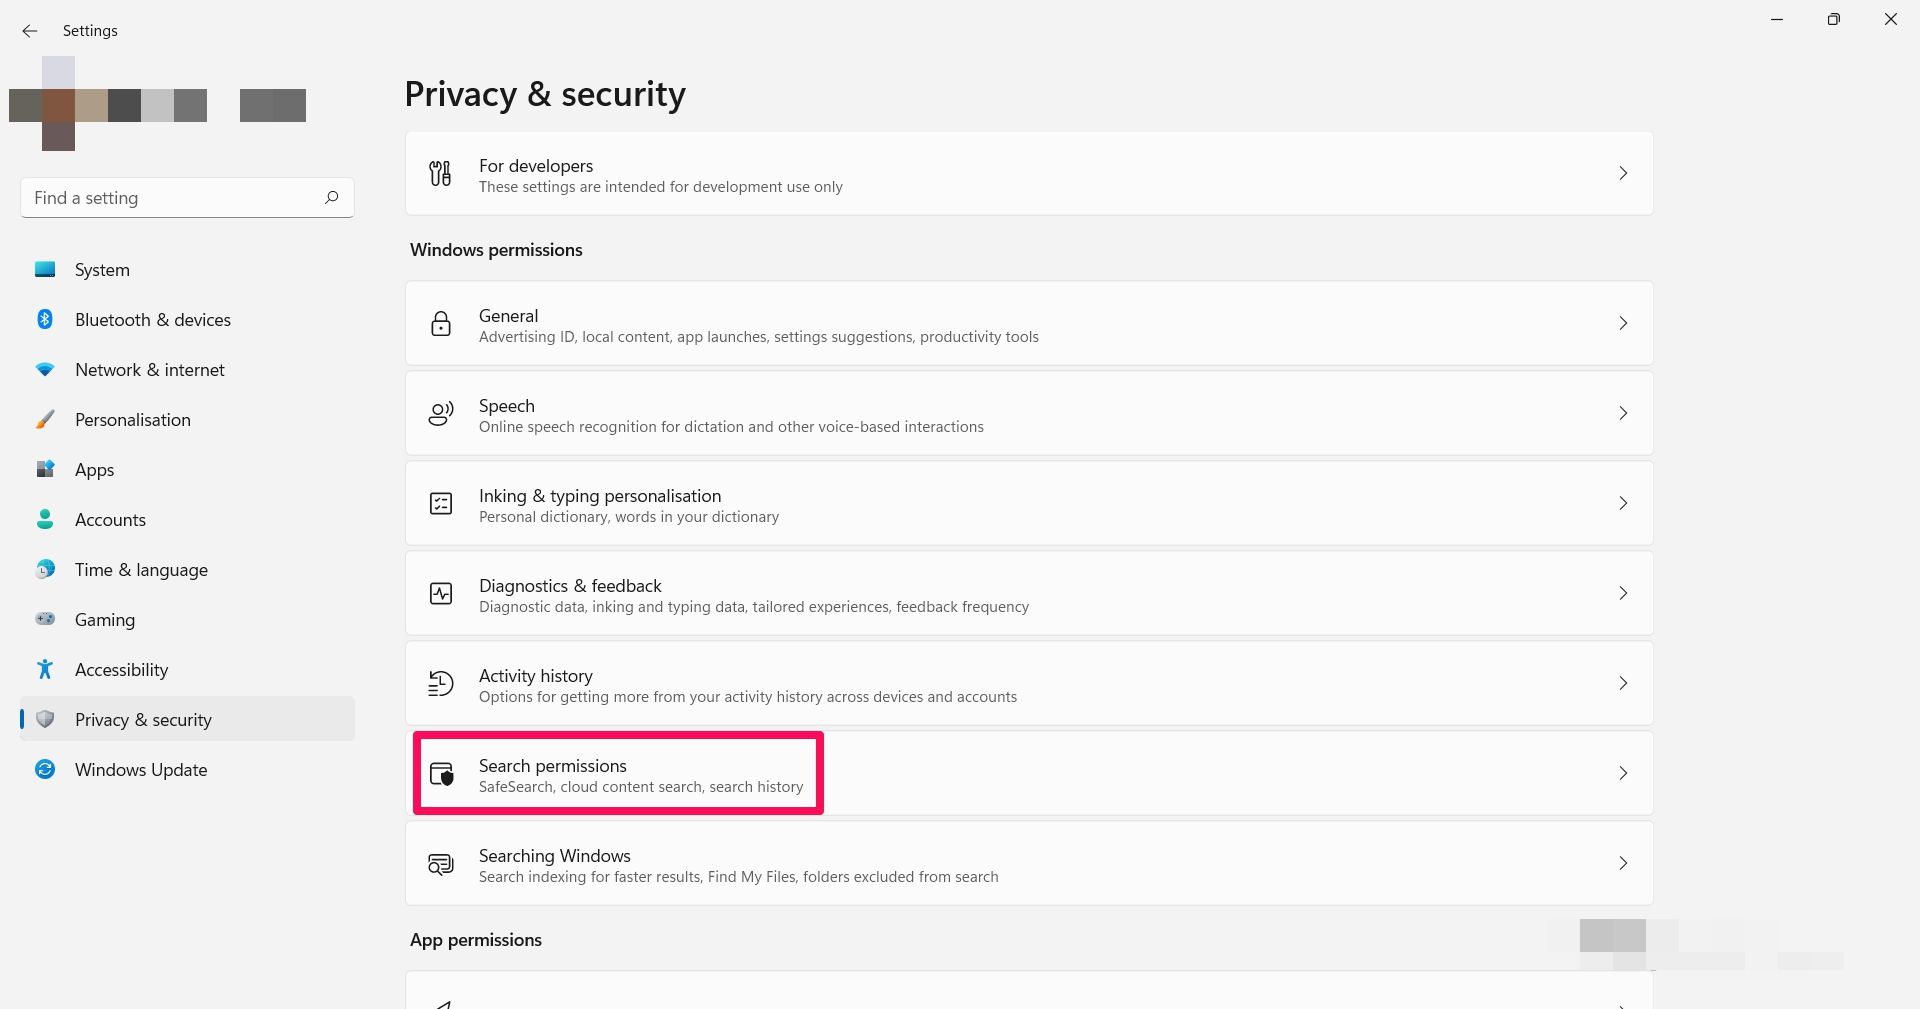
- UnderWindows permissions, clickSearch permissions .

- This will open up SafeSearch settings, under which three options exist:Strict ,Moderate, andOff .
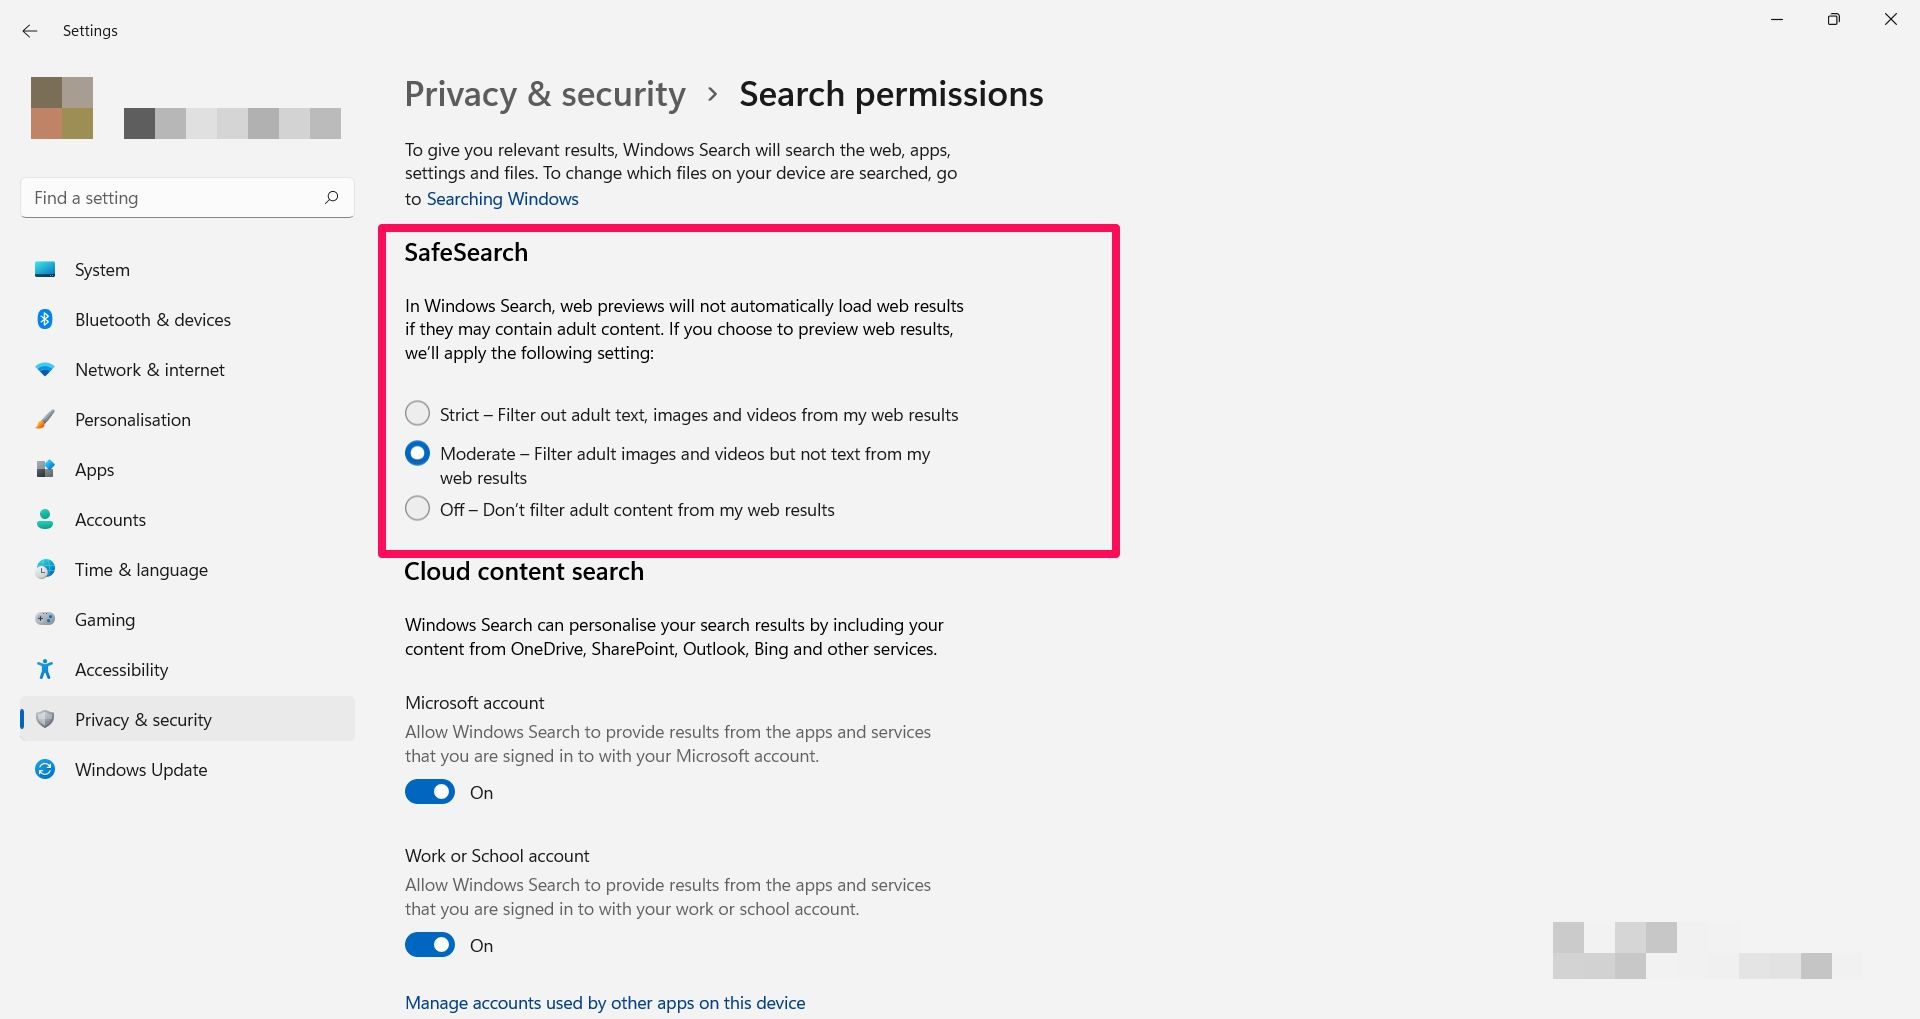
TheStrict setting will filter out all adult content in texts, images, and videos from web previews. On the other hand, theModerate setting will only filter out adult images and videos, excluding text. Lastly, theOff option will disable the filter entirely from your web results.
Choose any of theSafeSearch categories, depending on the level of filtering you want to apply to your search.
2. Include Search Results From Your Other Accounts
Content from accounts connected to Windows Search on your device is also included in your search results. In addition, Windows Search lets you manage these connected accounts to change the search experience on your PC.
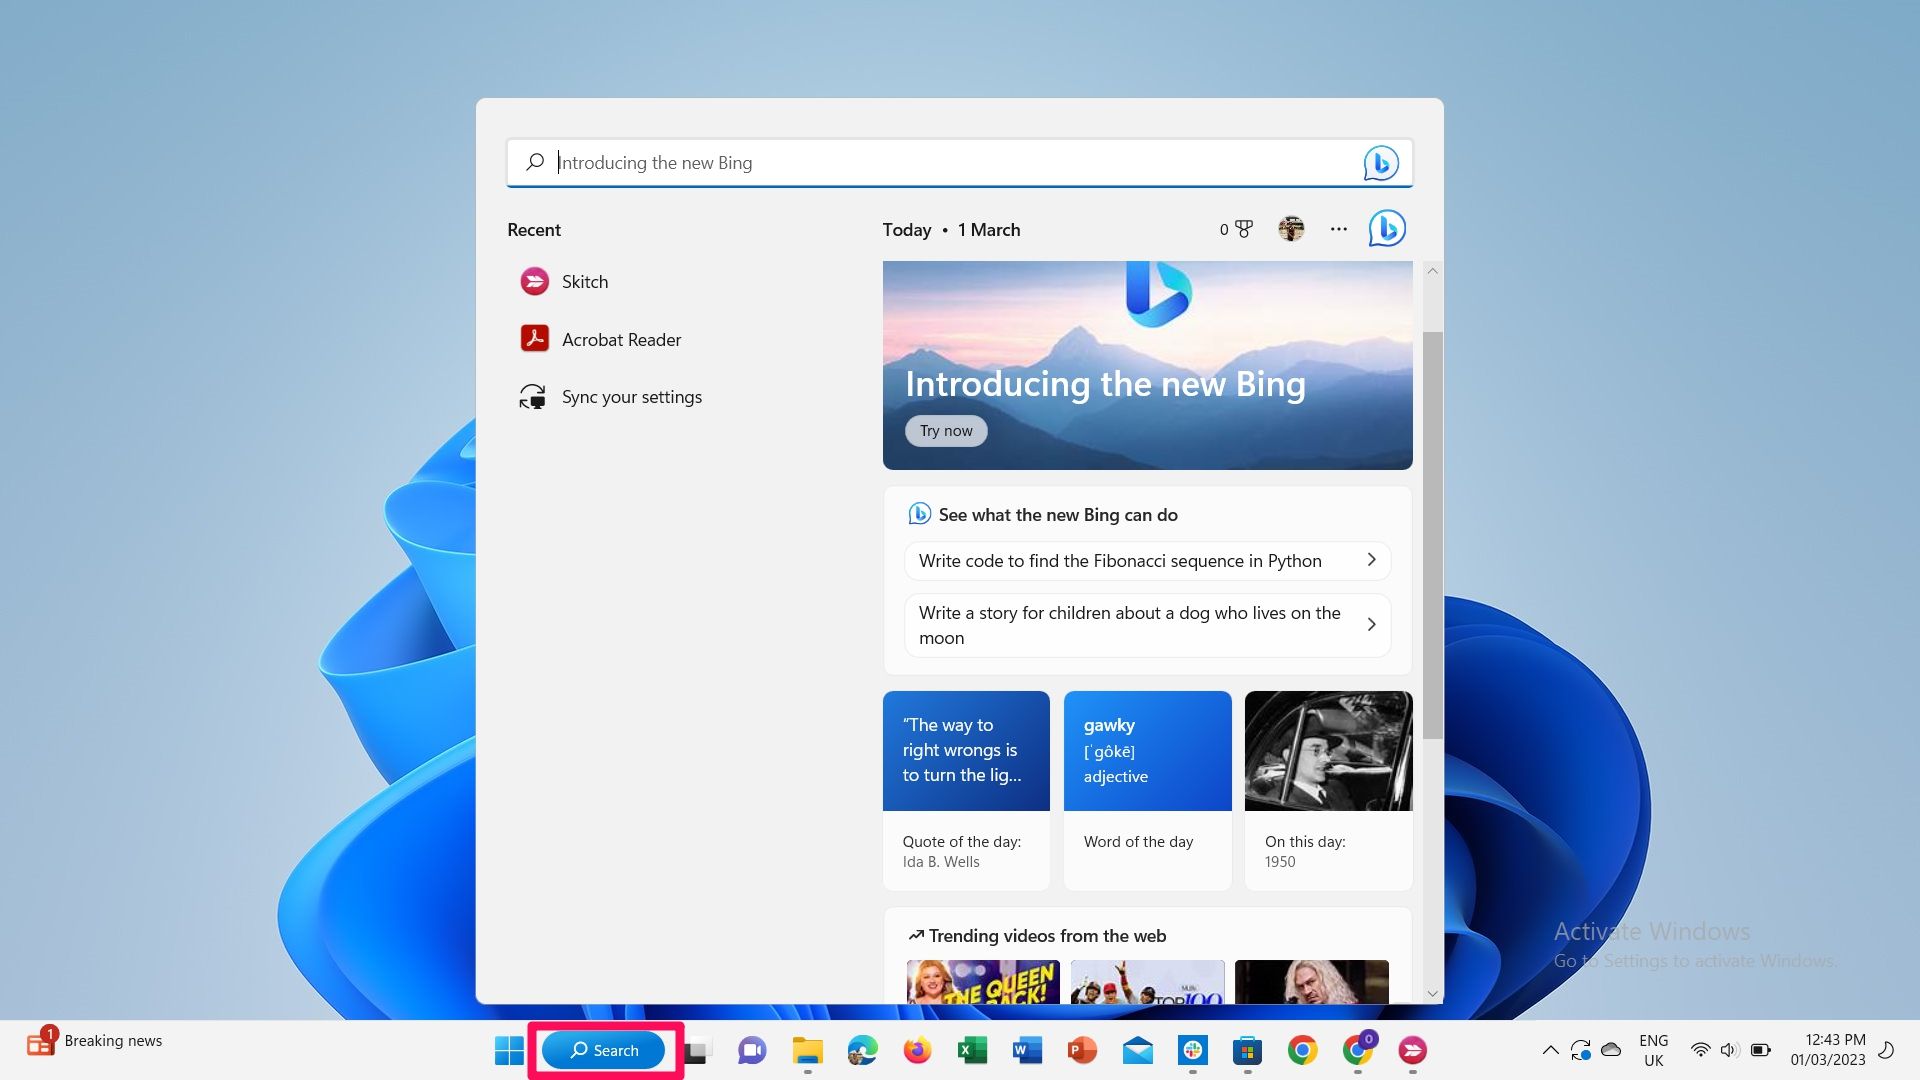
- To view accounts connected to Windows Search, click on the search icon from your taskbar.
- Then, by clicking your profile in the top right corner, you see a list of the accounts connected to Windows Search.

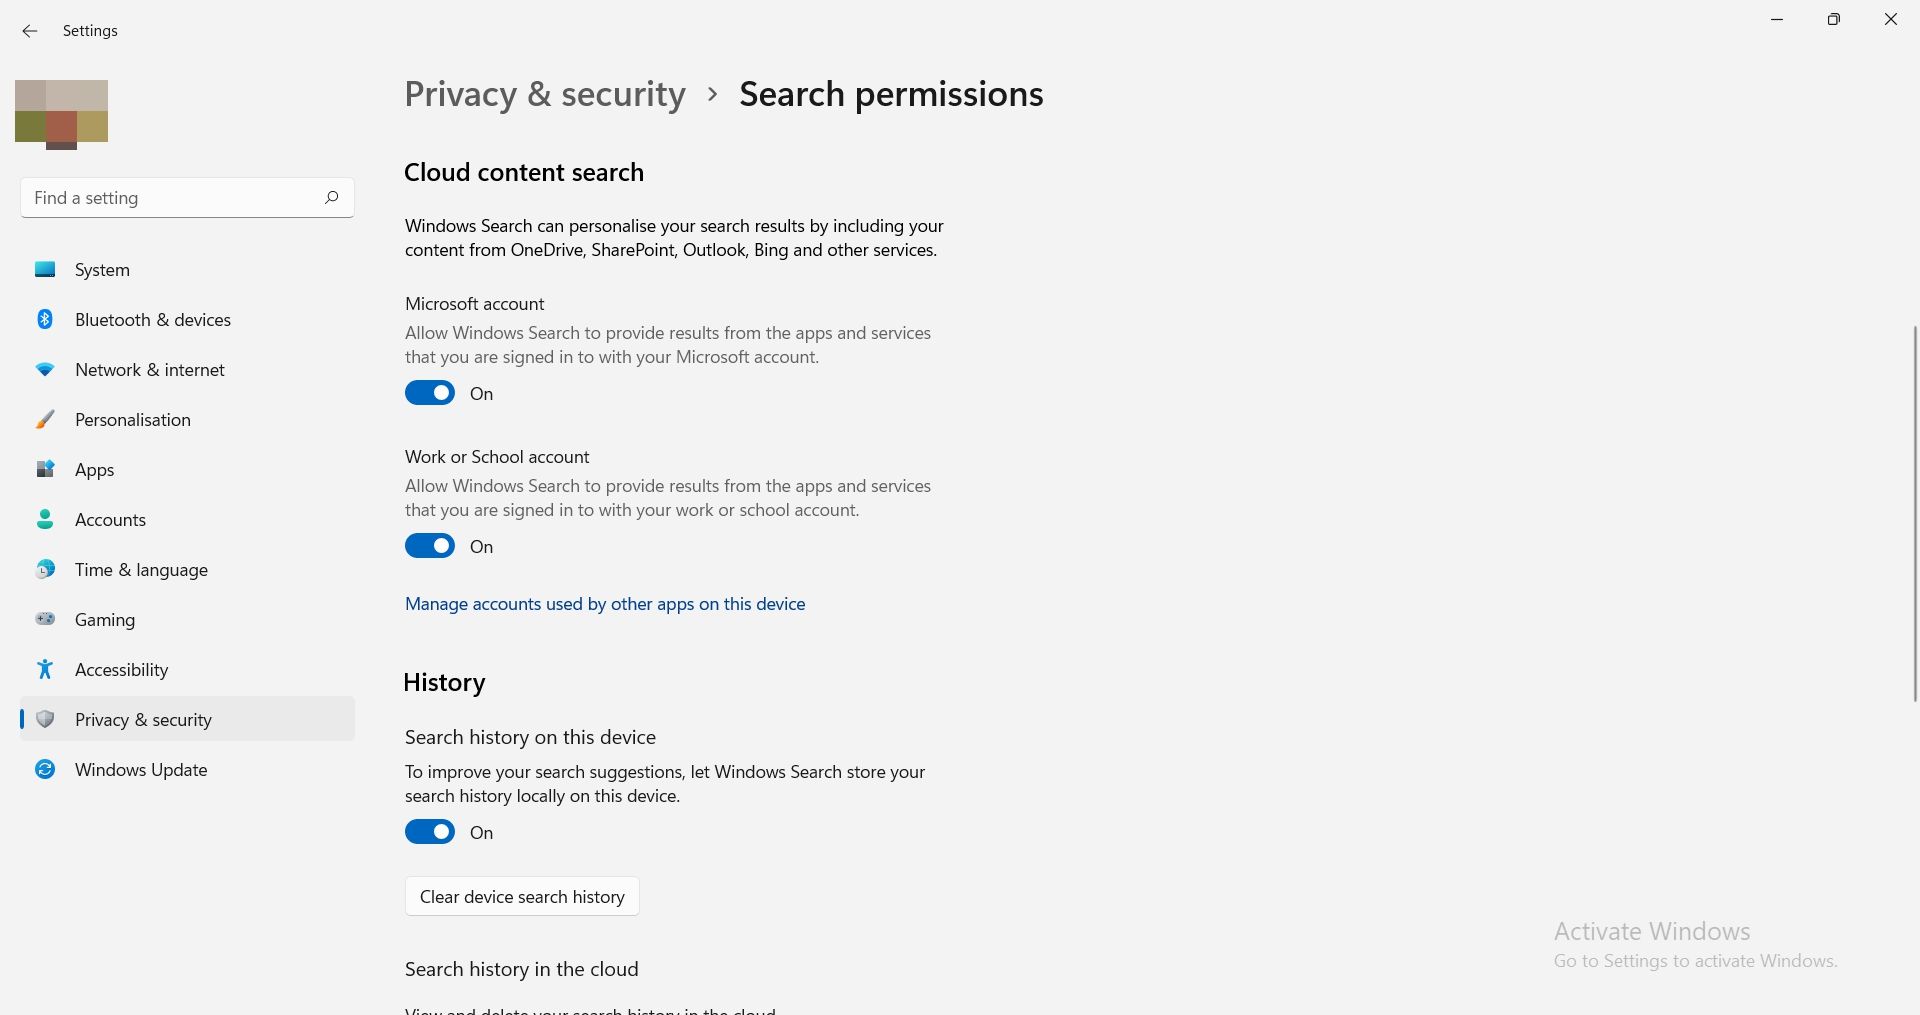
- To manage your connected accounts, go to Settings > Privacy & settings > Cloud Content Search .

UsingCloud Content Search settings, you can add search results from other accounts you are signed in to, or exclude them from your search. This could include Microsoft services such as Outlook, OneDrive, Bing, or your organization/school account. Simply toggle onMicrosoft account andWork or School Account option to do this.
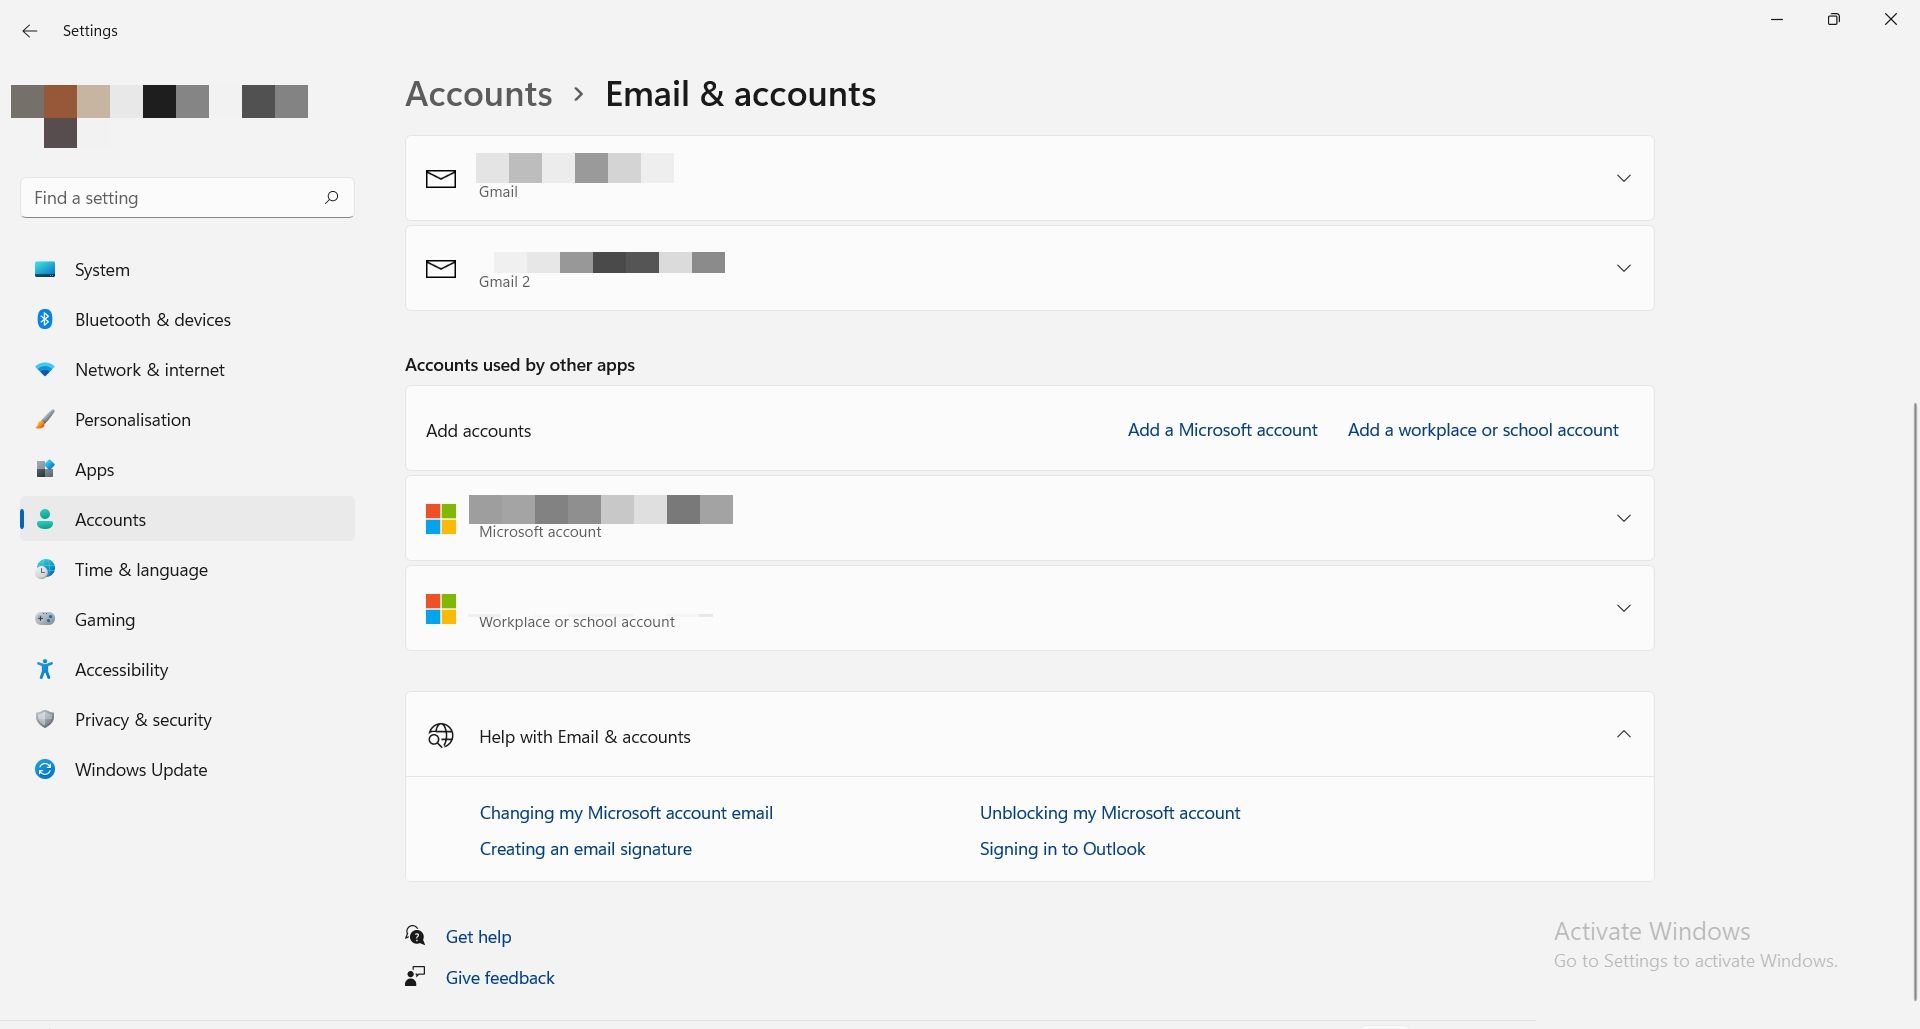
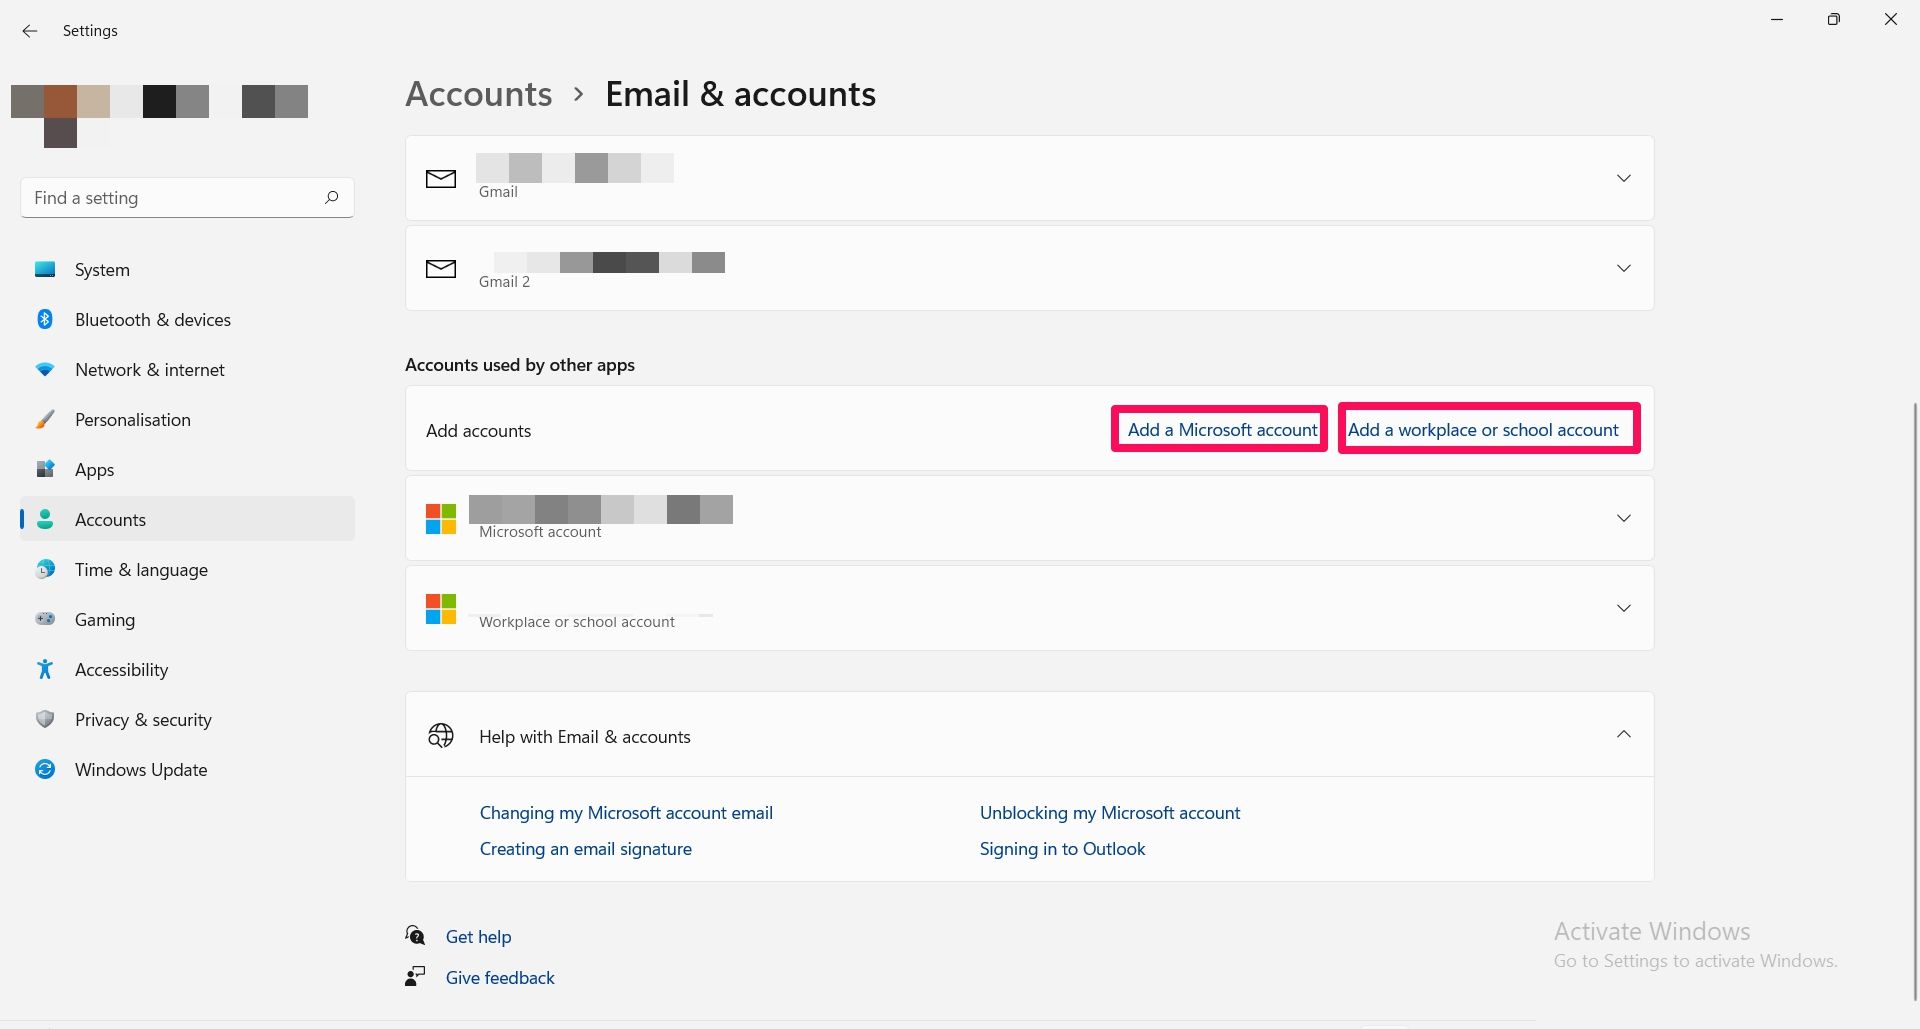
- To add an account to Windows Search, go toEmail & Accounts inSettings .

- BeneathAccounts Used by other apps , clickAdd a Microsoft Account to add one, orAdd a Workplace or School Account .

3. Clear Search History on Your Device
Search history is stored by default on your device to help you get faster results and recommendations based on your search patterns.
To change this, locateHistory from theSearch permissions category and toggle off the first menu to prevent Windows from saving your device’s search history.
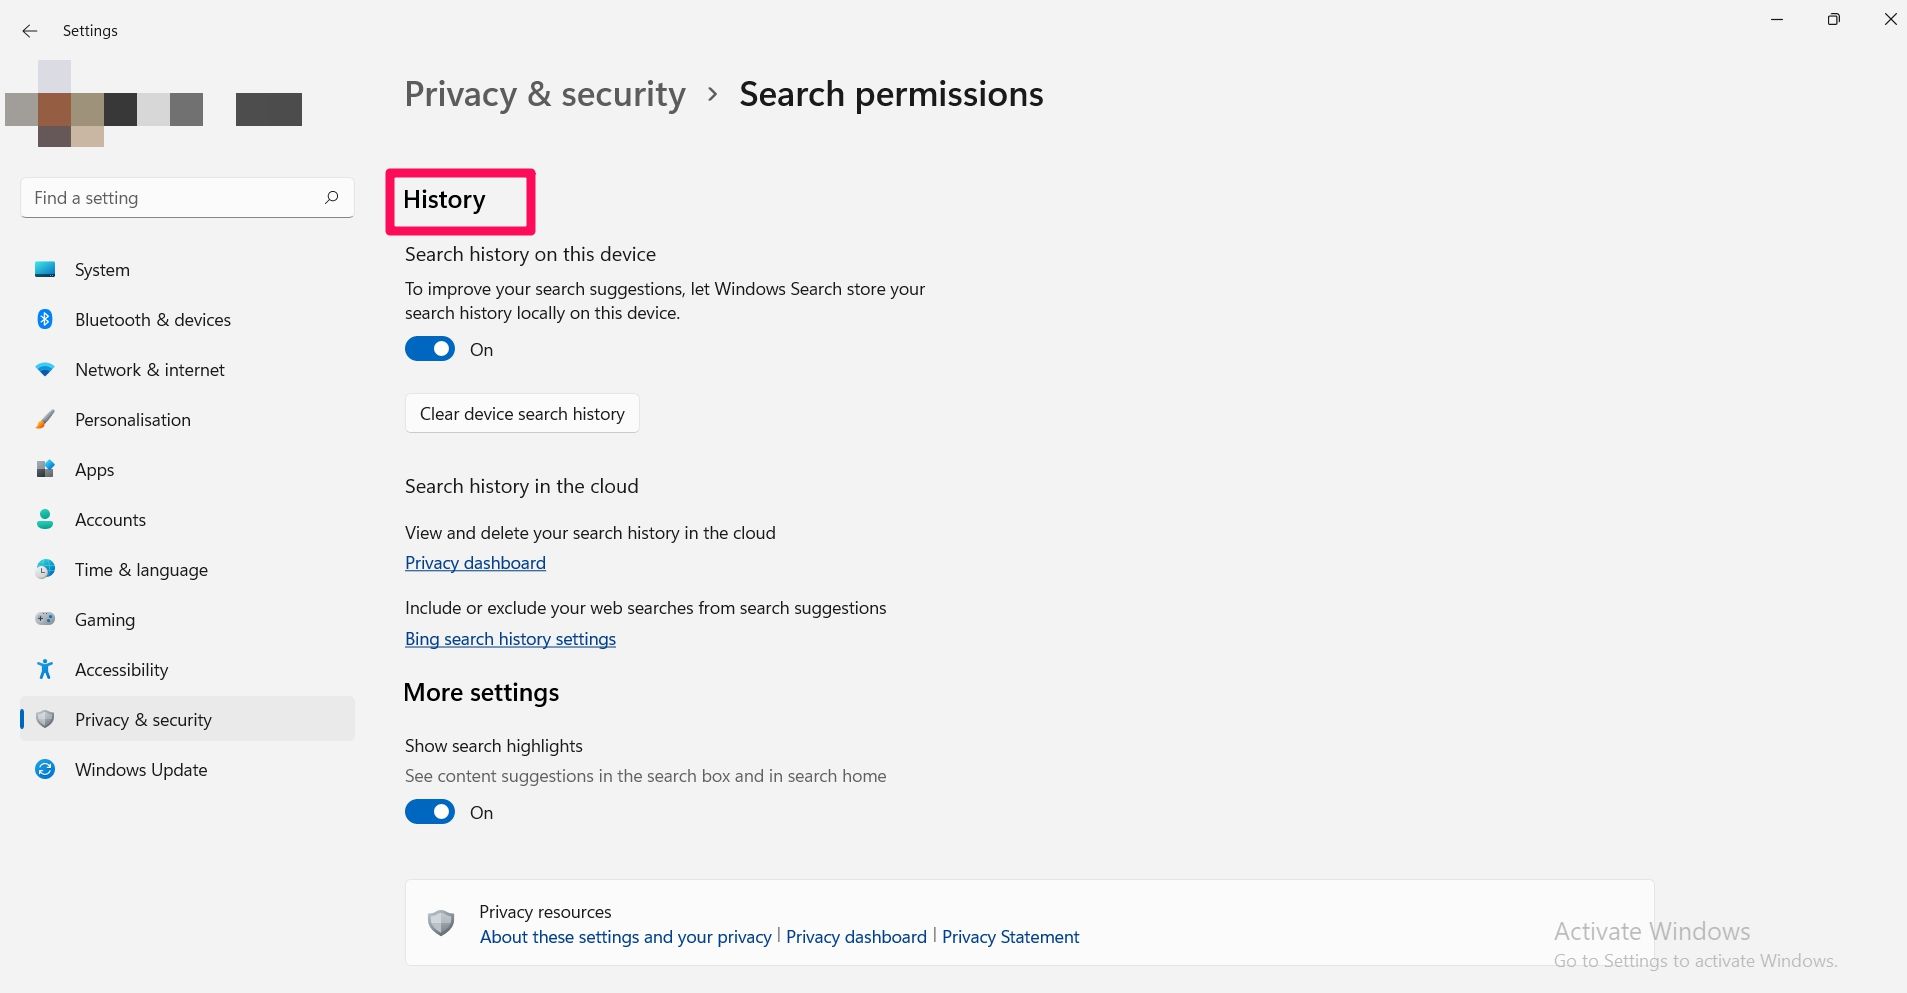
ClickClear device Search history to delete search history on your device.
You can also delete your cloud search history, as well as exclude web searches from your search suggestions.
Results from the Windows search will often bring up previews of web results. If you find this a bit confusing, you can exclude web search results to streamline your search to only local results from your PC.
4. Enable App Launch Tracking
Enabling app launch tracking on your PC lets Windows monitor the apps you frequently use to improve your search results. Thus, you can access these apps easily, especially from the start menu.
However, if you want to keep this turned off for, say, privacy concerns, Navigate toSettings > Privacy & Security > General. Then, toggle off Let Windows improve start and search results by tracking app launches .
![]()
5. Utilize Enhanced Search
When you run a search, your PC will typically look for files in specific locations, such as in theDocuments orPictures folders.
The enhanced search extends the search to other parts of your PC, thereby improving the quality of your search results. This is done byindexing the search results in Windows 11 , which means storing information on these files to make them easily accessible by your PC during a search.
Usually, it is set toClassic by default on your PC; hence your search will be limited to certain prime locations on your computer. Turning on enhanced search will change this mode of operation.
To turn on enhanced search, go to Settings > Privacy & Security > Searching Windows to turn on enhanced search. Tick theEnhanced search option to enable it. The process might take some time, so you might want to keep your PC plugged in.
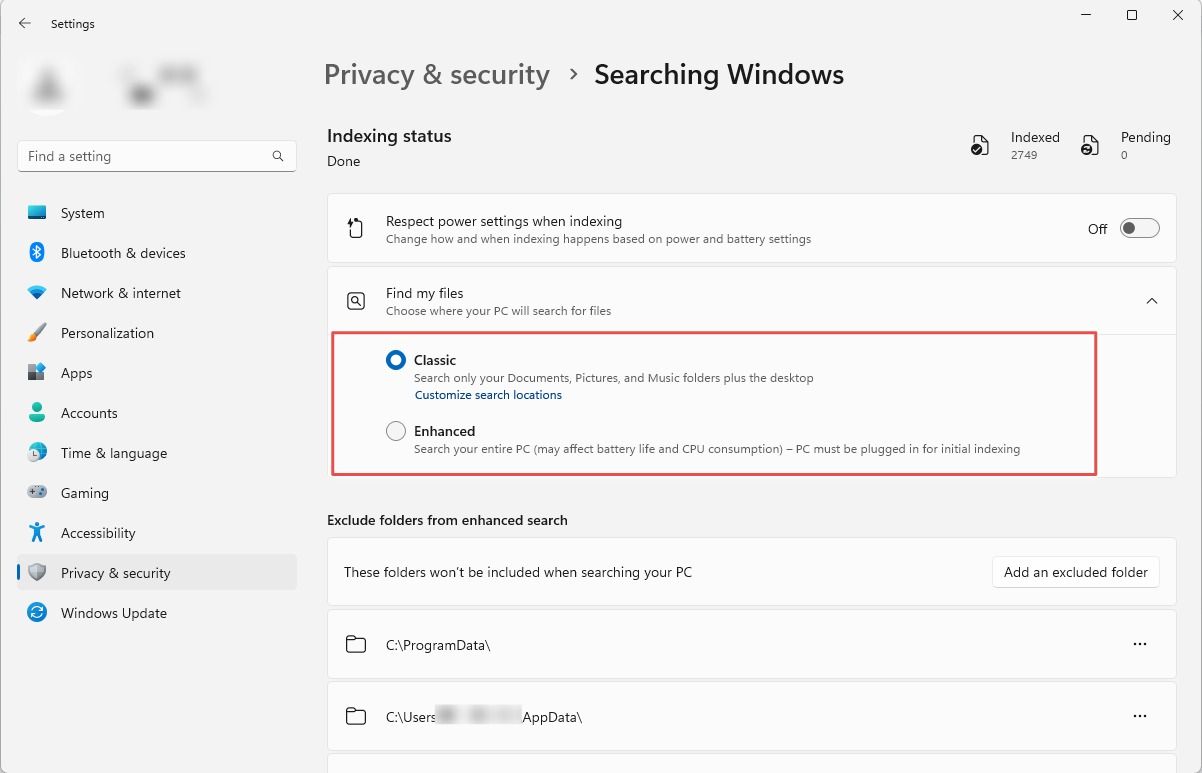
If there are some folders you’d like to keep out of your search, click onExclude folders from enhanced search.
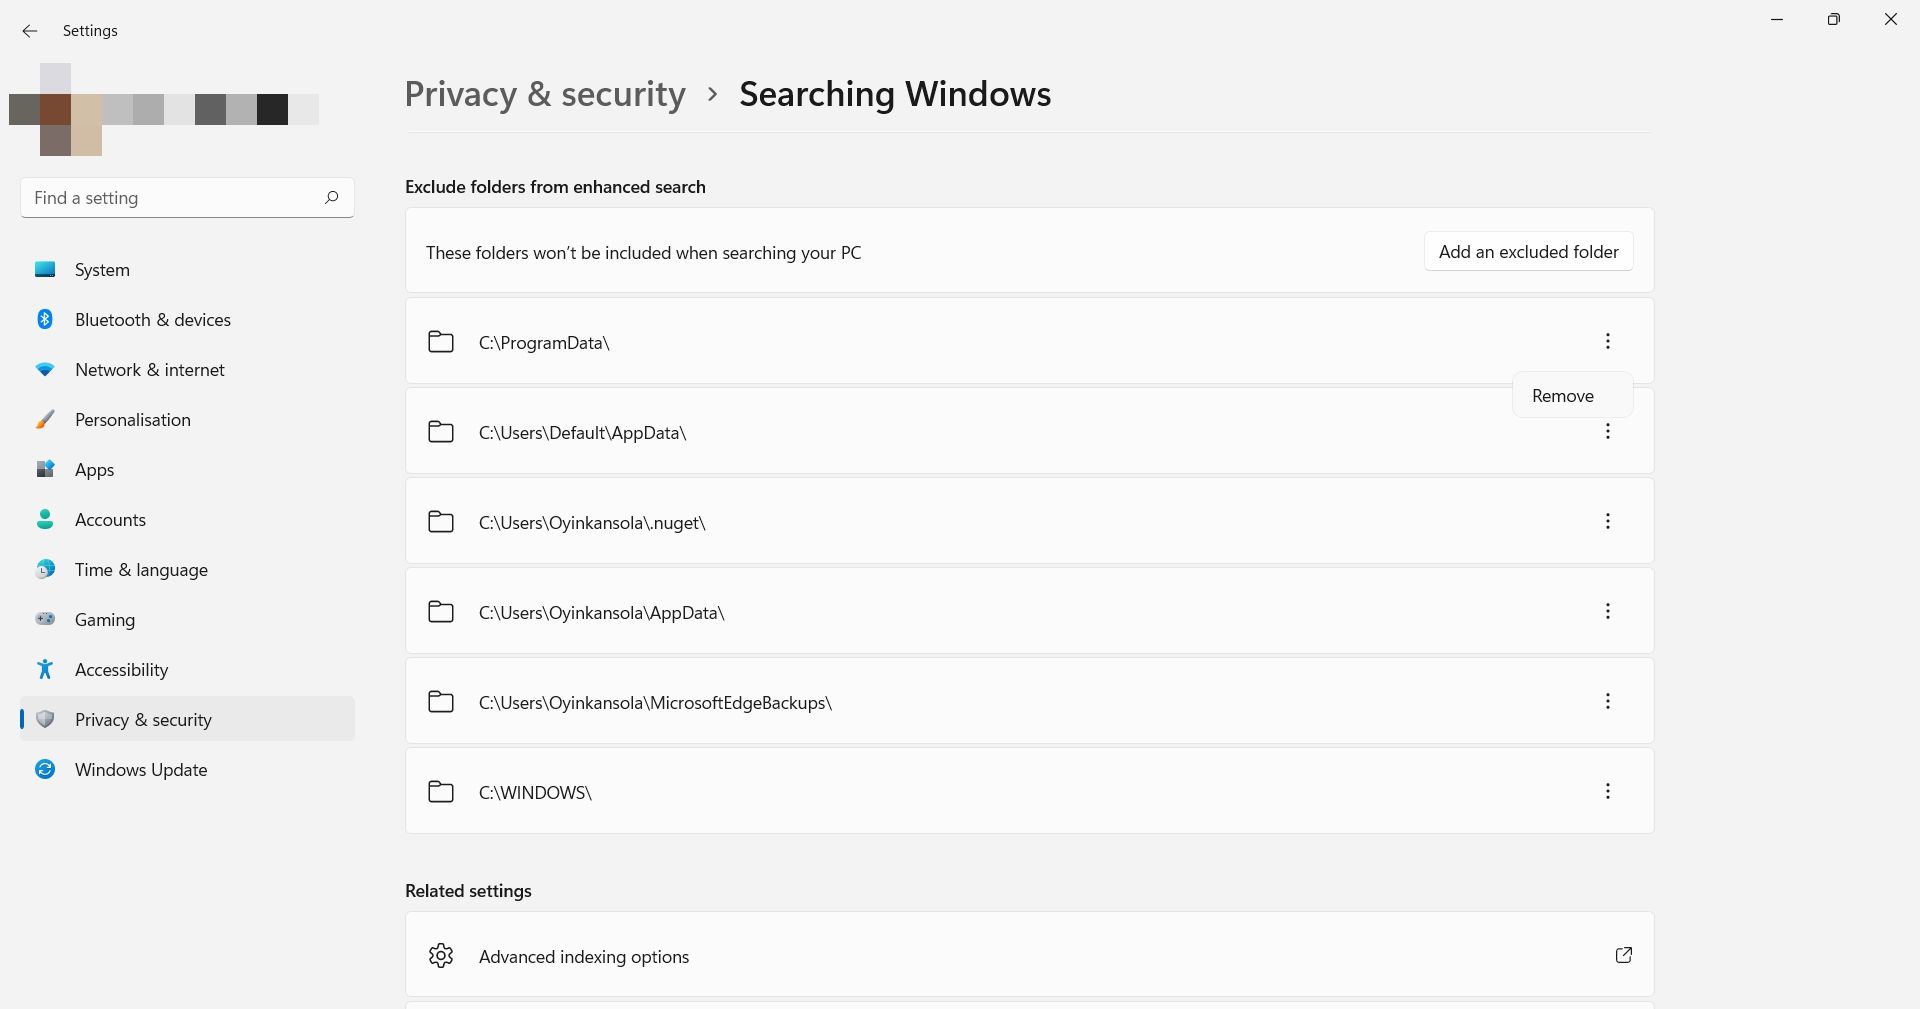
Click the three dotted lines on each menu and selectRemove to exclude it from a search.
Harnessing the Power of Windows Search
Search tools make finding things much easier, and your Windows 11 PC is no exception. With a few tweaks, you can improve search results on your PC and take your experience to a whole different level.
Windows 11 brings even more improvements to the search feature. Aside from being able to access it right from the taskbar, it also brings you the power of search highlights, with more content and insights to your search.
Also read:
- [Updated] In 2024, Google+ Virtuosos' Snapchat Highlights
- [Updated] In 2024, InstantVideo Snipper - FB Edition
- 2024 Approved Expert Review of PowerDirector - Features & Tips
- 2024 Approved How to Angle Videos for Improved Viewership
- 2024 Approved Zero Cost Zest The Ultimate Guide to Free Game Film
- 3 Methods to Mirror Realme C67 4G to Roku | Dr.fone
- Conquering Windows Service Obstacles with These 7 Powerful Strategies
- Free Guide to Converting DVDs to MP4 Files with Handbrake
- Fusing Windows Serial Number with MS Online Profile
- How to Fix the Action Needed Prompt for Wi-Fi in Windows
- How to Make Admin Access More Discreet in Windows 11
- How to Use Google Assistant on Your Lock Screen Of Infinix Smart 8 Pro Phone
- Nostalgia Reignited: Using RetroArch’s Shaders for Old Titles
- Reverie of Retro Play: Classic PC Through DOSBox-X
- Skyrocket Output: Leverage Flow Launcher in Your Workday
- Strategies to Overcome Failed uTorrent Setup for Windows Users
- Top Video Game Discounts of Oct. 2024'S Prime Event - Up To $1K Savings! HURRY, Limited Time Offers!
- Troubleshooting Error XC0000142 in Win11/Win10
- Win11 Resume Post-Creators Patching
- Title: Transforming Window 11'S Default Search Settings
- Author: Richard
- Created at : 2024-11-24 17:05:25
- Updated at : 2024-11-27 17:40:02
- Link: https://win11-tips.techidaily.com/transforming-window-11s-default-search-settings/
- License: This work is licensed under CC BY-NC-SA 4.0.
