Troubleshooting: Overcoming Windows' 0X80070003 File Updater Error

Troubleshooting: Overcoming Windows’ 0X80070003 File Updater Error
It’s not unusual for Windows users to run into issues when installing updates or upgrading to the latest version of Windows. The problem with these error codes is that most of the time, they do not specify the cause of the error or what users can do to avoid it.
A common error that users run into when trying to update their system is 0x80070003. This error is accompanied by a message stating “Some update files are missing.” Let’s explore the reasons behind this issue and the solutions you can try to resolve it.
Disclaimer: This post includes affiliate links
If you click on a link and make a purchase, I may receive a commission at no extra cost to you.
Why Are Update Files Missing From Your PC?
One or more of the following reasons might explain why you are experiencing the problem on your computer:
- The Windows log file might have corrupt data files that are interfering with the update installation process in Windows. The best way to deal with corrupt files is by repairing them using the built-in Windows utilities. If that does not work, you can delete them to resolve the problem.
- The essential system files have become corrupt. This scenario can be resolved by running the troubleshooting utilities described below. They can identify corrupt files and replace them with healthy ones.
- The Windows update components required for the pending updates to install are not functioning properly, which is causing the system to throw the error Fortunately, repairing the corrupt components is easy and can be done within a few minutes using the Command Prompt.
- The Windows Update service and other relevant services required by the system to install the pending updates are disabled or have become corrupt. In this case, you can simply restart the services to resolve the issue.
Now that you know what might be causing the problem let’s see how to resolve this case of missing update files in Windows.
1. Delete the Contents of the DataStore Folder
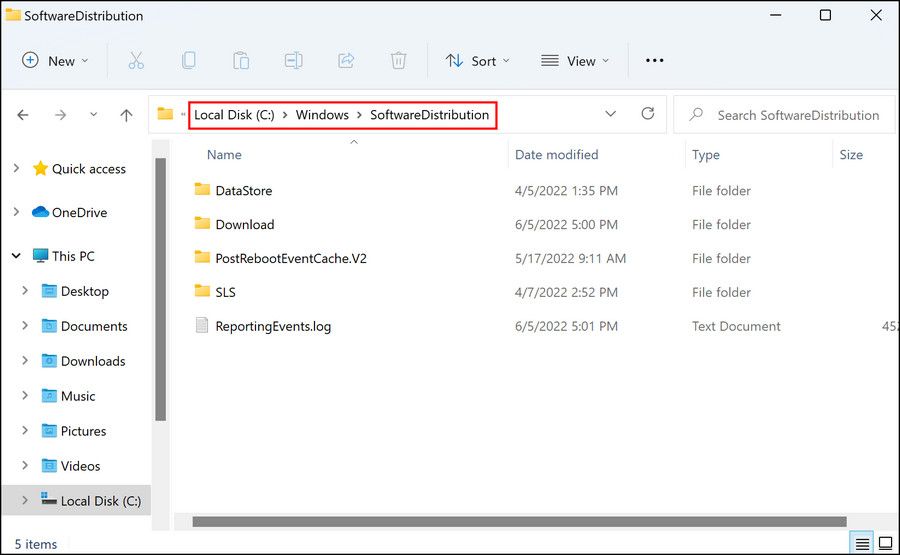
The DataStore folder in Windows is a log file that stores information about all the updates installed in the system. This folder is located in the SoftwareDistribution folder, which is a directory of update-related information in Windows.
In several cases, the underlying issue was caused due to the corrupt components of the DataStore folder, which were interfering with the system’s update process. An easy way to resolve this issue is by deleting the contents of this folder or removing the Data Store folder as a whole. Both methods are safe to execute.
We have described the steps for doing this below. However, if you do not want to delete the DataStore folder or its contents, you can also repair them. For that, follow the next method below.
Launch File Explorer and navigate to the following location below:
C:\Windows\SoftwareDistribution
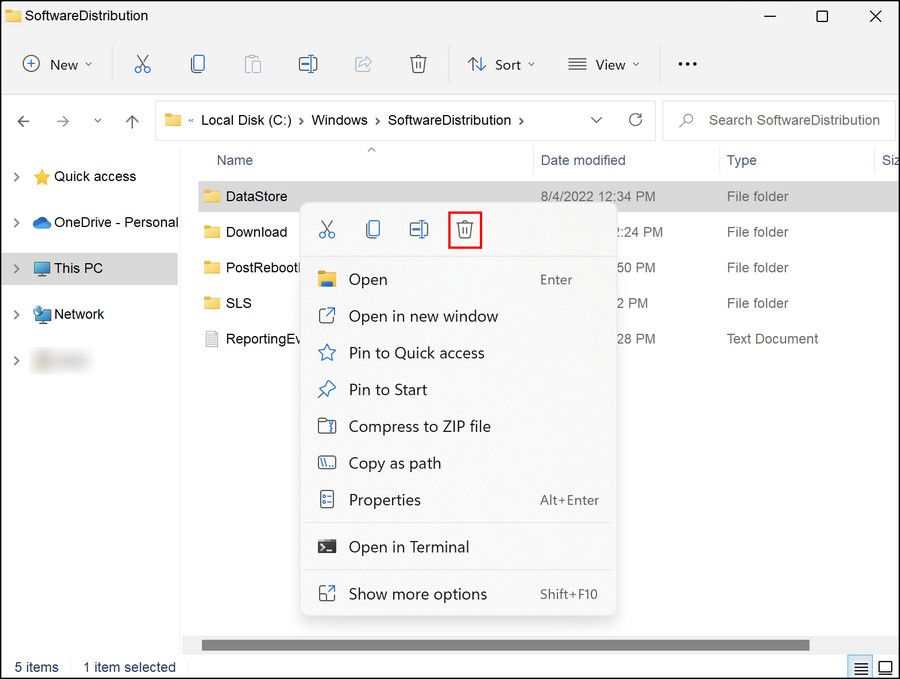
Locate theDataStore folder in the SoftwareDistribution folder and right-click on it.
ChooseDelete from the context menu.

ClickYes in the confirmation prompt to proceed.
Once the folder is deleted, open the Settings app and try installing the updates again.
2. Run System Scans
The next thing you can do is scan the system for potential issues. The best way to do this is by using built-in system utilities like the System File Checker and DISM.
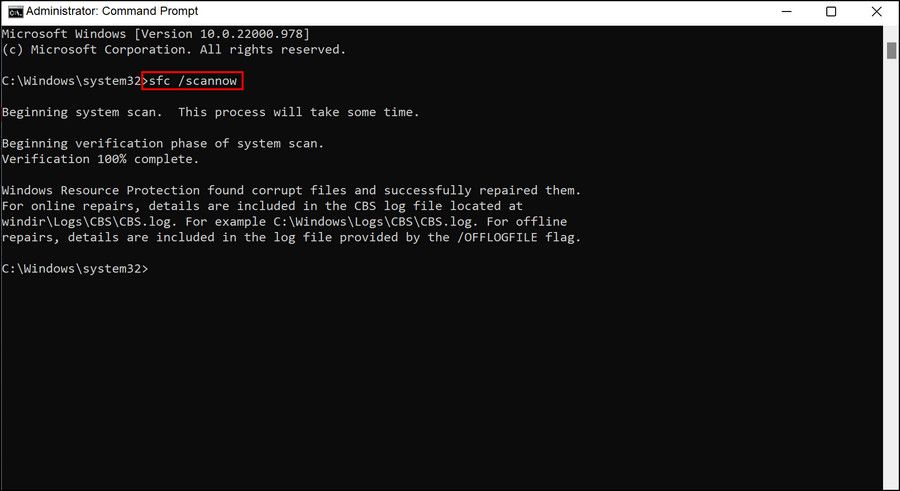
The System File Checker (SFC) will scan the protected system files for inconsistencies. If it finds a file that is corrupt, SFC will replace it with its healthier cached counterpart. DISM, on the other hand, will repair the system image.
We will be using the Command Prompt to run these tools. Make sure you are logged into Windows as an administrator before proceeding:
Here is all that you need to do:
- Open Command Prompt as an administrator (seehow to run the Command Prompt as an administrator for instructions).
- ClickYes in the User Account Control prompt.
- In the Command Prompt window, type the command mentioned below and hitEnter .
sfc /scannow
- Wait for the command to execute, and then execute the following command:
Dism /Online /Cleanup-Image /ScanHealth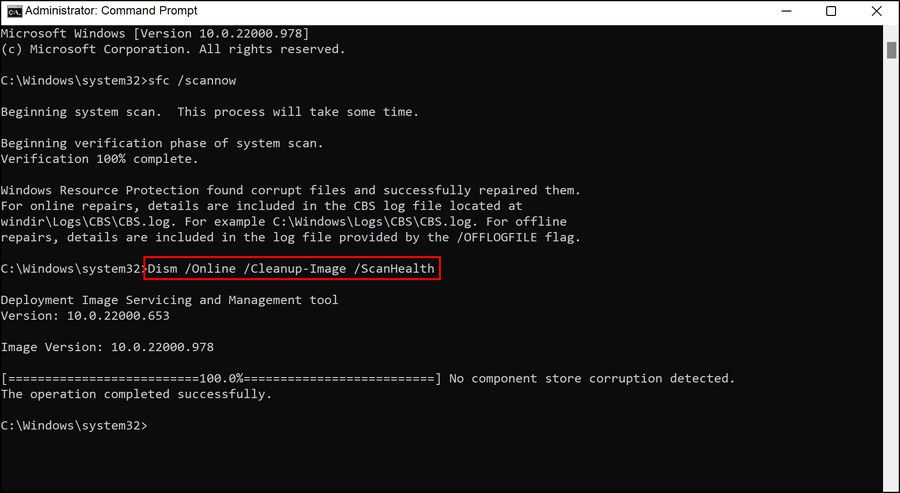
5. Next, proceed with the following command:
Dism /Online /Cleanup-Image /RestoreHealth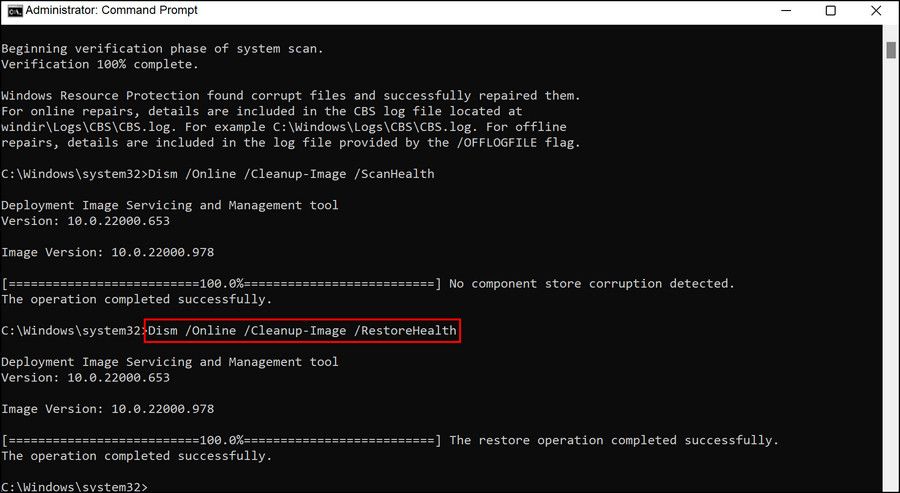
6. Once this command is executed, close the Command Prompt window and check if you can now download the targeted updates.
While you are at it, you can alsorun the Windows Update troubleshooter . This tool also works like the utilities we just described above. It will scan the system for errors and suggest you relevant fixes that can be applied using the troubleshooter as well.
3. Repair the Update Components
As we mentioned earlier, the update components can also deal with some kind of corruption, leading to the problem under discussion.
The good news is that repairing these components is quite simple, and we will also use the Command Prompt in this method. We recommendcreating a restore point before you proceed. This will help you revert to the current system state in case something goes wrong during the execution of the method.
Once the restore point is created, follow these steps:
- Open a Run dialog box (seehow to open Windows Run to learn how).
- Type cmd in the text field of Run and press Ctrl + Shift + Enter to open Command Prompt as an administrator.
- ClickYes in the User Account Control prompt.
- Once you are inside the Command Prompt, execute the commands below one by one:
<code>net stop wuauserv net stop cryptSvc net stop bits net stop msiserver
``
5. Once all the services are stopped, execute the following commands. These will clear the update cache in the system:<code>ren %systemroot%\softwaredistribution softwaredistribution.bak ren %systemroot%\system32\catroot2 catroot2.bak``
6. Now, proceed with the following commands one by one to start the Windows update services again:<code>net start wuauserv net start bits net start cryptsvc net start trustedinstaller net start appidsvc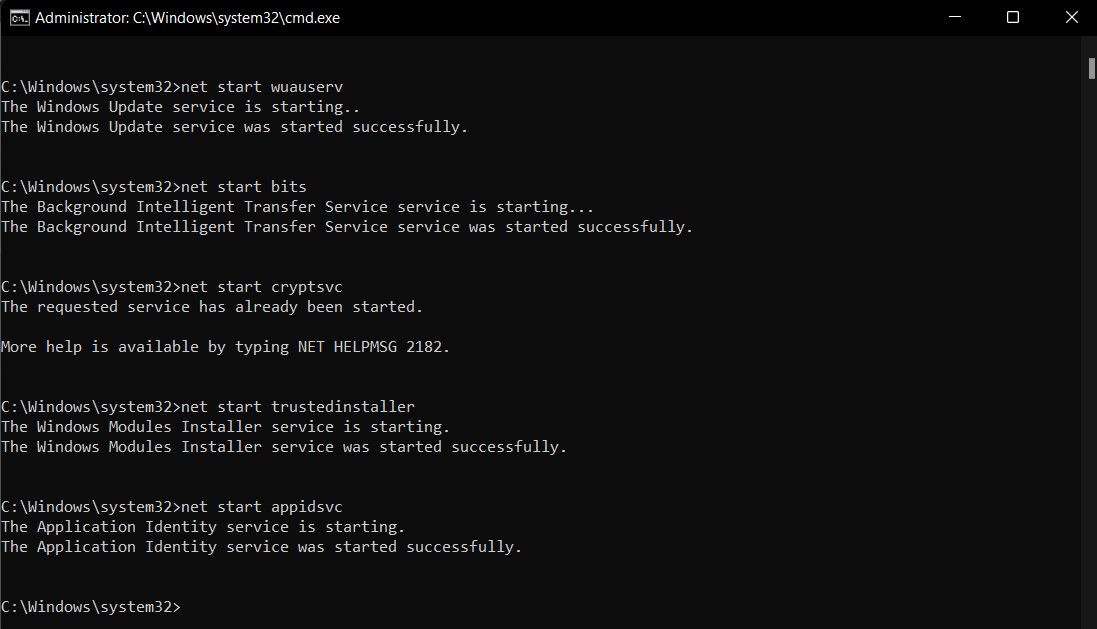
7. After the commands are executed, restart your computer. Hopefully, you will be able to install the pending updates on reboot.
Get the Missing Update Files Back on Windows
Hopefully, by now, you should have successfully resolved the annoying update error. In case you are still facing the issue, you can use the Microsoft update catalog to install the updates manually. It may also be a good idea to report this issue to the Microsoft support team so they can launch an official fix for the problem.
Also read:
- [New] 2024 Approved Choreographed Combat Selecting Superior Fighting Titles
- [New] Rehabilitating Faulty OBS Camera Connection for 2024
- [Updated] FB Profile Picture Dimensions for 2024
- [Updated] The Ultimate Guide 7 Steps for Stellar Cooking Films for 2024
- 2024 Approved Optimal OBS Configurations for Thrifty Computers
- 简单疗程:详解4种修复用户数据库丢失问题的技巧
- Easy-to-Follow Pathway: Accessing WordPad on PCs
- Enhancing Your User Experience: Customizing Windows 11 Defaults
- How to Enable Dark Mode in Notepad on Windows 10 & 11
- In 2024, Effortlessly Record Audio on Your Mac Using Audacity
- In 2024, Virtual Horizons Unveiled Critics' Top Oculus Headsets
- Is the Accell Thunderbolt 4 Windows Docking Station Top-Notch? Unveiling Features & Reviews at ZDNET
- Jump Back to Joy: Playing Classics on DOSBox-X
- Reactivating Hidden 'Remove' Button for Windows 11 Security
- Title: Troubleshooting: Overcoming Windows' 0X80070003 File Updater Error
- Author: Richard
- Created at : 2024-11-13 19:41:51
- Updated at : 2024-11-17 18:27:12
- Link: https://win11-tips.techidaily.com/troubleshooting-overcoming-windows-0x80070003-file-updater-error/
- License: This work is licensed under CC BY-NC-SA 4.0.
