
Turbo-Charging WIndows Printer Performance
Turbo-Charging WIndows Printer Performance
It is frustrating when your printer takes a long time to print something. While the cause of this could be anything from misconfigured settings to outdated drivers, fixing the problem is not too difficult.
If you are having trouble with a slow printer, whether it is wired or wireless, the following troubleshooting steps for Windows should help.
1. Restart Your Printer
This may seem like an overly-simple fix, but restarting your printer can help resolve any temporary issues that may be affecting its performance. Hence, it’s the first thing you should try.
Turn off your printer by pressing the power button. Once it is off, remove the power cable and wait for at least 30 seconds or so before reconnecting it. After that, power on your printer and try printing something to see if the issue is resolved.
2. Adjust the Print Quality
The printing speed of your printer is often affected by the quality settings you choose. Printing at higher quality settings usually takes longer, as it requires the printer to produce more detailed output.
You need to check the set print quality and make sure it is not too high. This should result in a faster printing experience on your Windows 10 or 11 PC.
To adjust the print quality settings on Windows:
- Open the Start menu and click the gear-shaped icon to launch the Settings app.
- Navigate to Bluetooth & devices > Printers & scanners.
- Select your printer from the list.
- Click on Printer preferences.
- Under the Quality tab, select your preferred print quality.
- Hit Apply followed by OK.
 TubeDigger - online video downloader from mostly any site

 TubeDigger - online video downloader from mostly any site
You will see a variety of options for setting the print quality. You can experiment with them and choose the one that provides the best balance between print quality and speed for you. Keep in mind that the lower the print quality, the faster the output will be.
 Forex Robotron Gold Package
3. Select the Correct Paper Type
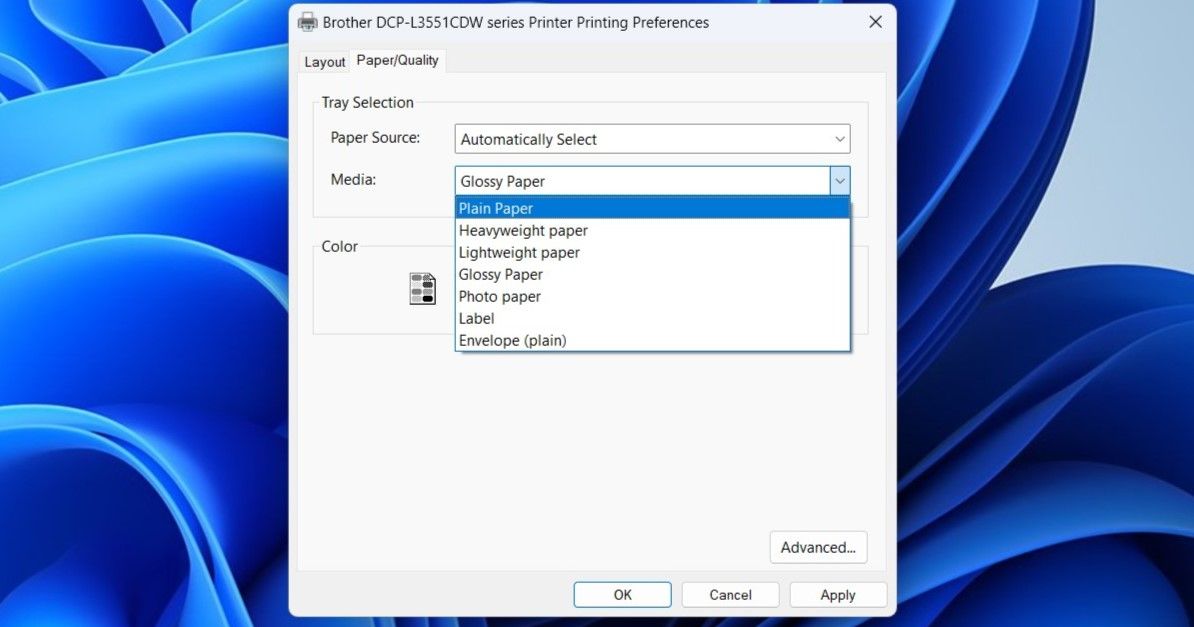
Another reason why your printer may print slowly is if your PC is printing using the wrong paper settings. To prevent any issues, you need to ensure that the selected paper type matches the actual paper loaded into the printer. Here’s how to check.
- Press Win + I to open the Settings app.
- Navigate to Bluetooth & devices > Printers & scanners.
- Select your printer from the list.
- Click on Printer preferences.
- Under the Paper/Quality tab, use the drop-down menu next to Media to select the appropriate paper type.
- Hit Apply followed by OK.
4. Disable Quiet Mode
Several modern-day printers offer a Quiet Mode feature that reduces operational noise during printing. To achieve this, the printer usually decreases its printing speed. If performance is a priority, you should consider disabling Quiet Mode on your printer.
The process of disabling Quiet Mode on a printer may differ depending on its make and model. Usually, you can turn off this setting through the printer software or app. If not, refer to your printer manual for instructions.

5. Run the Relevant Windows Troubleshooters
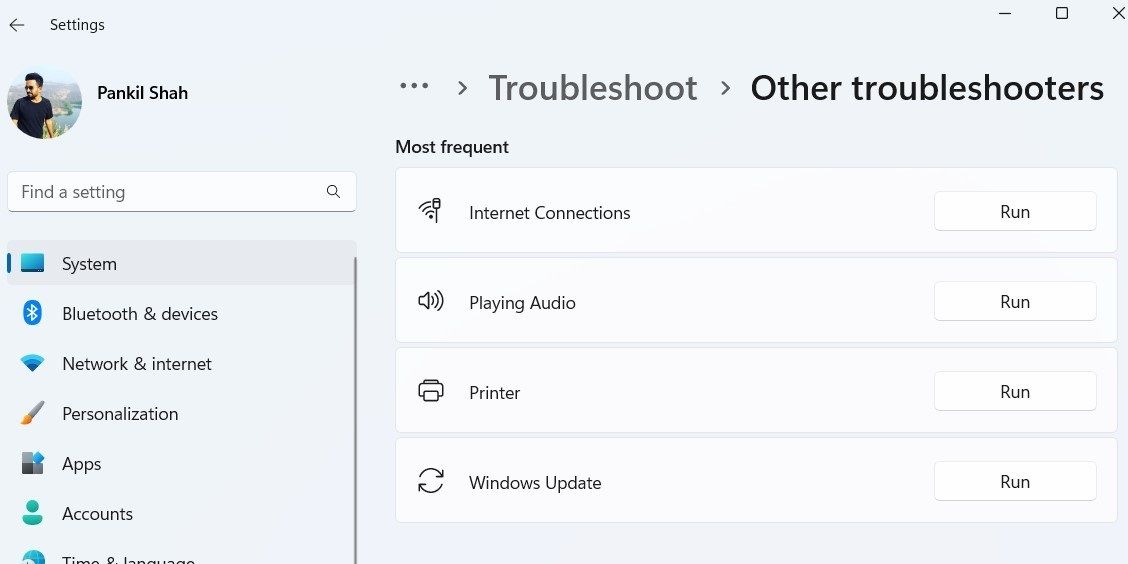
Both Windows 10 and 11 come with a dedicated printer troubleshooter designed to address common printer-related issues. It can scan your system for potential problems, such as slow printing, and fix them automatically.
- Use one of the many ways to open the Settings app .
- In the System tab, click on Troubleshoot.
- Select Other troubleshooters.
- Click the Run button next to Printer.
Wait for the troubleshooter to find and fix any issues, and then check if your printer is still slow. Additionally, if you are using a network printer, consider running the Network adapter troubleshooter from the same menu.
6. Clear the Print Queue and Restart the Printer Spooler Service
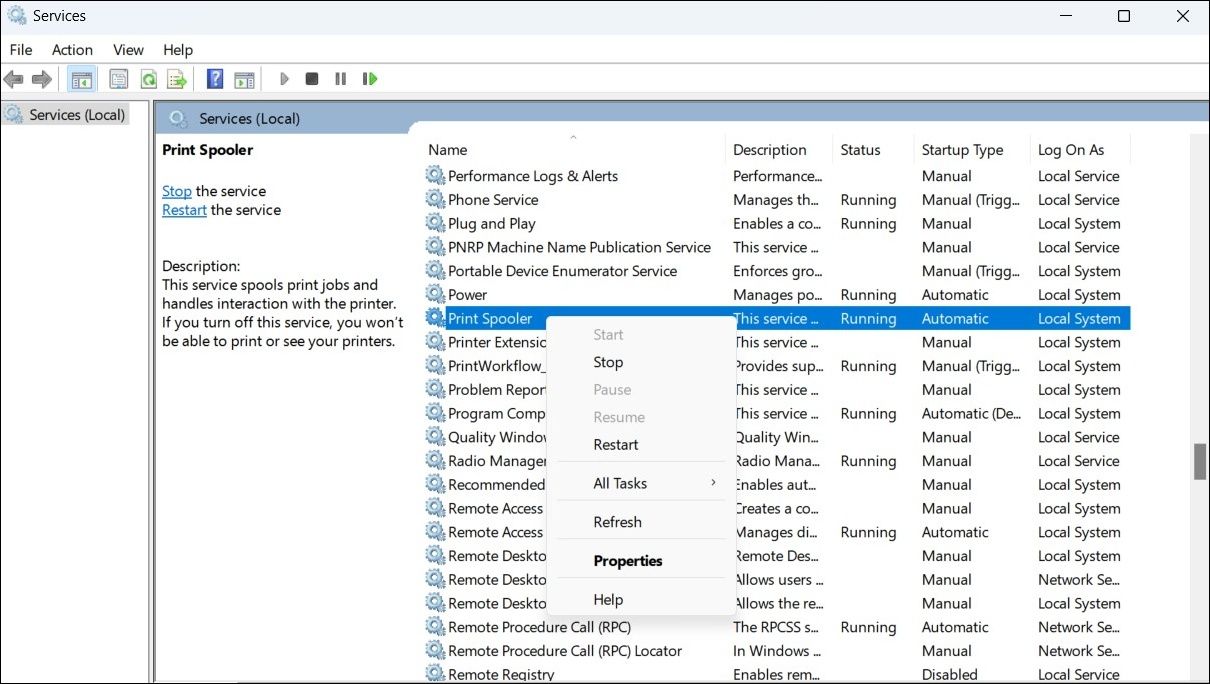
The Print Spooler is a crucial system service that manages print operations on your Windows computer. It is responsible for storing all of your print jobs and sending them to the printer. If a print job becomes stuck or encounters an error, your printer may operate slowly on Windows.
To fix this, you can try clearing the print queue and restarting the Printer Spooler service by following the steps below.
- Press Win + R to open the Run dialog box.
- Type services.msc in the box and press Enter.
- Locate the Print Spooler service on the list. Right-click on it and select Stop.
- Press Win + E to open File Explorer.
- Type %systemroot%\System32\spool\printers\ in File Explorer’s address bar and press Enter.
- Press Ctrl + A to select all the files within the Printers folder and delete them.
- Return to the Services window, right-click on the Print Spooler service again, and select Start.
WonderFox DVD Ripper Pro

 WonderFox DVD Ripper Pro
 Simple and intuitive video editing
7. Update the Printer’s Drivers
Outdated or corrupted printer drivers on Windows can lead to all kinds of printing issues, including this one. To avoid them, you should ensure that you are running the latest printer drivers on your PC.
If you need help with that, check out how to find and replace outdated drivers on Windows .
8. Remove and Re-Add Your Printer
If updating the printer drivers does not help, you can try removing your printer completely and adding it back. Here’s how to do it.
- Press Win + R to open the Run dialog box.
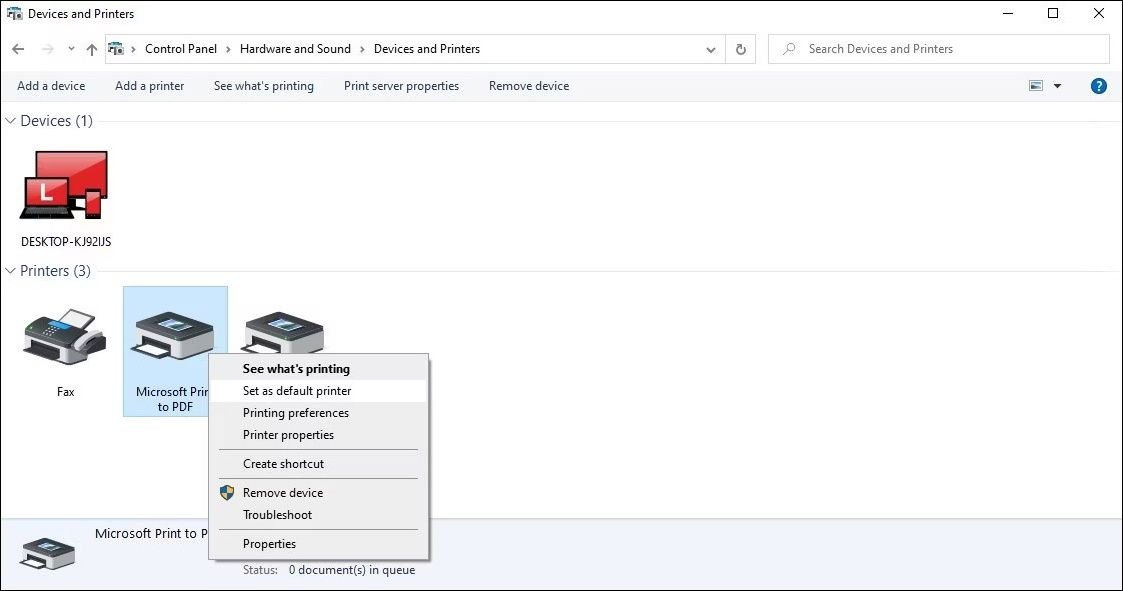
- Type control printers in the box and press Enter.
- In the Devices and Printers window, right-click on your printer and select Remove device from the context menu.
- Click Add a printer button at the top and setup the printer using its IP address or hostname.

If you run into any errors while removing your printer, check our guide on how to force delete or uninstall a printer on Windows for more methods.
9. Try Some Generic Windows Fixes
Finally, there may be a Windows-based issue that’s slowing down your printing. If the above solutions do not work, you can try a few generic Windows fixes to resolve the slow printing problem:
- Run an SFC scan:Running an SFC scan on Windows will allow you to scan your PC’s system files. This should help fix any issues caused by damaged or missing system files.
- Install the latest Windows updates: Using an outdated or buggy Windows build could also result in such problems. Hence, it’s a good idea to install pending Windows updates if you haven’t already.
 Software Update Pro - Check and update software installed on your computer.
Speed Up Your Printing on Windows
Without a clear indication of what’s going wrong, fixing slow printing issues on Windows can be challenging. Hopefully, one or more of the above suggestions have been helpful, and your printer is now printing at a normal speed.
FAQ
Q: What Affects Printer Speed?
Various items affect the speed at which your printer prints files. Your file’s size mainly determines what speed your printer will print your file. If yours is a large document containing several pages, the printer can take a while to print all those pages. Similarly, if yours is a high-quality image, the printer will take time to print your photo.

Q: Can You Change Printer Speed?
Some printers allow you to change the rate your files are printed. You’ll find the option to change the printing speed in your printer’s print utility. In most apps, you can launch this utility by pressing Ctrl + P.
Q: Does Wi-Fi Affect Printer Speed?
Yes, Wi-Fi is a wireless technology, and it affects your printer’s printing speed. A cable connection to a printer usually works faster than a wireless connection. This depends on your printer model, though, as some printers work well even on Wi-Fi networks.
If you are having trouble with a slow printer, whether it is wired or wireless, the following troubleshooting steps for Windows should help.
- Title: Turbo-Charging WIndows Printer Performance
- Author: Richard
- Created at : 2024-08-16 02:16:50
- Updated at : 2024-08-17 02:16:50
- Link: https://win11-tips.techidaily.com/turbo-charging-windows-printer-performance/
- License: This work is licensed under CC BY-NC-SA 4.0.