Twirl Your Photos with These 6 Steps on Windows 11

Twirl Your Photos with These 6 Steps on Windows 11
Images can have landscape (horizontal) or portrait (vertical) orientations. Rotating images 90 or 180 degrees enables you to change the orientation of photos. This can be useful when you think a picture would look better with a different orientation.
You can rotate images in many ways within Windows 11. Windows 11 has built-in options and three pre-installed apps with which you can rotate pictures. However, you can also rotate images with myriad editing software and web apps. Here are six different methods for rotating images on a Windows 11 PC.
Disclaimer: This post includes affiliate links
If you click on a link and make a purchase, I may receive a commission at no extra cost to you.
1. How to Rotate Images With File Explorer
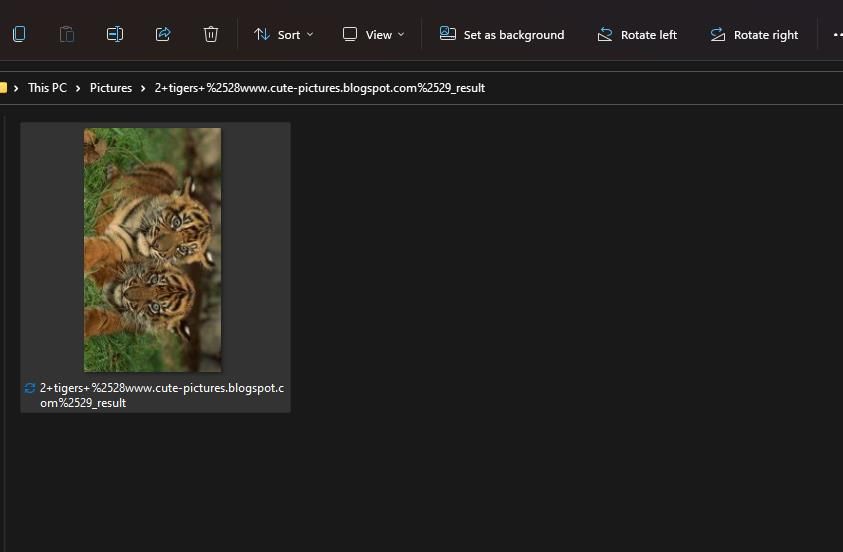
Windows File Explorer incorporates two basic options for rotating images left and right. Those options will be adequate when you only need to apply basic rotating to images. This is how you can rotate an image in File Explorer:
- Press the Windows key + X keyboard buttons and click on the File Explorer shortcut.
- Open a folder containing some images to rotate.
- Click View > Extra Large icons, so you can see the image rotation applied in Explorer.
- Then click an image once to select it without opening.
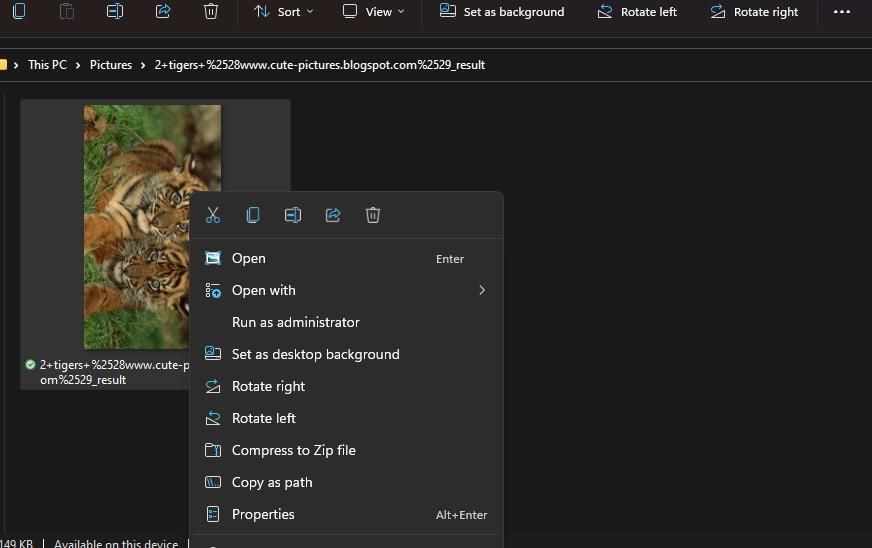
- Press the Rotate left or Rotate right button on Explorer’s command bar, depending on preference.

Alternatively, you can select the same options on File Explorer’s context menu. Right-click an image and select Rotate left or Rotate right. Those are convenient shortcuts for rotating images saved on the desktop.
2. How to Rotate Images With the Photos App
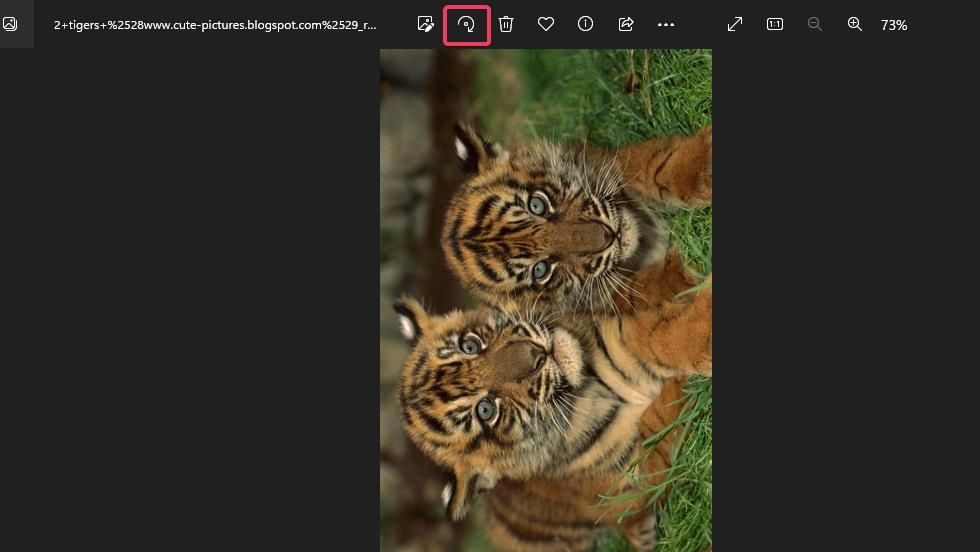
Photos is Windows 11’s default image viewer app that includes some editing options. Among them is a basic Rotate option for 90-degree rightward rotation. You can rotate images with that option as follows:
- To open Photos, select the pinned shortcut for that app on the Start menu.
- Double-click an image within All Photos to view it in a second window.
- Click the Rotate button or press Ctrl + R.

- Press the Save as copy button. Or you can click that button’s small arrow to select a Save option that overwrites the file.
Or you can select alternative clockwise or anticlockwise rotation options. To do so, press the Edit image button beside the Rotate option in Photos. Then click the Rotate image 90 degrees clockwise or Rotate image 90 degrees anticlockwise options.
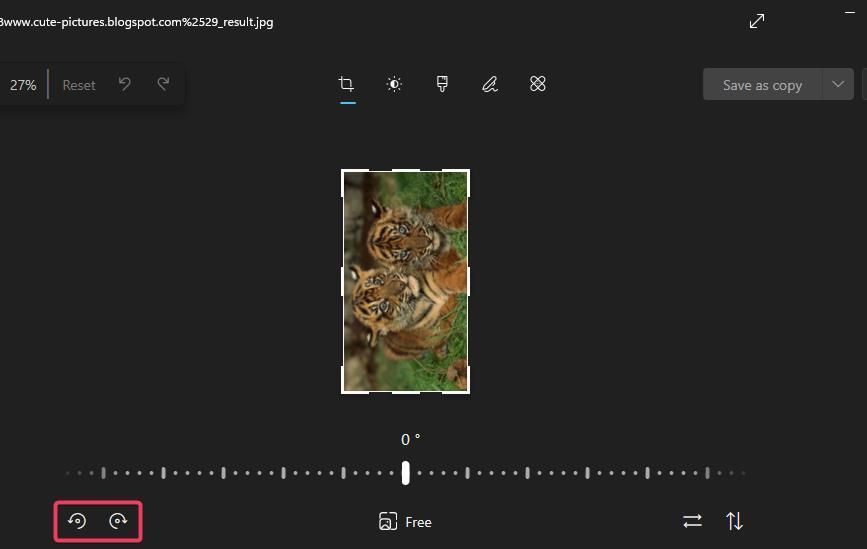
Note that Photos’ cropping tool also has a rotation bar. You can drag the slider on that bar to freely rotate the image by any angle within a cropping box. Everything outside the cropping box area gets cut out of the picture. Rotating an image like that is one of the different ways to crop a picture in Windows 11 .
3. How to Rotate Images With Paint
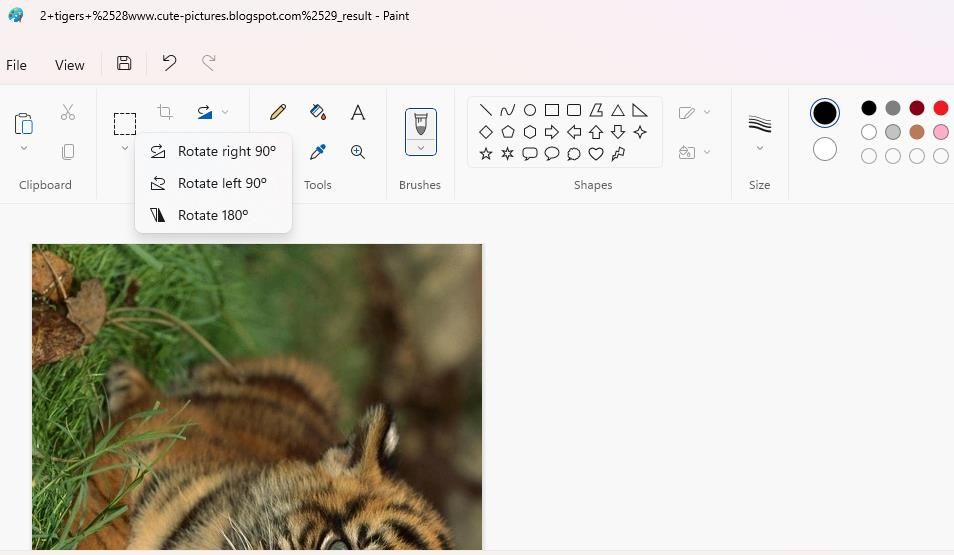
Paint is the graphics editor included with Windows 11. That pre-installed app has three rotation options with which to change the orientation of your images. This is how to rotate images with Paint:
- Press your keyboard’s Windows logo + S buttons and type “paint” into Windows Search.
- Select Paint to access that app.
- Press Ctrl + O to bring up an Open window.
- Select an image and click Open.
- Click the Rotate button to view a small menu with three options.

- Select the Rotate right 90° or alternative left and 180° options.
- Press Ctrl + S to save over the original file.
You can also adjust an image’s orientation with Paint’s flipping options just below the Rotate button. For example, clicking Flip vertical has the same effect as the Rotate 180° option.
4. How to Rotate Images With Edge’s Image Editor
Microsoft Edge is Windows 11’s pre-installed browser that now has a built-in image editor. That feature enables you to rotate images and apply other tweaks to pictures you find online before downloading them. It’s quite similar to the image editor in the Photos app. These are the steps for rotating images with Microsoft Edge:
- Open the Google search engine in Microsoft Edge.
- Enter a keyword to find some images.
- Click Google’s Images tab.
- Right-click a picture thumbnail and select Edit image.

- Select the Rotate image 90 degrees counter anticlockwise or Rotate image 90 degrees clockwise options within the Crop tool.
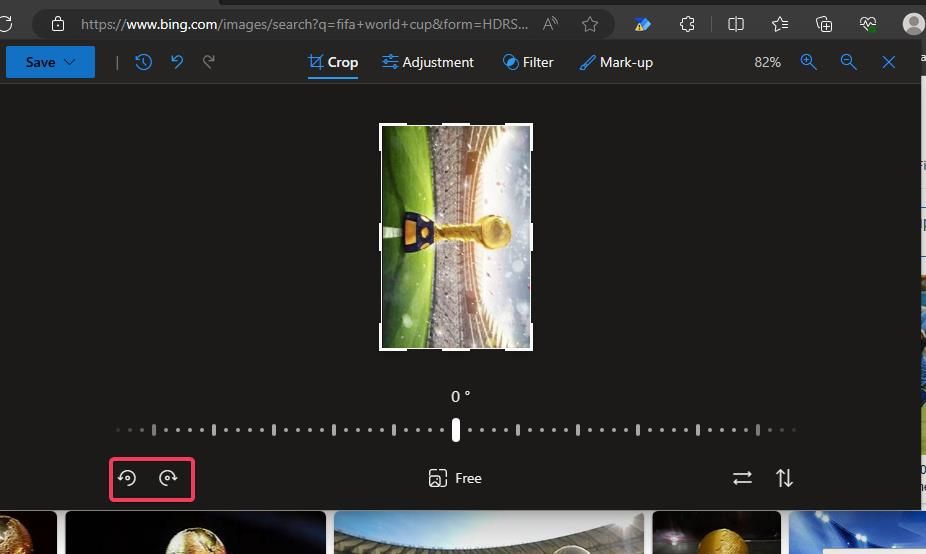
6. Click Save to download the rotated image.
You cannot upload images to rotate within Edge’s crop tool. If you want to utilize the tool for rotating your photos, upload the pictures to a cloud storage account like Google Drive to make them accessible within Edge.
Then you can right-click your uploaded photos there to select Edit image. Our guide to editing images in Edge provides further details about how to tweak your photos with that browser.
5. How to Rotate Images With Online Image Tool
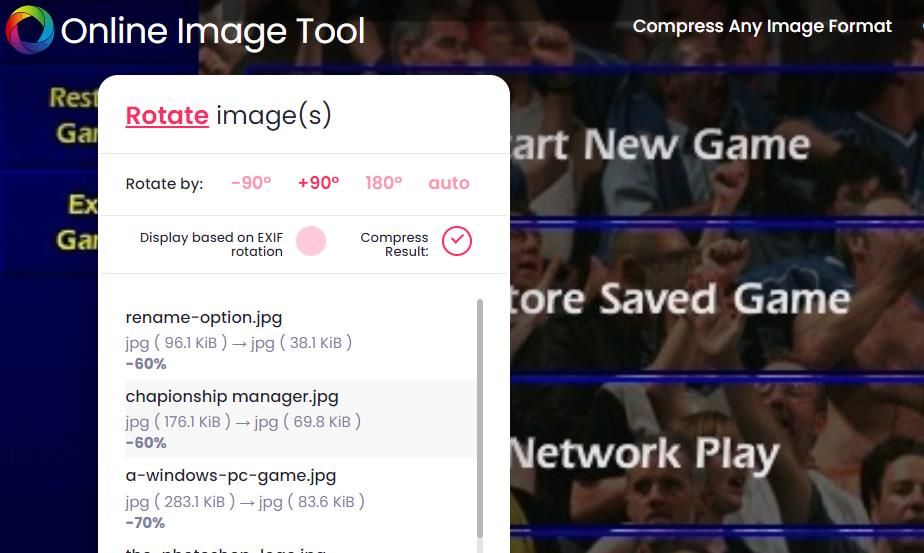
You can rotate images without installing software with the Online Image Tool web app. Unlike Edge’s image editor, that tool enables you to upload pictures on your PC for rotation. Plus, you can upload more than one file at a time to rotate multiple images in batches. This is how you can rotate photos with the Online Image Tool in a Windows browser:
- Open the Online Image Tool website app in your browser of choice.
- Click the Add images button.
- Select multiple images to rotate by holding the Ctrl button.
- Click Open to bring up your image selection within the web app.
- Next, select the 90°, 180°, or -90° rotation options.

- You can drag the slider across the image thumbnail to compare the original selected image with the optimized one.

- Click Save All to download the rotated images.
Online Image Tool also has handy tools for batch resizing, converting, and compressing pictures. Click the Compress Any Image Format, Convert Image Formats, and Resize Batch of Images links along the top of the web app’s page to access them.
6. How to Rotate Images With IrfanView
IrfanView is a nifty image viewer app for Windows platforms that’s freely available. That app includes a custom rotation feature for rotating images at angles other than 90 or 180 degrees. You can install IrfanView and rotate images with that app like this:
- Open this IrfanView webpage and download the app.

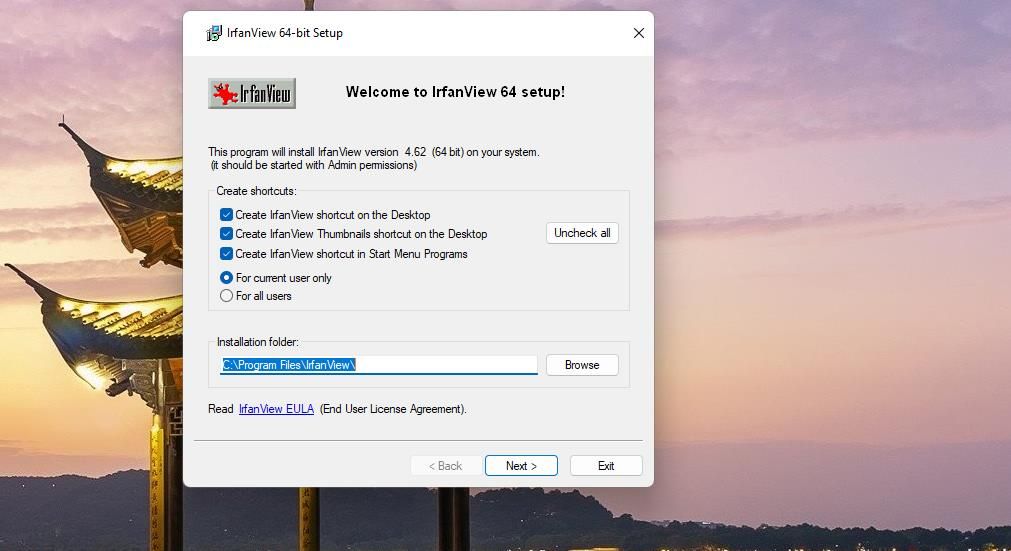
- Click Next four times in the setup wizard to install IrfanView with its default installation settings.
- Open IrfanView by double-clicking its desktop shortcut.
- Press the O keyboard shortcut, select a file to rotate, and click Open.
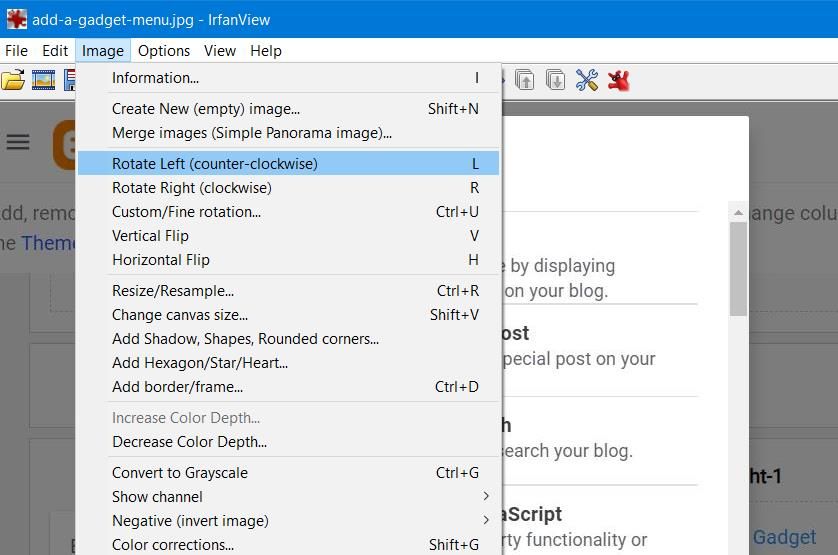
- Click on the Image menu.

- Select the Rotate Left or Rotate Right option for the standard 90-degree rotation.
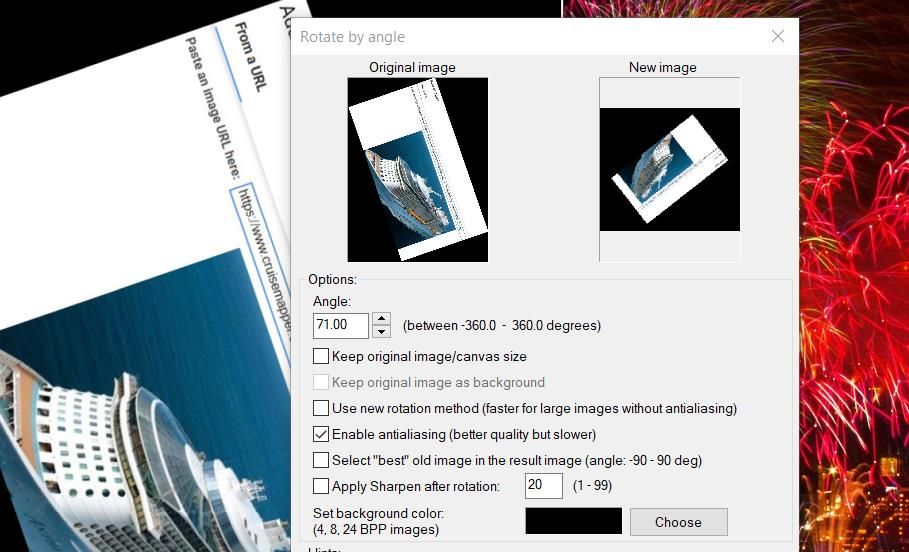
If you want to try IrfanView’s custom rotation tool, press the app’s Ctrl + U hotkey. Input a rotation value up to 360 within the Angle box. That will rotate the image by the value entered within its canvas. Then click OK to view the rotated image output within IrfanView.
Rotate Images for a Better Orientation in Windows 11
So, you don’t need Adobe Photoshop to rotate images on a Windows 11 PC. It’s easy to correct image orientation on a Windows 11 PC with any of the rotation methods above. Choose whatever image rotation method you like best.
You can rotate images in many ways within Windows 11. Windows 11 has built-in options and three pre-installed apps with which you can rotate pictures. However, you can also rotate images with myriad editing software and web apps. Here are six different methods for rotating images on a Windows 11 PC.
Also read:
- [New] Instagram's Secret Weapons for Follower Increase for 2024
- [Updated] Banishing Blackout Blues From YouTube Videos for 2024
- 2023 | Best Facebook Video Downloader And Addons for Firefox
- Direct Link Method for Photos & Videos for 2024
- Efficiently Utilizing Remaining Space in Your RAM
- In 2024, Guide on How To Remove Apple ID From Apple iPhone 12 mini
- In 2024, Premium Quality Transformer for Video Enthusiasts
- Lightning Speed: Locate Your GPU on Windows 11 PC
- Making Non-Operational Win11 Licenses Work
- Overcoming Installation Failures in Windows 11
- Perfecting Your Images LightRoom's Favorite LUTs
- Stopping the Phantom Disk Space Gobblers
- The Complete Guide to Fine-Tuning Disk Storage via NTFS Compression
- Visual Symphony IOS/Android Instagram Collage App for 2024
- Winning Device Names Uniqueness with 5 Steps (Windows Edition)
- Title: Twirl Your Photos with These 6 Steps on Windows 11
- Author: Richard
- Created at : 2024-12-10 19:22:49
- Updated at : 2024-12-12 17:16:28
- Link: https://win11-tips.techidaily.com/twirl-your-photos-with-these-6-steps-on-windows-11/
- License: This work is licensed under CC BY-NC-SA 4.0.
