
Unraveling the History of Your Windows PC

Unraveling the History of Your Windows PC
Knowing how to find the age of a Windows computer can be useful in many ways. Whether you are purchasing a second-hand computer or received one as a gift, knowing the laptop age can help you determine the warranty and upgradability of the device.
One way to check your computer’s age is if you have the original packaging. The packing often includes a sticker with manufacturing details. If the original packing or the bill is not available, here is how you can find the manufacturing date and other critical details of your computer.
Disclaimer: This post includes affiliate links
If you click on a link and make a purchase, I may receive a commission at no extra cost to you.
1. Use the Serial Number to Check the Warranty Status
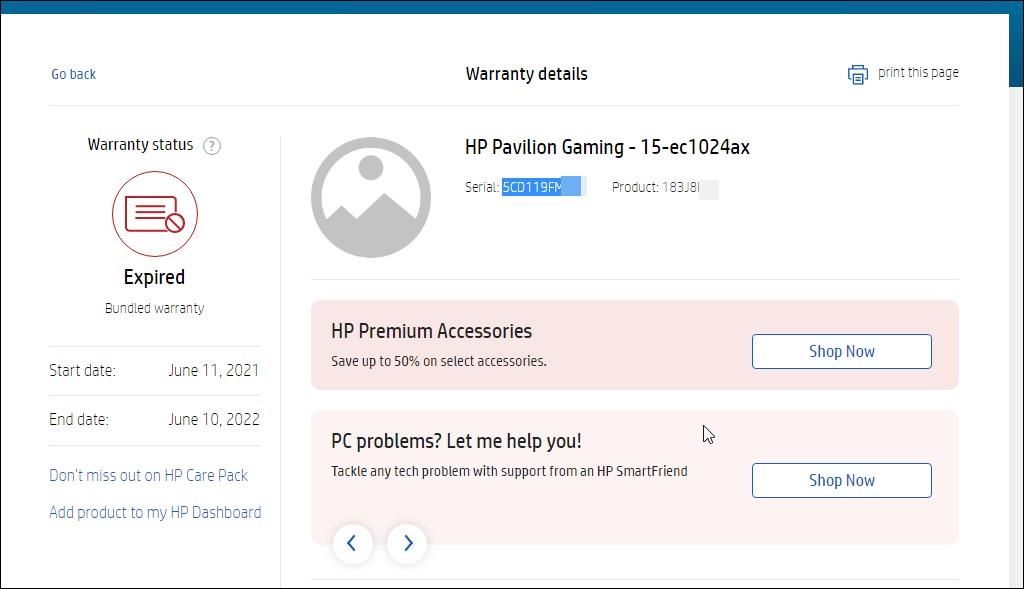
Windows laptops often come with their serial numbers and other manufacturing details like Made, Product ID, and model number imprinted on the back panel. Each laptop features a unique serial identifier.
You can use this information to check your Windows computer’s warranty. The warranty status gives a better idea of the system’s age than checking the manufactured date.
Follow these steps to check the warranty status of an HP laptop. While the process is identical for other OEMs, you’ll need to use your manufacturer’s warranty status web service to determine the same.
- Flip your Windows laptop upside down to view the rear panel. On an HP laptop, you’ll find some tiny imprinted details on the edge of the panel. You may find a serial number sticker with a barcode and other details on other devices.
- Here, locate the serial number (SN#). For example, the serial number will look like - 5CD119FWWZ. Note down the serial number. Click a picture for easier reference.
- Next, go to the HP Check Warranty page . Similarly, Dell, Asus, Lenovo, and other OEMs offer their own services to view the warranty status online.
- Enter the Serial number in the given field and click Submit.
Wait for the page to populate with your device warranty details. To determine the device’s age, check the Start date for the warranty. The warranty start date often starts when the user registers the device after the initial setup.
While this is not a tamper-proof mechanism, in most cases, the warranty details are sufficient to determine the age and value of a Windows laptop.
2. Check the Serial Number Using the Command Prompt
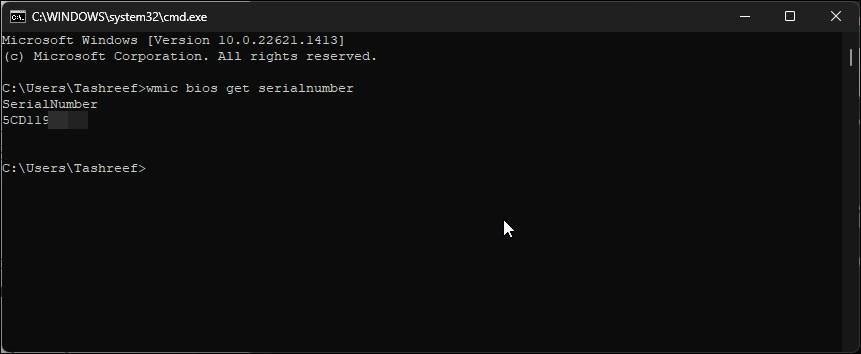
If the serial number is not visible or the sticker is removed, you can use Windows Management Instrumentation command-line utility to recover your computer’s serial number.
To view the Windows laptop’s serial number using Command Prompt:
- Press the Win key and type cmd.
- Right-click on Command Prompt and select Run as administrator.
- In the Command Prompt window, type the following command and press Enter:
wmic bios get serial number - The output will display your device’s serial number. Use the same to check your device’s warranty status and more using the steps in the first method.
3. Check the BIOS Version Using the System Information Utility
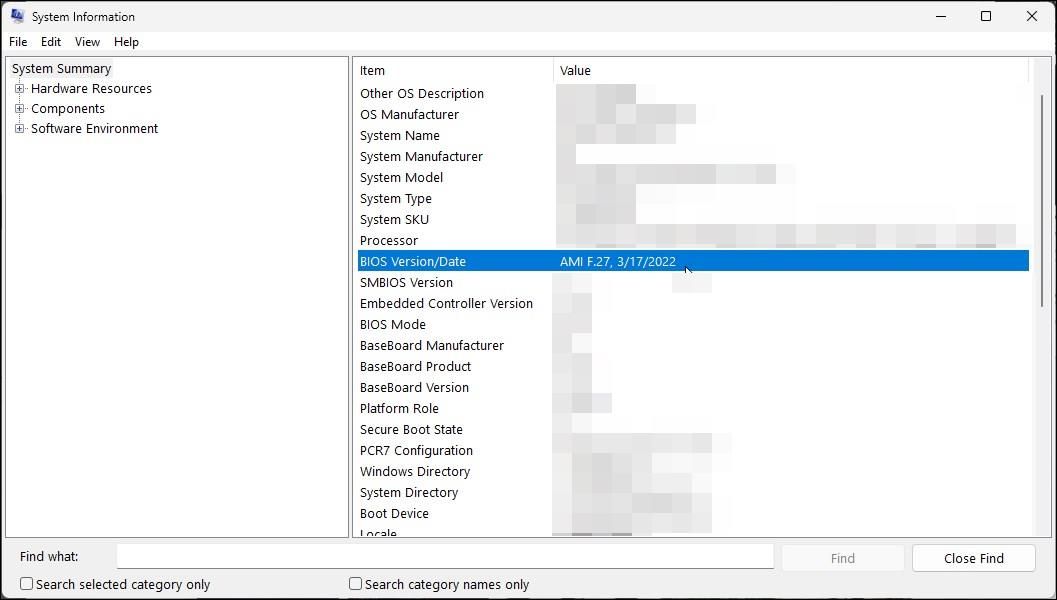
If you need to know the manufacturing date, check the BIOS version. You can use the System Information utility on Windows to check the BOS version , including the date it was installed.
To check the BIOS version:
- Press the Win key and type system information. Open the System Information app from the search results.
- In the System Information dialog, select the System Summary option.
- In the right pane, locate the BIOS Version/Date entry. It shows the current BIOS version installed along with the date.
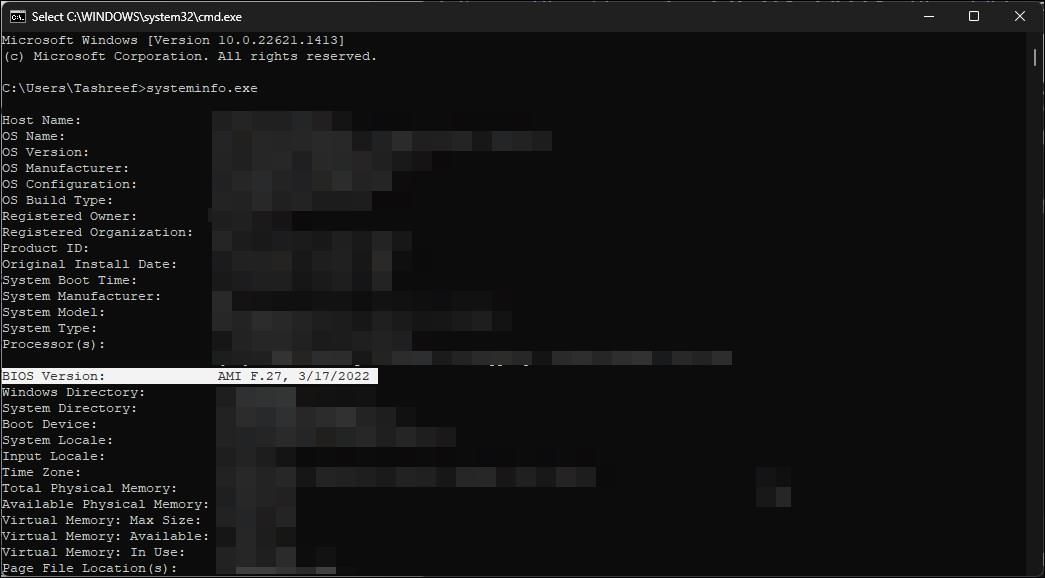
You can also view the BIOS version using Command Prompt. Open Command Prompt and type the following command. Press Enter to execute.
systeminfo.exe
The above command will execute the system information command-line version and show all the essential details of your computer. Locate the BIOS Version entry and check the date.
Important to note that if your system has received a BIOS update, the date will reflect the latest update date and not the manufacturer date.
4. Check the Windows Installation Method Using the Command Prompt
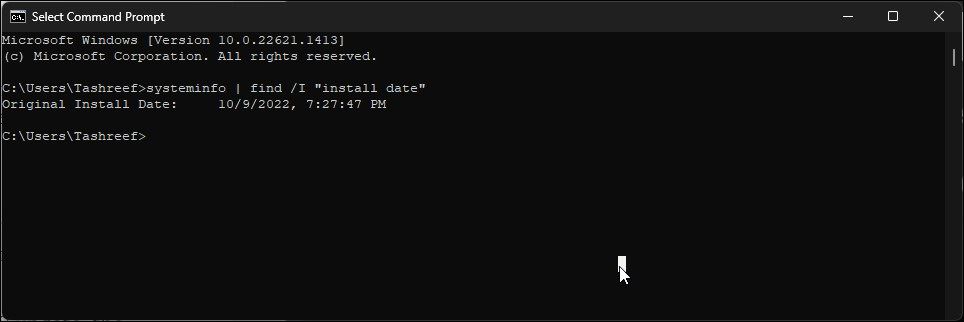
You can use the systeminfo command to find the original install date for the Windows OS. The caveat is it displays the date of the last Windows installation. So, if you have recently performed an upgrade or clean installed the Windows OS, the Original Install Date will reflect the same.
To view the Original install date, open Command Prompt and type the following command. Press Enter to continue.
systeminfo | find /I “install date”
The command will filter and only display the original install date from the System Information summary page.
5. Check Your CPU Details
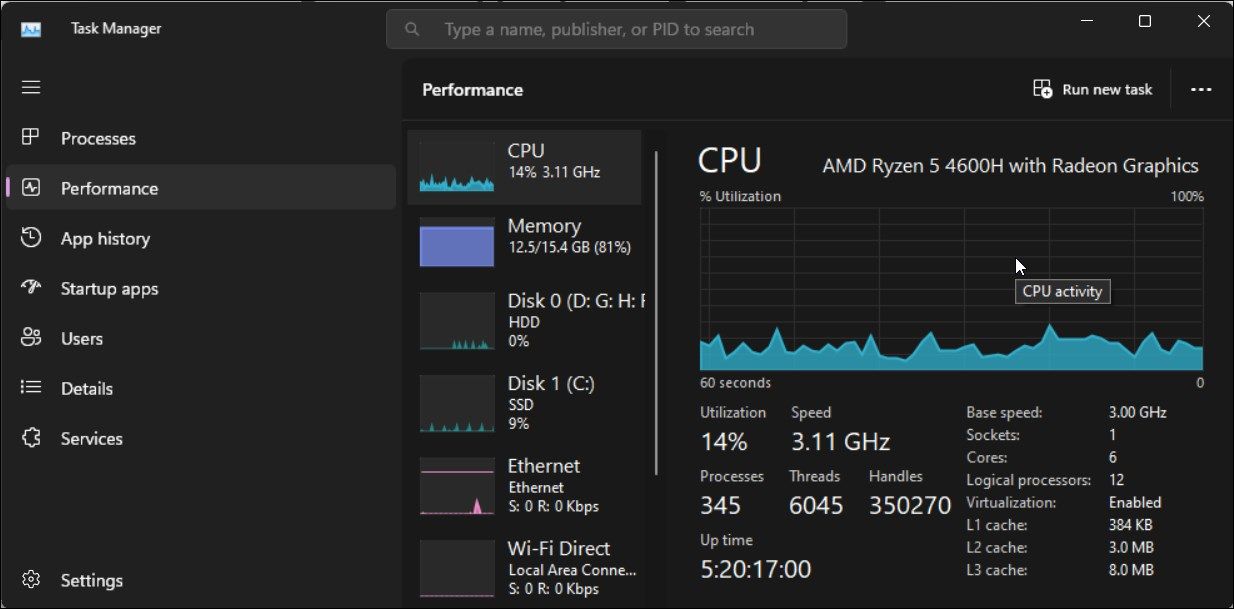
Another way to get a rough idea about your laptop’s age is to check the CPU’s make. Some laptops have a CPU and GPU sticker near the trackpad. If no sticker is found, you can use the Task Manager utility to check the CPU model.
Open Task Manager on Windows and click the Performance tab. Next, select the CPU tab to view the CPU make in the top right corner. A quick search on the web for the model number should reveal the year of making and hardware compatibility.
6. Use the OEM Tool to Detect the Laptop’s Age
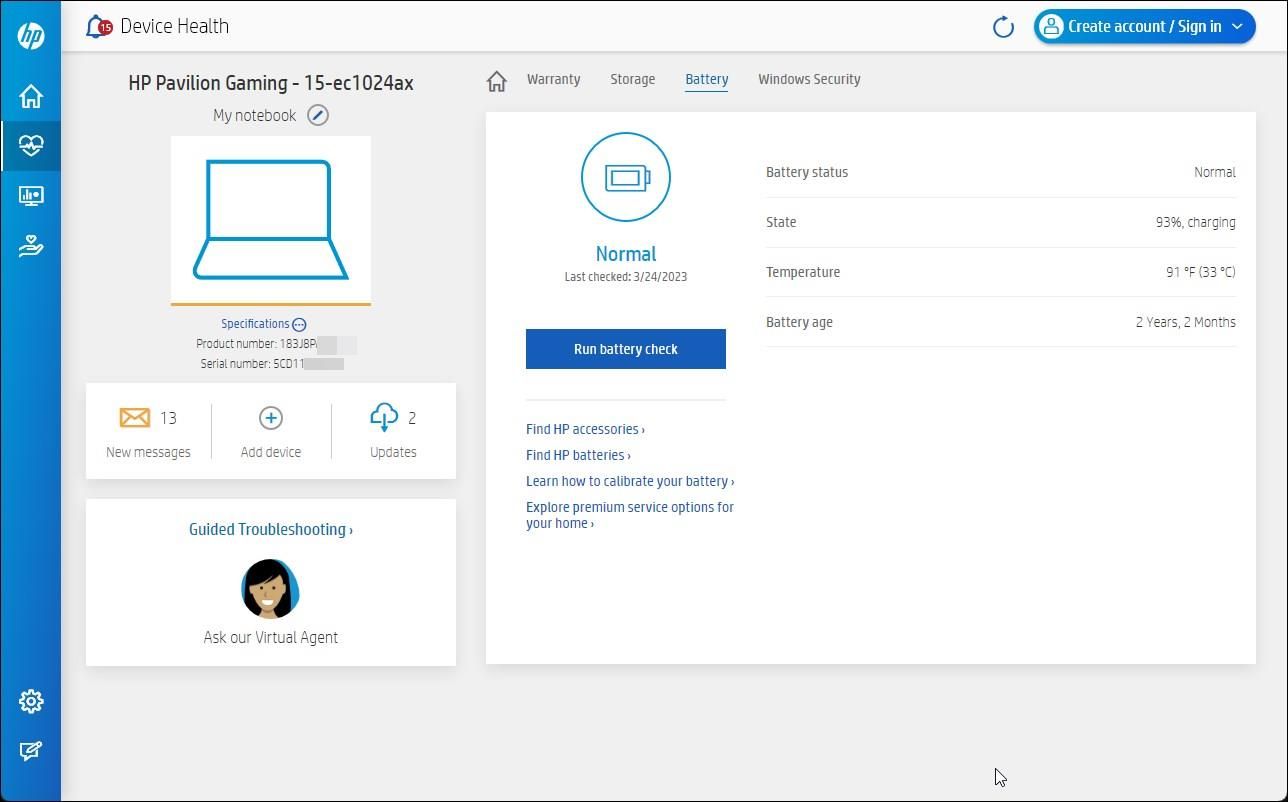
Laptop manufacturers like HP, Dell, Lenovo, and Asus offer free applications to maintain your devices. For example, HP’s Support Assistant lets you access your product information, including model name, product ID, serial number, and Warranty Status.
Battery status is another critical bit of information that you may find useful. It displays the battery’s health and age to help you gauge how old your system is. Especially when you want to buy a second-hand laptop, knowing battery health can help you bargain the right price.
How to Tell Your Desktop Computer Age
You can use the above method to identify the age of a factory-built desktop computer. However, the same doesn’t apply to a custom-built PC.
You can run the System Information utility on the PC to extract CPU, GPU, memory, storage drive, and network component information. For everything else, you’ll need to perform a manual inspection to find the serial number and see the condition.
The PC Components or Laptop Age is Not Everything
While a newer computer tends to be more reliable and less likely to go kaput, age is not everything. Some manufacturers tend to release newer systems with last-generation components in their affordable machines. These systems can work for years without any issues.
A second-hand computer buying decision must be made keeping the computer’s age and condition in mind. A two-year-old computer used for office work and casual browsing will likely serve you better than a one-year-old device used for crypto mining.
Also read:
- [New] Bandicam Reviewed The Latest Tech Enhancements and Tips for 2024
- [New] Rev Up Your Mobile Vids with Top Speed Apps
- 2024 Approved Cutting Edge Converter Elevate Your Screen Viewing
- 2024 Approved Maximizing Your Photography with Polarr's Enhanced Features
- Addressing BD Issues on WS-21, WS-8 & Older Windows
- Eliminating Windows Update Requests
- Expert Tips on Commanding ChatGPT AI for Successful Car Modification Solutions
- How to Fix 'Windows Cannot Be Installed on an MBR Disk': A Guide for Windows 11 Users
- Key Savings Techniques for Thrifty Windows 10 Enthusiasts
- Overcoming Wi-Fi Setup Obstacles: Bridging Actions on Windows OS
- Protect Your Privacy: Stop iPhones From Hoarding Images Post-Deletion with These 8 Strategies
- Simplifying Legacy Systems for Grandparent Users
- Title: Unraveling the History of Your Windows PC
- Author: Richard
- Created at : 2024-12-11 19:23:35
- Updated at : 2024-12-12 20:11:34
- Link: https://win11-tips.techidaily.com/unraveling-the-history-of-your-windows-pc/
- License: This work is licensed under CC BY-NC-SA 4.0.