Unzipping Files Proficiently Using PowerShell Commands

Unzipping Files Proficiently Using PowerShell Commands
Are you running out of space on your Windows PC? The best thing you can do to free up some space is to compress big files through zipping. There are plenty of third-party tools that can come in handy in this situation.
However, if you prefer to use Command Prompt or Windows PowerShell over anything else, there are commands you can use in these utilities to zip or unzip files. So, let’s check out how to zip or unzip files using Command Prompt and Windows PowerShell.
Disclaimer: This post includes affiliate links
If you click on a link and make a purchase, I may receive a commission at no extra cost to you.
How to Zip Files Using Command Prompt
You can zip files through Command Prompt using the tar command. It’s a command line tool that helps you to extract files and create archives. However, this command only works in Windows 10 or later.
Here’s how to zip files using Command Prompt:
- Open theStart Menu by pressing theWin key.
- In the search bar, typeCommand Prompt andRun as administrator from the right pane.
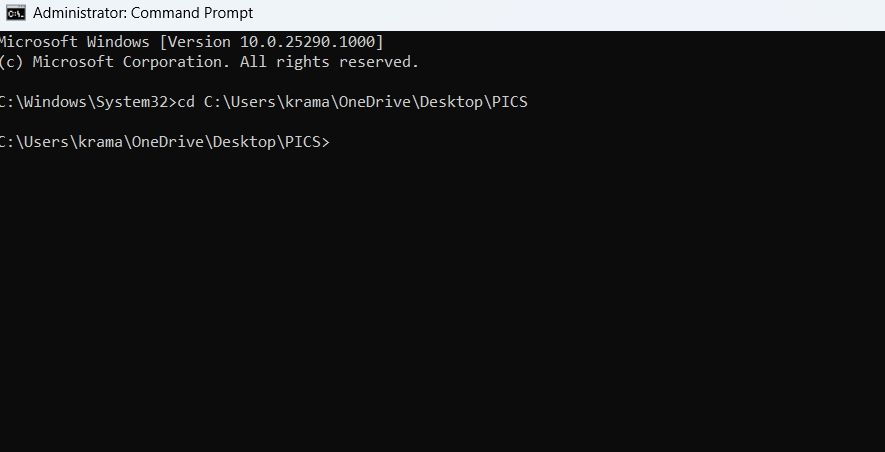
- In the console, type the following command and pressEnter . Replace**’Place’** with the location of the file.
cd Place
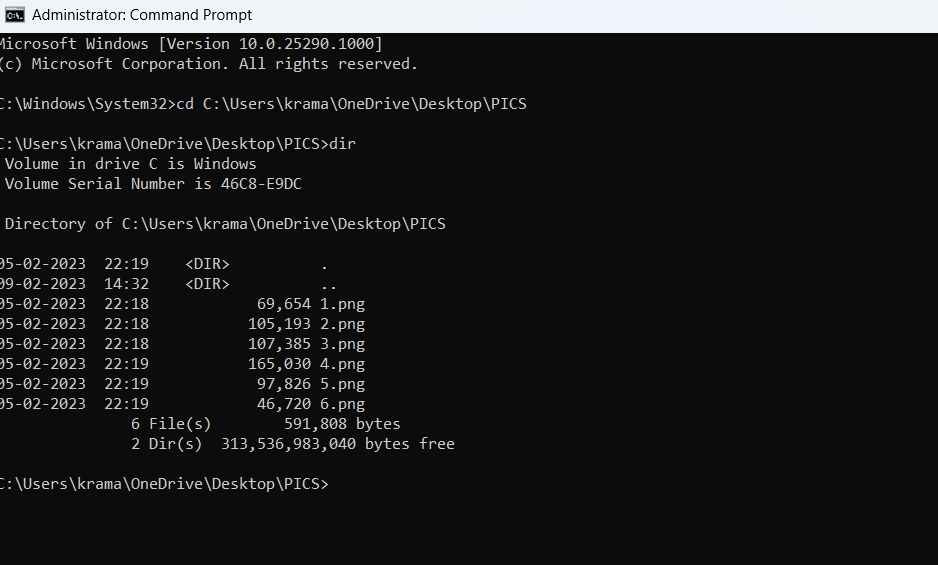
- Typedir and pressEnter . It’ll show the files inside the selected folder.

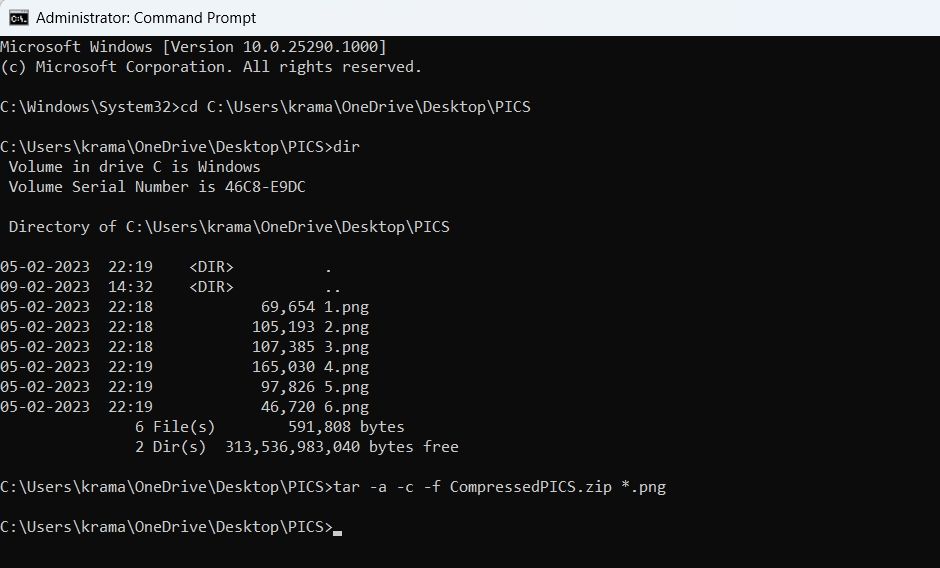
- To zip all the files inside the selected folder, type the following command and pressEnter . Replace ‘Compressed ‘ with the name you want to give your folder where the zip file will be stored. Also, replace ‘FileExt ‘ with the extension of the file you’re zipping.
tar -a -c -f Compressed.zip *.FileExt
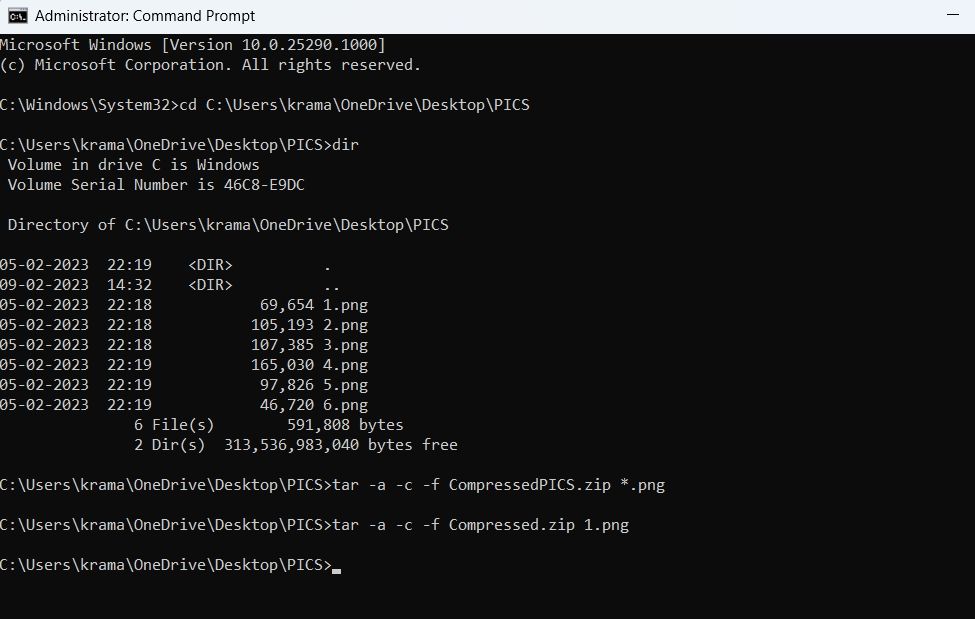
- To zip a single file, execute the following command. Again, replace ‘Compressed ‘ with the name you want to give your folder where the zip file will be stored, ‘FileExt ‘ with your file’s extension, and ‘FileName ‘ with the name of the file you want to zip.
tar -a -c -f Compressed.zip FileName.FileExt
How to Zip Files Using Windows PowerShell
There are several viable ways tocreate zip files on Windows . One of these is through Windows PowerShell. However, thetar command doesn’t work in Windows PowerShell; we’ll use another command to get the work done.
Here’s how to zip files using Windows PowerShell:
- Open the Start Menu, typeWindows PowerShell, and choose Run as administrator from the right pane.
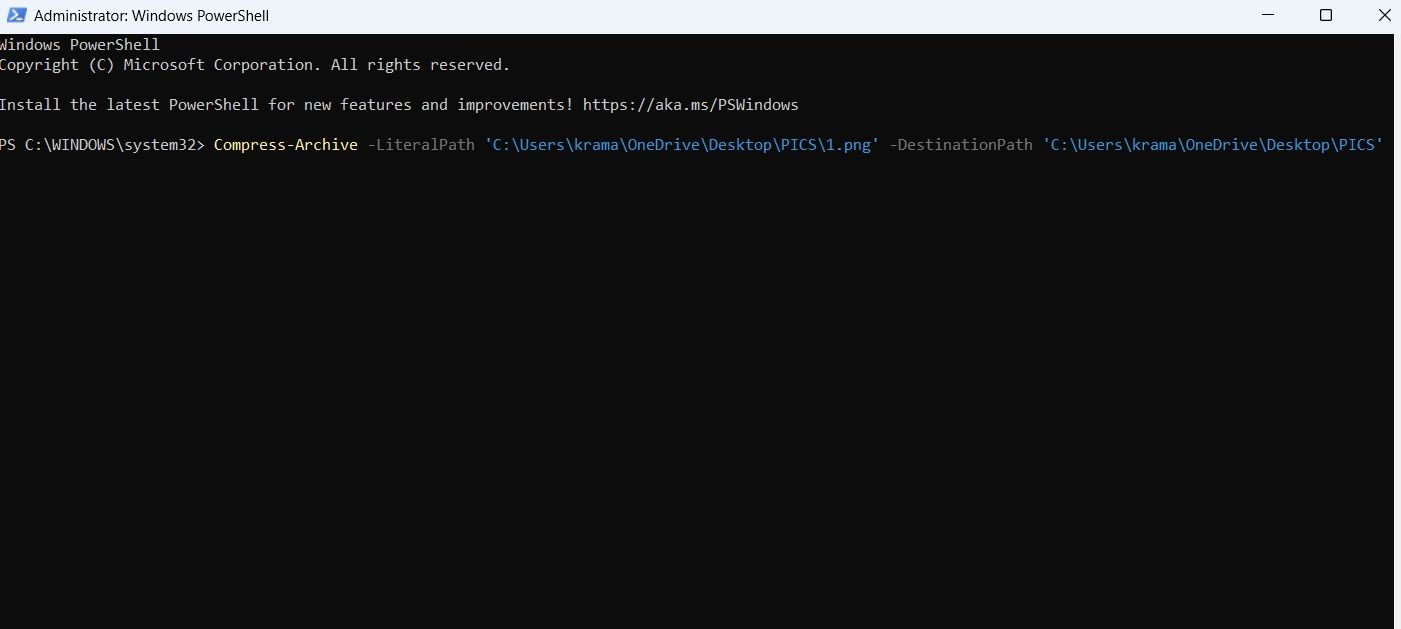
- In the console, type the following command and pressEnter . Ensure to replacefile destination andtarget location with the location of the file and the place where you want the file to be zipped, respectively. Also, replacefile name with the name of the file you want to zip anddestination name with the destination folder name.
Compress-Archive -LiteralPath 'file destination\file name' -DestinationPath 'target location\destination name'
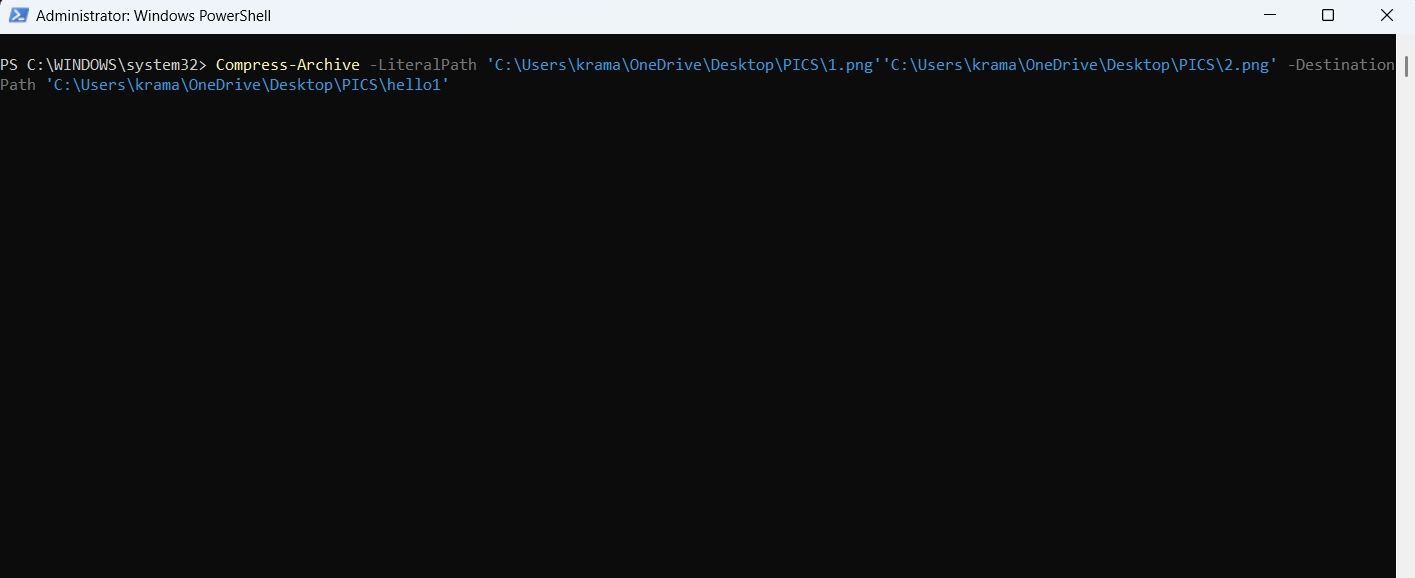
If you want to zip multiple files, execute the following command. Replacefile destination andfile destination 1 with the location of the first and second files, respectively. And replacefile name andfile name 2 with the first and second file names.
Compress-Archive -LiteralPath 'file destination\file name', 'file destination 1\file name 2 -DestinationPath 'target location\destination name'
How to Unzip Files Using Command Prompt
There may be situations where you want tounzip files on your Windows computer . Fortunately, you can do that as well using Command Prompt. Here’s how:
- Launch Command Prompt with admin privileges.
- Use thecd command to head toward the zip file’s location.
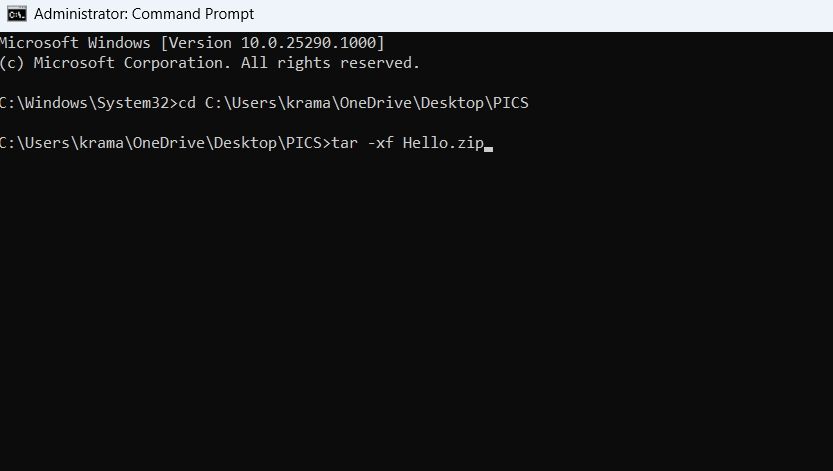
- Type the following command and pressEnter . Replace ‘Name ‘ with the name of the zip file.
tar -xf Name.zip
You’ve successfully unzipped the file.
How to Unzip Files Using Windows PowerShell
Windows PowerShell lets you quickly unzip files on your computer. Here’s how to do that:
- Open Windows PowerShell with admin rights.
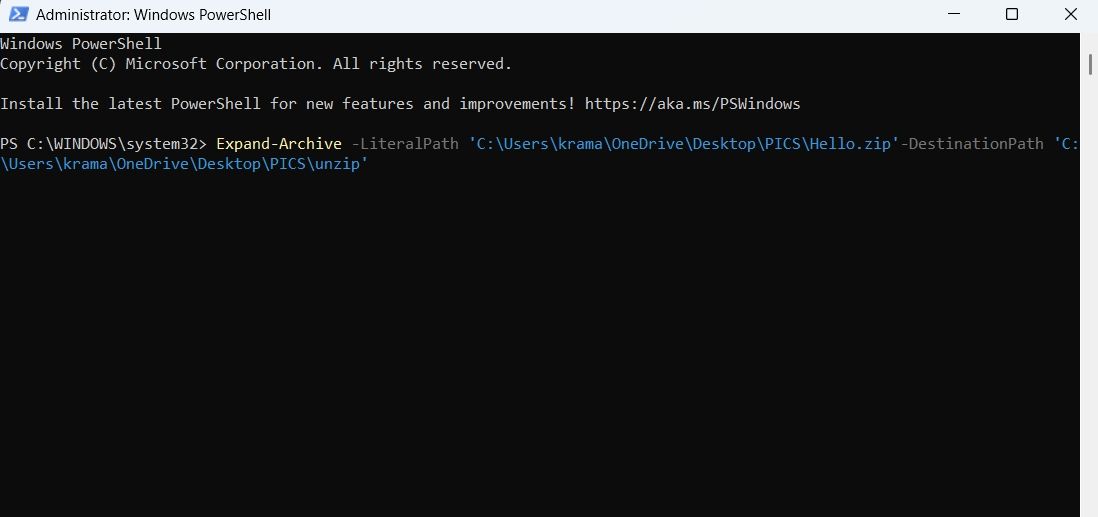
- Type the following command and pressEnter . Make sure to replace <**file** **destination** > and <**target** **location** > with the location of the zip file and the place where you want the file to be unzipped, respectively.
Expand-Archive -LiteralPath <file destination> -DestinationPath <target location>
Save Up Space on Windows 11 by Zipping Your Files
As a Windows user, you will always come across situations where you want to zip or unzip files. However, if you don’t want to use a third-party tool, you can use Command Prompt and Windows PowerShell to quickly zip and unzip files on Windows using the above methods.
Meanwhile, you might be interested in learning a few important Command Prompt commands.
Also read:
- [New] Maximizing Memories Techniques for Gameplay Recording for 2024
- [Updated] 2024 Approved Rising Above the Crowd Trending Techniques for YouTubers
- 2024 Approved Professional Tips Rotate and Flip iPhone Imagery
- 2024 Approved Unraveling Time Reverse Video on Instagram Secrets
- Adding a Convenient Upgrade Notification Toolbar in Windows 11/11
- Comprehensive Tutorial: Making Sense of Blue Screen in W11
- Discover Winning Software for the Ultimate PC
- In 2024, 15 Best Strongest Pokémon To Use in Pokémon GO PvP Leagues For Realme 12+ 5G | Dr.fone
- In 2024, How to Migrate Android Data From Xiaomi Redmi 12 5G to New Android Phone? | Dr.fone
- In 2024, Taming Darkness for a Bright YouTube Experience
- Navigating the World of PC Chips – Identifying Gen Through Windows (8 Ways)
- New In 2024, Final Cut Pro X Power User Master 40 Time-Saving Shortcuts
- New In 2024, The Ultimate Guide Best Android Video Editor Apps for Chromebook
- Steps to Toggle SmartScreen Filters in Windows 11
- Title: Unzipping Files Proficiently Using PowerShell Commands
- Author: Richard
- Created at : 2024-11-16 18:13:35
- Updated at : 2024-11-17 19:14:48
- Link: https://win11-tips.techidaily.com/unzipping-files-proficiently-using-powershell-commands/
- License: This work is licensed under CC BY-NC-SA 4.0.
