Windows 10/11: Adding Custom Actions to File Context Menus

Windows 10/11: Adding Custom Actions to File Context Menus
You may frequently need to move or copy files to alternative folders in Windows. To do this, you might move files to different folders by dragging and dropping them. To copy a file to another location, you can either hold theCtrl key while dragging or utilize the copy-paste hotkeys.
It would be better to have context menu options for moving and copying files to selected locations. Then you could right-click a file and select aMove to folder orCopy to folder option. This is how you can add context menu options for moving and copying files to folders in Windows 11/10.
Disclaimer: This post includes affiliate links
If you click on a link and make a purchase, I may receive a commission at no extra cost to you.
How to Add a Move to Folder Context Menu Option
To add new context menu options in Windows 11/10, you must tweak theWindows registry one way or another. The Registry Editor app enables users to customize Windows’ right-click menus by manually tweaking the registry. You can add a Move to folder option to the context menu with the Registry Editor as follows:
Bring up the Registry Editor with a method included in ourhow to open regedit guide.
Click inside the address bar at the top of Registry Editor, and erase the current key location there.
Then enter thisContextMenuHandlers key location and pressReturn :
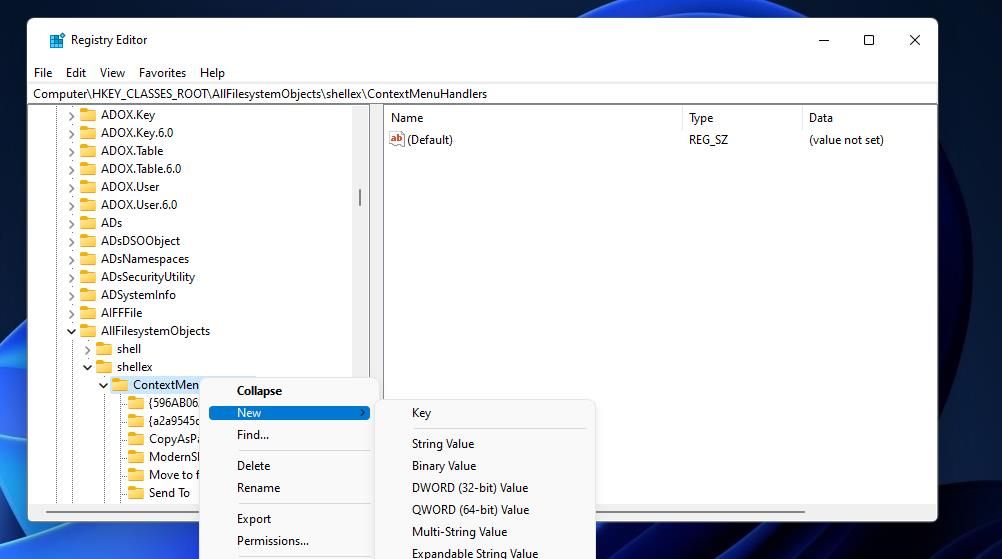
HKEY_CLASSES_ROOT\AllFilesystemObjects\shellex\ContextMenuHandlersNext, right-clickContextMenuHandlers and select theNew submenu.
ClickKey on the submenu.

EnterMove to folder for the new key’s name.
Select the newMove to folder key in the Registry Editor’s sidebar.
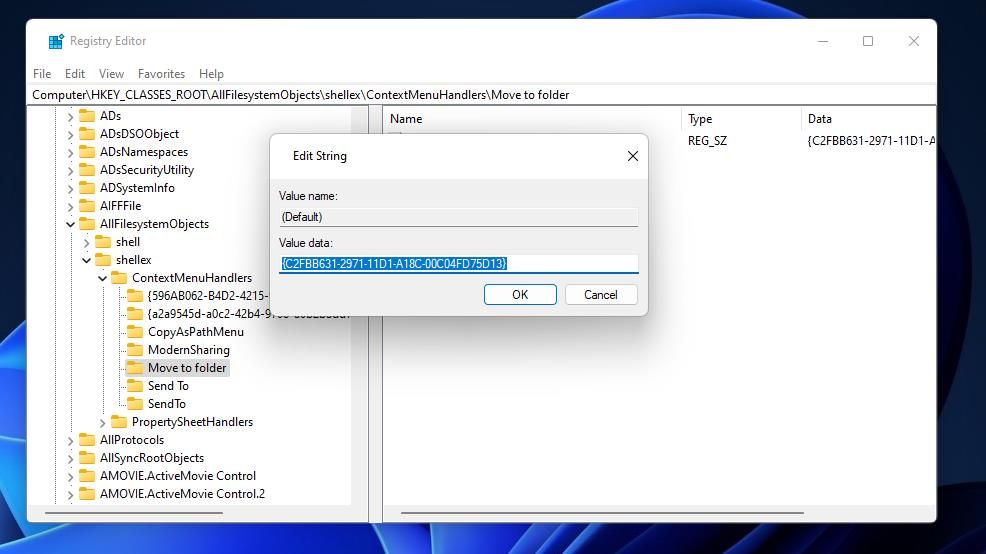
Double-click the**(Default)** string for the selected key.
Input**{C2FBB631-2971-11D1-A18C-00C04FD75D13}** inside theValue data box.

SelectOK to set the new value for the (Default) string.
Exit the Registry Editor.
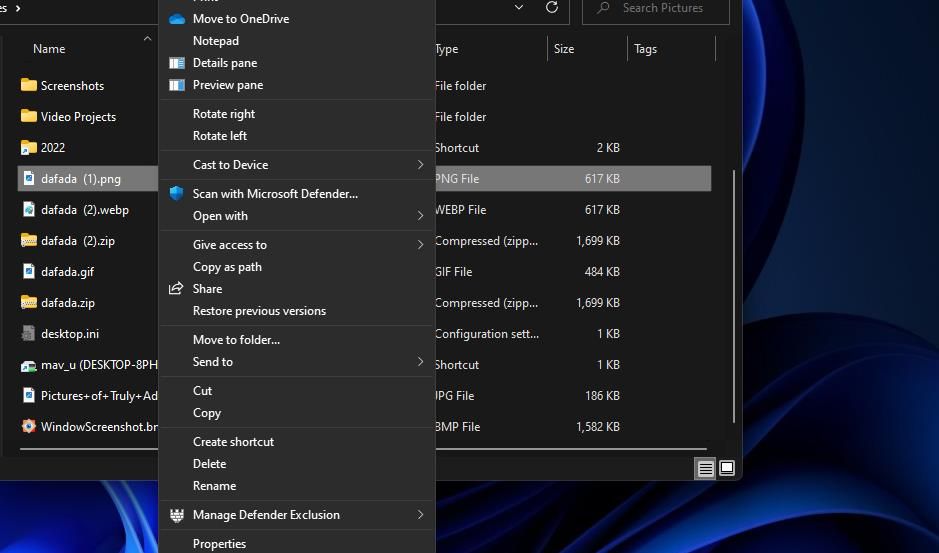
You can now try out the newMove to folder option on the context menu. Press theExplorer taskbar button to view the Windows file manager. Right-click a file and select the newMove to folder option. You’ll need to selectShow more options >Move to folder i n Windows 11.
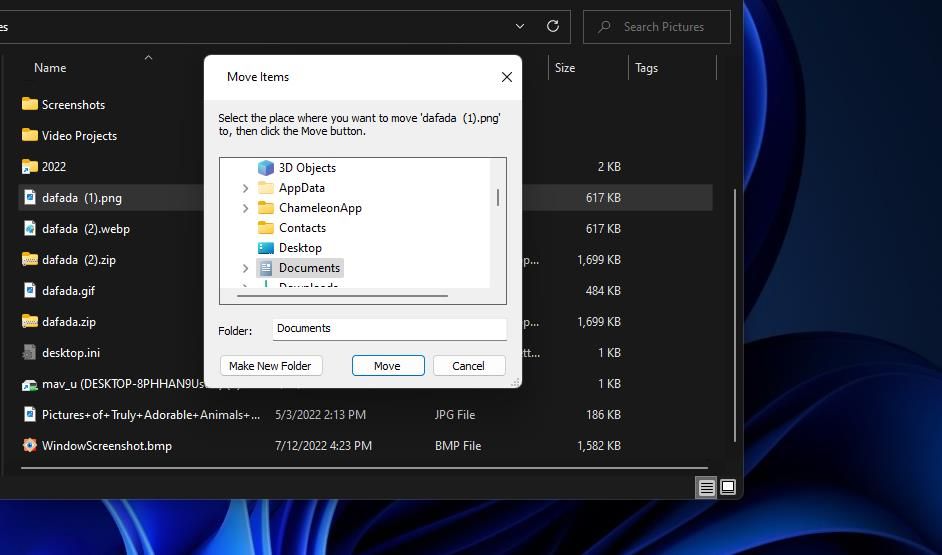
A small Move Items window will then appear from which you can select a destination folder. Choose a folder to move the file to in that window. Then clickMove to place the file in the selected directory.
How to Add a Copy to Folder Context Menu Option
The Windows context menu includes aCopy option, but that doesn’t enable you to select a destination for pasting the file. Thus, users must manually paste copied items into different folders after selecting that option. However, you can add a betterCopy to folder context menu option that brings up a destination folder selection window like this:
- Open theContextMenuHandlers registry key as covered in the first three steps for adding aMove to folder option.
- Click theContextMenuHandlers with the right mouse button and select its New option.
- SelectKey to add a new one to the registry.
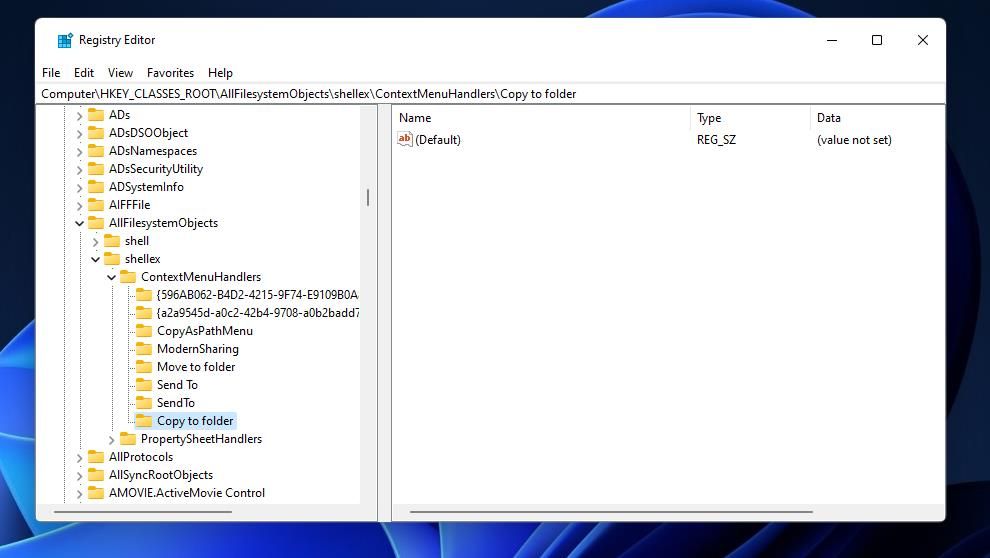
- TypeCopy to folder inside the text box for the new key.

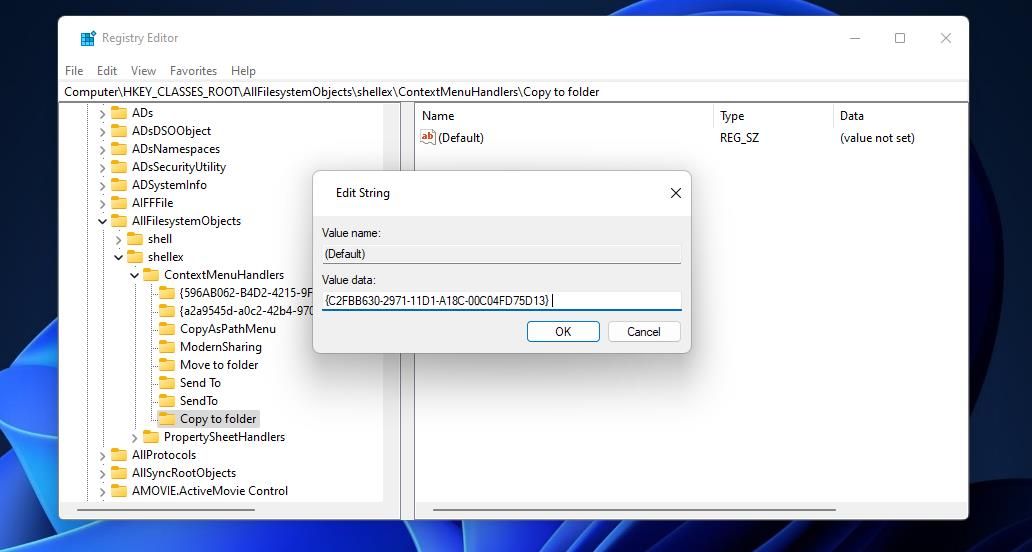
- SelectCopy to folder and double-click its**(Default)** string.
- Enter the value**{C2FBB630-2971-11D1-A18C-00C04FD75D13}** inside theData box.

- Click theOK button to apply the value.
- Close the Registry Editor app’s window.
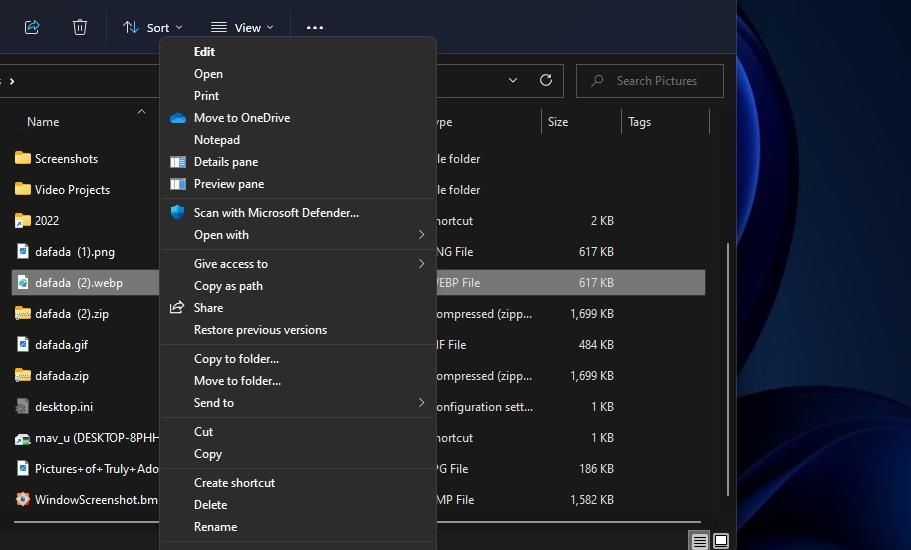
Then you can select theCopy to folder context menu option much the same as the move one. Right-click a file in Explorer, selectShow more options (in Windows 11), and clickCopy to folder . A Copy Items window will open from which you can choose a folder to include the copied file. ClickingCopy will paste the item into the selected folder.
You can remove the “Copy/Move to folder” options from the right-click menu by deleting their registry keys. Open theContextMenuHandlers key location specified in step three for adding a Move to folder context menu option. Right-click theCopy to folder orMove to folder registry key and selectDelete . SelectYes when prompted to confirm you’re sure about erasing that key.
How to Add Move and Copy to Folder Context Menu Options With WinBubble
It’s relatively straightforward to add the “Copy/Move to folder” options with the Registry Editor, but there’s still an easier way to do it. You can add the same options to the context menu with the freeware WinBubble. WinBubble is customization software that includes a wide variety of context menu options. This is how to add a “Copy/Move to folder” context menu options with WinBubble:
Head over tothe WinBubble page on Softpedia.
Press WinBubble’sDownload Now button.
Click theSoftpedia Mirror (US) option for the download location.
Next, bring up aDownloads tab or page in whatever web browser you’re utilizing. You can do that in Chrome, Edge, Firefox, or Opera with theCtrl +J hotkey.
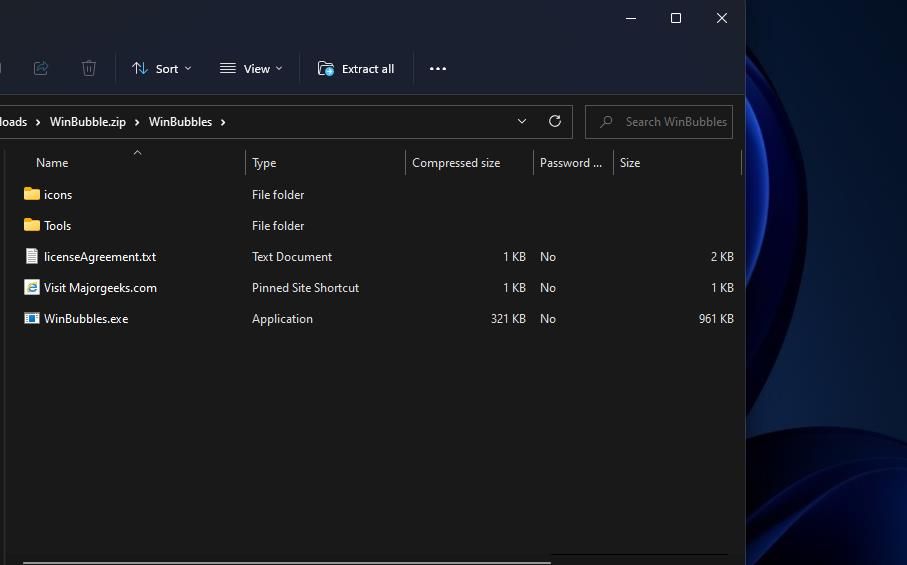
Double-click the WinBubble ZIP to view that archive inside File Explorer.
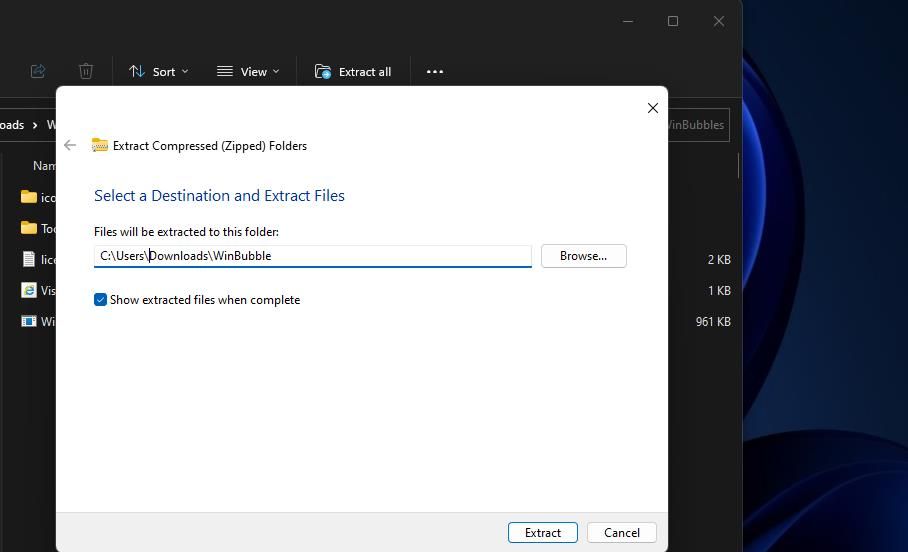
SelectExtract all on Explorer’s command bar or theCompressed Folder Tools tab in Windows 10.

Press theBrowse button.
- Choose a suitable directory to extract the archive outside the one it downloaded to, and click theSelect Folder option.
- Next, selectShow extracted files when complete for the WinBubbles folder to automatically open after extraction.
- Then clickExtract to bring up the unzipped WinBubbles folder.

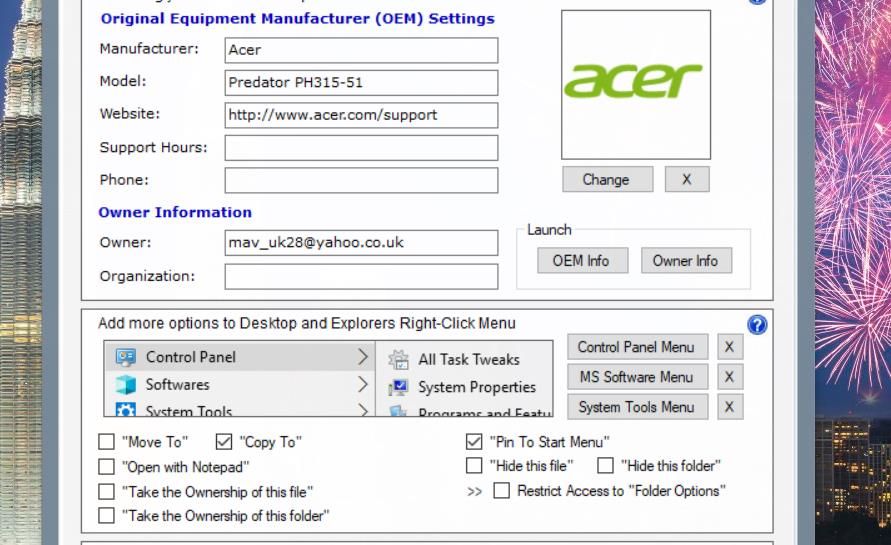
- Now double-click WinBubbles EXE to launch that software.
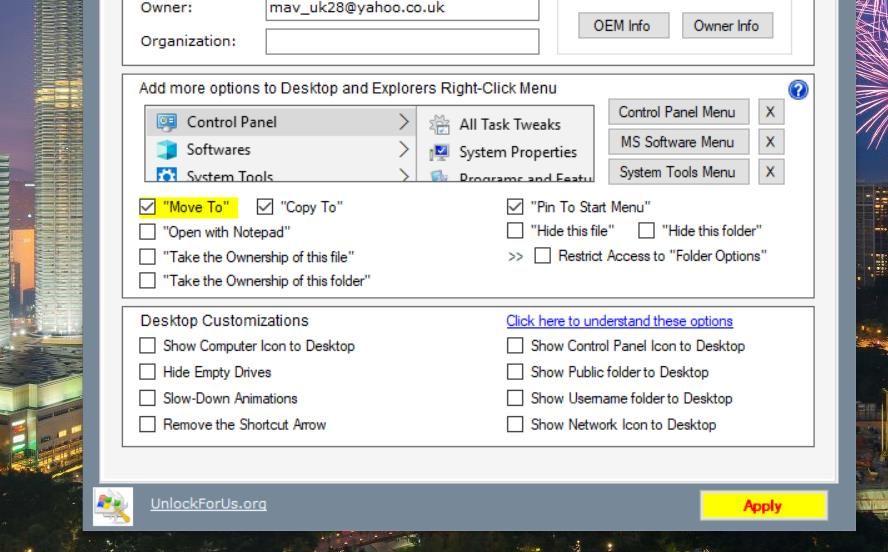
- Select theMove to option on theGeneral tab.
- Click theCopy to checkbox to select that option.

- Press WinBubble’sApply option when highlighted yellow.

- A WinBubble dialog box window will appear confirming the tweaks have been saved. ClickOK to close that message.
- Minimize or exit the WinBubble window.
Now look at your new context menu options for copying and moving items to different locations. WinBubble adds them to the classic context menu like the manual registry tweak methods. So, you’ll still need to selectShow more options or pressShift +F10 to access those options in Windows 11.
You can also utilize WinBubble to remove the “Copy/Move to Folder” options. Uncheck the selectedMove to andCopy to checkboxes on itsGeneral tab. ClickApply to set the new options.
Move and Copy Files to Folders With Your New Context Menu Options
The**”** Copy/Move to folder” context menu options undoubtedly provide more convenient ways to copy and move files into alternative directories. You won’t need to drag files about anymore for moving items in Windows 11 after adding a new**”** Move to Folder option” to the right-click menu. Nor will you need to paste copied files elsewhere in Windows 11 thanks to the “Copy to folder” menu option.
Also read:
- [New] Harmonious Hues Recording with a Mac for 2024
- [Updated] Zero Clutter, Max Impact Professional Tips for Striking Virtual Presence for 2024
- Guide: Transferring Your Favorite Videos From YouTube to Your Samsung Mobile Device
- In 2024, Unlocking Photo Magic Intro to Snapseed Features
- Mastering the Art of Crafting Interactive Web Services Using Language Models
- Optimize PC Query Speed Using EverythingApp
- Paving the Way for Public Dialogue with ChatGPT
- Quick Guide: Efficient PowerToys Setup in Win11
- Resolve Photo Capture Failures in Windows OS
- Windows ChatGPT Integration Steps
- Title: Windows 10/11: Adding Custom Actions to File Context Menus
- Author: Richard
- Created at : 2024-10-25 17:38:42
- Updated at : 2024-11-01 19:08:12
- Link: https://win11-tips.techidaily.com/windows-1011-adding-custom-actions-to-file-context-menus/
- License: This work is licensed under CC BY-NC-SA 4.0.
