
Windows 11: Managing Your Network Proxy
Windows 11: Managing Your Network Proxy
If you’re unsure whether you’re connected to a proxy server or need to check your proxy settings for any other reason, you’ve come to the right place. Here, we’ll explore different ways to find your proxy server settings on Windows 11. We’ll also see how to reset the WinHTTP proxy server.
What Is a Proxy Server?
A proxy server acts as a gateway between your computer and the internet. When you connect to a proxy server and send a request to a website, your system directs the request to the proxy server. This request could be anything like playing a video, downloading a file, or opening a webpage.
Subsequently, your request is forwarded to the website and then routed back to your computer. Connecting to a proxy server can come in handy in various situations. Some of them are listed below:
- A proxy server hides your identity. This way, you can browse the internet without revealing your identity .
- You can connect to a proxy server to block traffic from a particular website.
- Proxy server regularly caches frequently accessed websites. This improves the browser’s performance and allows it to load websites faster.
- Connecting to a proxy server can also come in handy when you want to access a website that is blocked in your country or region.
There are mainly three examples of proxy servers: Open proxies, Commercial proxies, and Residential proxies. The open proxy servers are free to use, and you can find them online. However, they are not always secure, and the probability is very low that they will work.
Commercial proxy servers charge a certain amount of money for their services, and they are more secure than open proxy servers.
Lastly, residential proxies are hosted on computers and smartphones. They are the most secure and reliable example of proxy servers. You can use them for web scrapping, social media marketing, bypassing geo-blocking, or any other operation requiring high anonymity.

The Various Ways to Check Your Proxy Server Settings on Windows 11
There are various methods to check your proxy server settings on Windows 11. Let’s explore each of them in detail.
1. How to Check Your Proxy Server Settings Using the Settings App
The fastest way to find your proxy server settings is by using the Windows Settings app. Here’s what you need to do:
- Press Win + I to open the Settings app.
- Choose Network & internet from the left sidebar and Proxy from the right pane.
- Click the Set up button next to Use a proxy server.

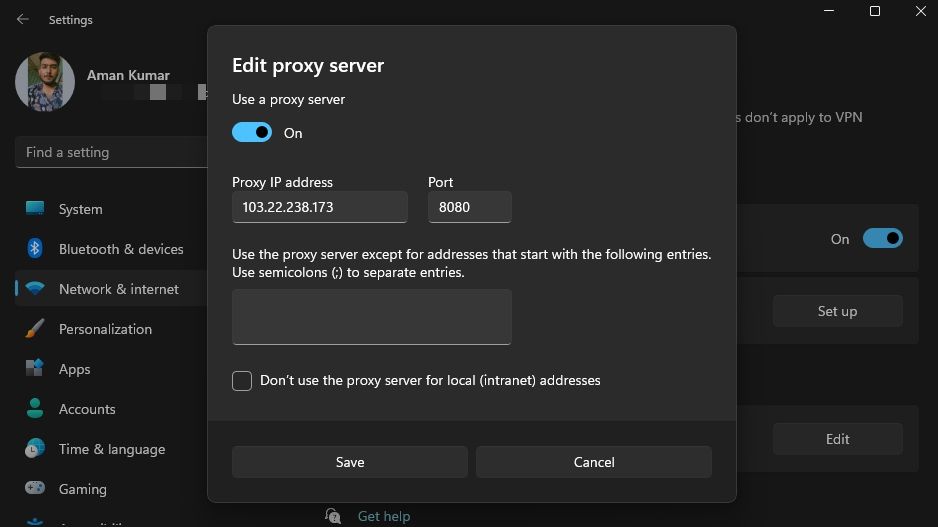
You’ll see the proxy server details in the Edit proxy server window that crops up.
2. How to Check Your Proxy Server Settings Using Internet Options
The Internet Options menu on Windows allows you to configure internet-related settings on your computer. To view your proxy server settings, follow the below instructions:
- Press Win key to open the Start menu, type Internet Options in the search bar and press Enter.
- Switch to the Connections tab and click LAN settings.
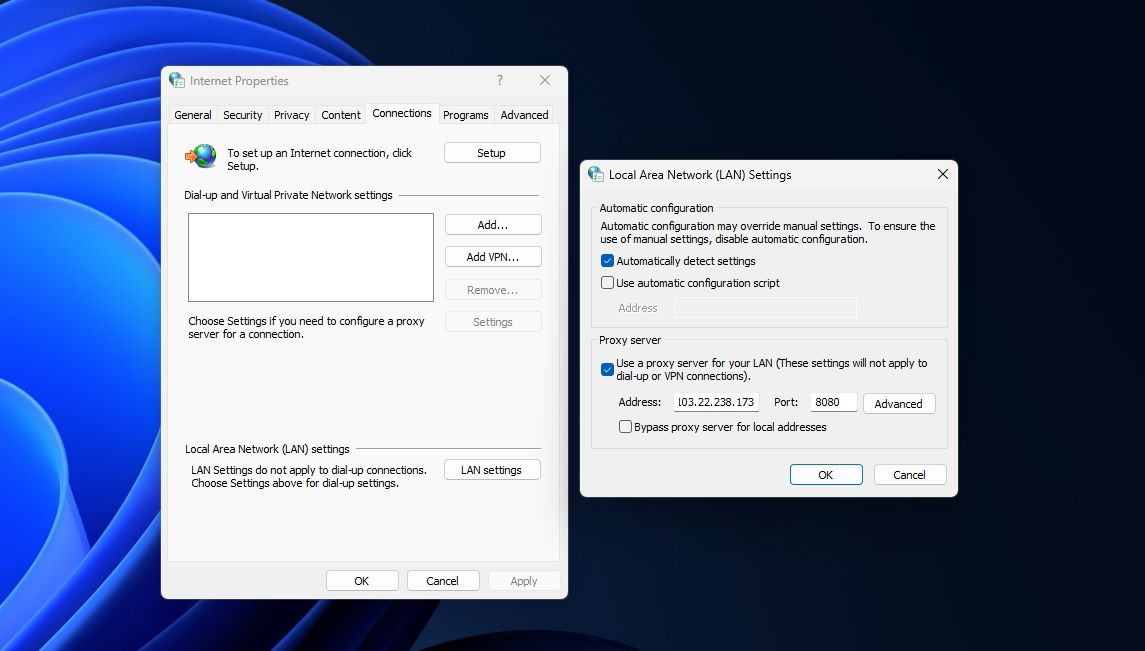
You’ll get the details of your proxy server in the Proxy Server section.
3. Check Your Proxy Server Settings Using Different Browsers
You also use your browser to view your proxy server settings. To check in Google Chrome, type chrome://net-internals/#proxy in the address bar and press Enter.

In Microsoft Edge, type edge: //net-internals/#proxy and hit Enter.
And to check in Mozilla Firefox, type about:preferences#advanced in the URL bar and press Enter. Then, scroll down and click the Settings button next to Configure how Firefox connects to the internet.
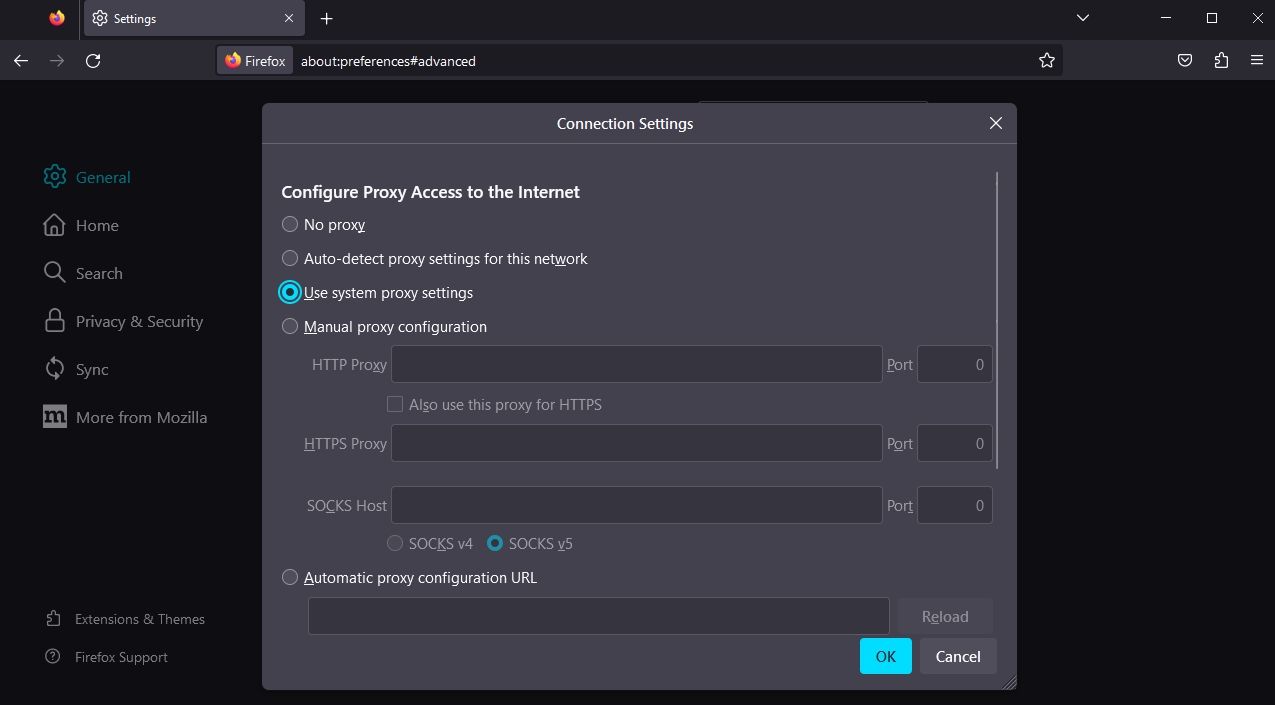

A Connection Settings window will crop up where you can view and configure the proxy server settings.
4. Check Your Proxy Server Settings Using Command-Line Tools
Command-line tools such as Command Prompt and Windows PowerShell can also come in handy in viewing your proxy server details. Here’s how to check it using Command Prompt:
- Open the Start Menu, type Command Prompt in the search bar, and choose Run as administrator from the right pane.
- Type the following command and press Enter:
netsh.exe winhttp show proxy

To check your proxy server settings using PowerShell, launch Windows PowerShell as an administrator (see how to run Windows PowerShell with administrative rights ), type the following command, and hit Enter.
Get-ItemProperty -Path 'HKCU:\Software\Microsoft\Windows\CurrentVersion\Internet Settings' | findstr ProxyServer
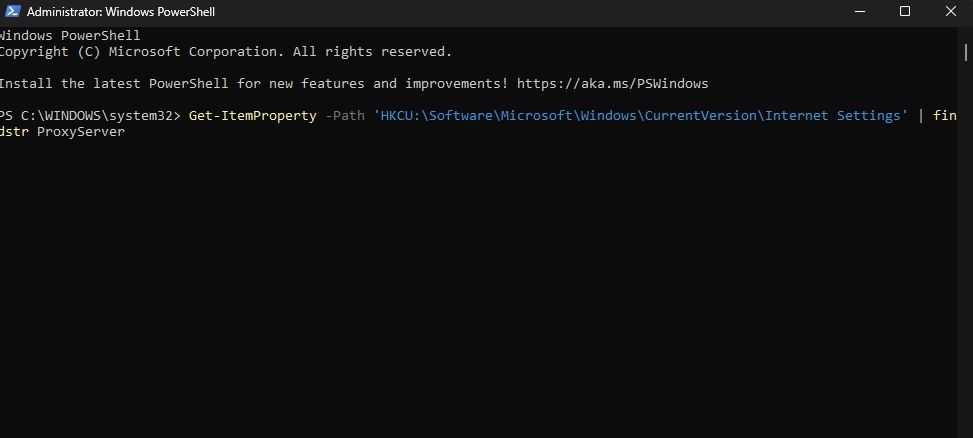
PowerShell will display the proxy server details in the result.
 WinUtilities Pro
How to Reset the WinHTTP Proxy Settings
WinHTTP or Windows HTTP Services allows the desktop applications and Windows services to communicate with the HTTP server. However, there may be times when you need to reset the WinHTTP proxy.
If you face connectivity issues when updating Windows or using Microsoft Store or other UWP apps, try resetting the WinHTTP proxy. Here are the methods to do that.
 EmEditor Professional (Lifetime License, non-store app)
1. Reset the WinHTTP Proxy Settings Using Command Prompt
To reset the WinHTTP proxy using Command Prompt, launch Command Prompt as an administrator and execute the following command.
netsh winhttp reset proxy
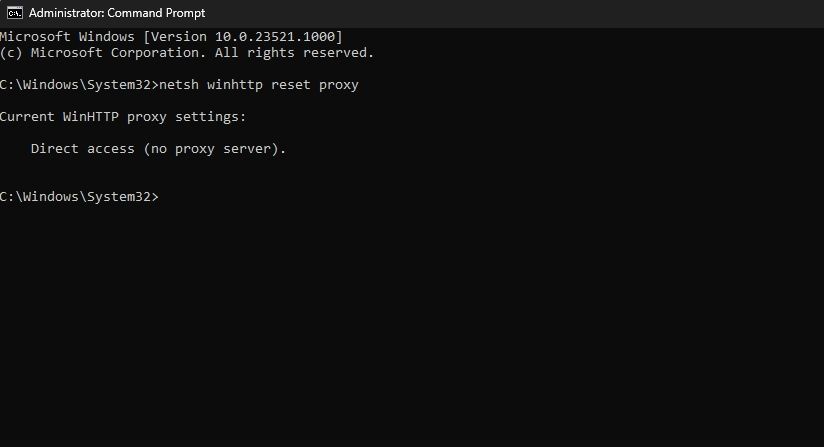
Once the command is successfully executed, you will see a message that says Direct access (no proxy server).
2. Reset the WinINET Proxy Settings Using Internet Options
Most UWP apps use the WinINET library instead of WinHTTP. So, to reset the WinINET proxy using the Internet Options, follow these steps:
- Launch Internet Options as above and switch to the Connections tab.
- Click the LAN settings button.
- Check the Automatically detect settings box.
- Uncheck the Use a proxy server for your LAN (These settings will not apply to dial-up or the VPN connection) box. Then, click OK to save the changes.
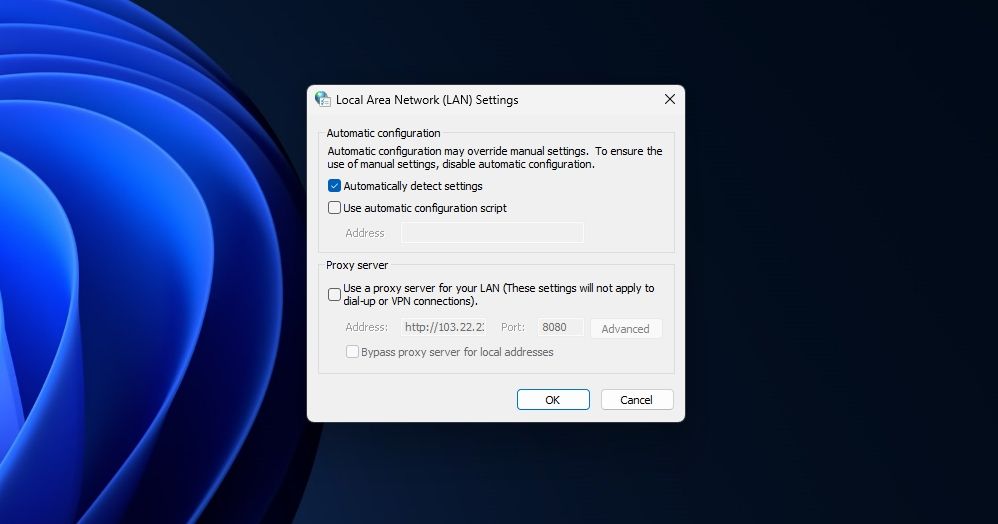

You’ve successfully reset the WinINET proxy.
## Manage Your Proxy Server Settings on WindowsUsing a proxy server has numerous benefits, including privacy protection, access to regionally blocked websites, and much more. However, there may be situations when you want to check your proxy server settings.
Whether you want to troubleshoot an internet-related problem or simply want to confirm your connection to a proxy server, you can quickly check your proxy server settings using the above methods.
FAQ
 vMix Pro - Software based live production. vMix Pro includes everything in vMix 4K plus 8 channels of Replay and 8 vMix Call
Q: Does Windows 11 Have a Proxy Server?
Windows 11 doesn’t come with a proxy server built-in, but you can add your own server settings to route your internet traffic via your proxy. You can configure a proxy server on your PC using the Settings app.
Q: Should I Set Proxy On or Off?
Whether to enable or disable your proxy server depends on how you want to access the internet. If you want to route your internet data via a proxy server, you should keep the option enabled on your PC. If you don’t want to route your internet traffic, you can turn off your proxy server .

Q: Are Proxy Servers Safe?
There are both good as well as bad proxy servers out there . As long as you get your proxy server from a trusted company, your data should be safe with it. You shouldn’t trust any random proxy server on the web.
- Title: Windows 11: Managing Your Network Proxy
- Author: Richard
- Created at : 2024-08-16 02:25:10
- Updated at : 2024-08-17 02:25:10
- Link: https://win11-tips.techidaily.com/windows-11-managing-your-network-proxy/
- License: This work is licensed under CC BY-NC-SA 4.0.