
Windows: Custom Inactive Period Setting
Windows: Custom Inactive Period Setting
PC security is not just about having antivirus software on your computer. You should also restrict access to your documents on your PC while you’re away from your machine.
Read on to explore how you can automatically lock your PC after a set time, even when you leave it unattended.
How to Keep Your Windows PC Inaccessible While Your Gone
There are lots of places you could use a PC or laptop. It could be in the office, at a conference venue, or on the go at your favorite café. And there’ll be times you just need to get up to attend to something pressing.
Fortunately, you can set your PC to lock automatically after a custom amount of time without activity. This means you can safely leave your work desk, knowing your work is safe from prying eyes.
Of course, you can also lock your PC manually when you walk away from it—just press theWin + L keys together orCtrl + Alt + Del and then sign out. But you could miss doing that in a rush, or if you’re distracted.
Instead, check out these methods to configure your Windows PC to lock automatically when there is no activity after a specific amount of time.
1. How to Lock Your Windows PC After a Set Time via the Local Security Policy
Using the Local Security Policy, you can set the exact time in seconds after which your PC will lock itself automatically. Make sure you’re signed in as an administrator to automatically lock your PC.
Local Security Policy is only available in the Windows 10 and 11 Pro, Education, and Enterprise editions. If you’re using the Home version, skip to method two.
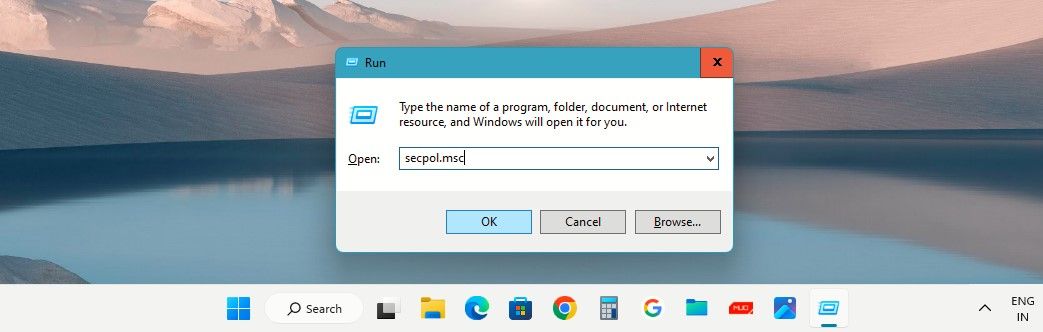
- TypeLocal Security Policy in Windows Search. Click theLocal Security Policy underBest match to open it. Alternatively, press theWin + R keys together to open theRun box. Typesecpol.msc in theOpen navigation bar and clickOK or hitEnter to launch it.

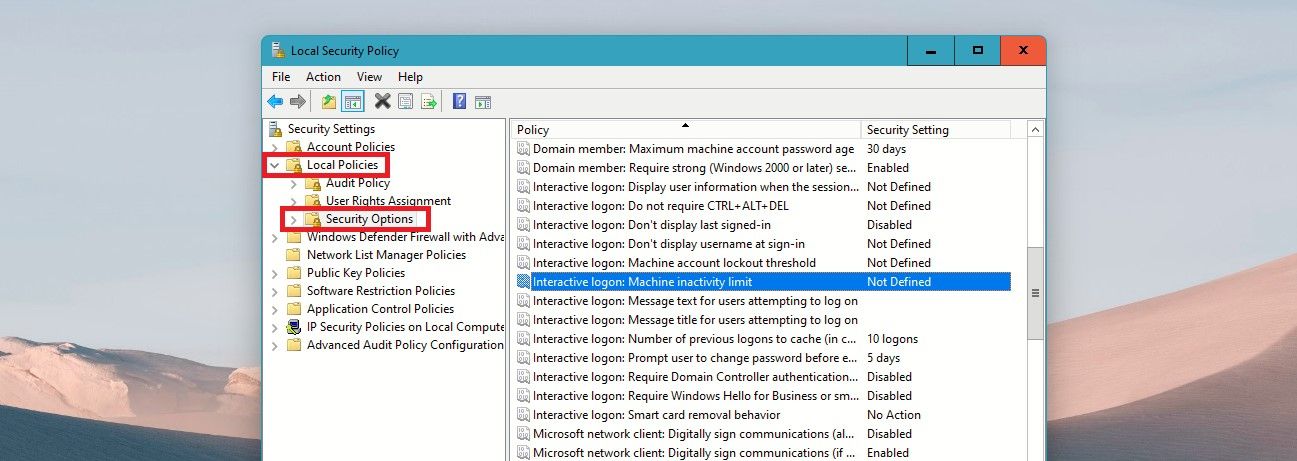
- Click the down arrow next toLocal Policies in the left pane to expand it.
- Click onSecurity Options to open it.
- The Security Options will open up in the right pane. Now scroll down to the policy namedInteractive logon: Machine inactivity limit and double-click on it to open its properties.
Any DRM Removal for Win:Remove DRM from Adobe, Kindle, Sony eReader, Kobo, etc, read your ebooks anywhere.
- Under the sectionMachine will be locked after , enter the time in seconds after which you want your PC to get locked automatically. This time is the time of machine inactivity or the time when your PC is idle. You can enter the time between0 to599940 seconds. For this tutorial, we’ll enter300 seconds which is five minutes. Now click onApply and thenOK .
- Finally, close the Local Security Policy window and restart your computer for the change to take effect.
 Any DRM Removal for Win:Remove DRM from Adobe, Kindle, Sony eReader, Kobo, etc, read your ebooks anywhere.
Now, when you use your PC, you will experience that your PC will lock itself after your custom timer expires. And if someone tries to unlock your PC while you’re gone, it’ll ask them for your password, which should keep them at bay until you get back.
If you ever want to reverse this action and not have your PC lock automatically, just open theInteractive logon: Machine inactivity limit policy inLocal Security Policy . Then just change the time or seconds to0 —this is the default setting and will not lock your PC automatically.
2. How to Lock Your Windows PC After a Specific Amount of Inactivity via the Registry Editor
You can tweak settings in the Registry Editor to configure your PC to lock automatically after a set time. And you can do this in Windows Home and all the other Windows editions.
However, you must be careful while making changes in the registry and should only make the changes as detailed below and not change anything else. It’d be a good idea to create a restore point in Windows before you change your registry settings. If something goes wrong, you can revert your PC to its last working state.
Now let’s go ahead and explore how to lock your PC automatically via the Registry Editor.
- TypeRegistry Editor inWindows Search and selectRegistry Editor underBest match . Or use one of the many ways to open the Registry Editor in Windows 11 .
- Click onYes on the UAC prompt.
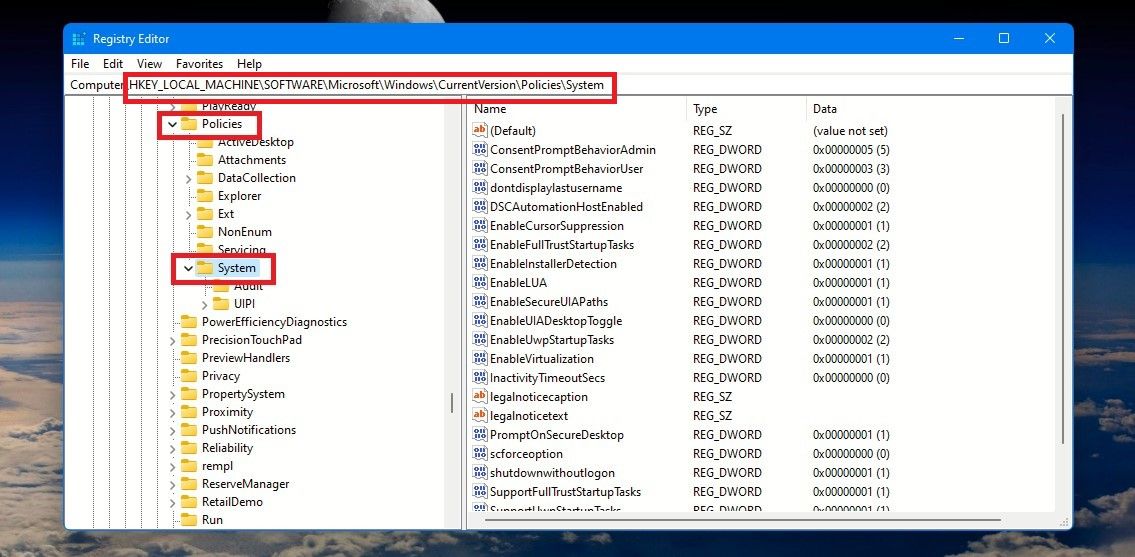
- In the left pane, use the following path to reach theSystem registry key: HKEY_LOCAL_MACHINE\SOFTWARE\Microsoft\Windows\CurrentVersion\Policies\System
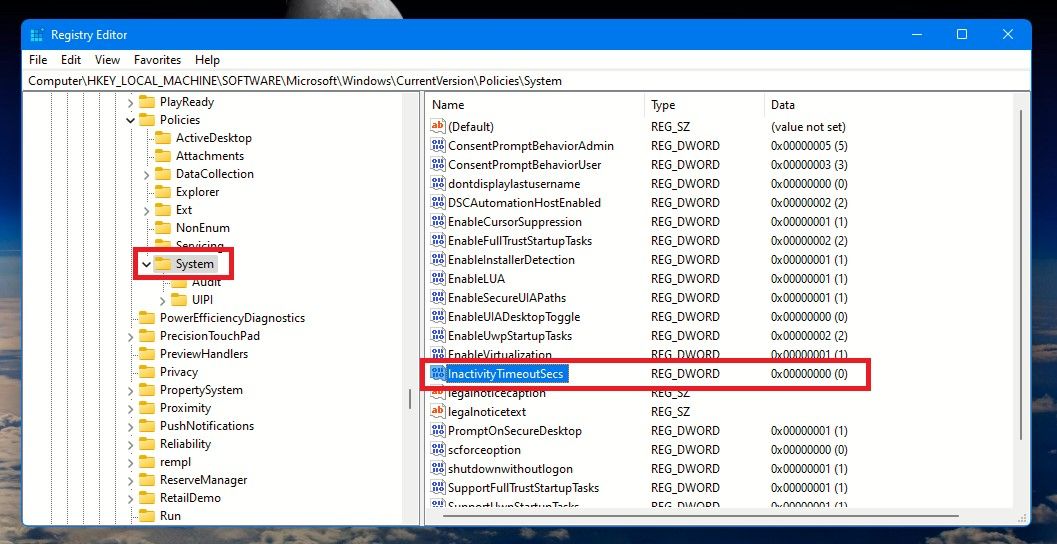
- Click on theSystem key in the left pane and its components will open up in the right pane. Now scroll down to get to theInactivityTimeoutSecs DWORD.
- Double-click on theInactivityTimeoutSecs DWORD to modify its value. SelectDecimal underBase , and underValue data , enter a number between0 to599940 —this is the time in seconds after which your PC will get locked automatically. Like in the Local Security Policy method, we’ll give it a time of300 seconds or five minutes. Now tap onOK .
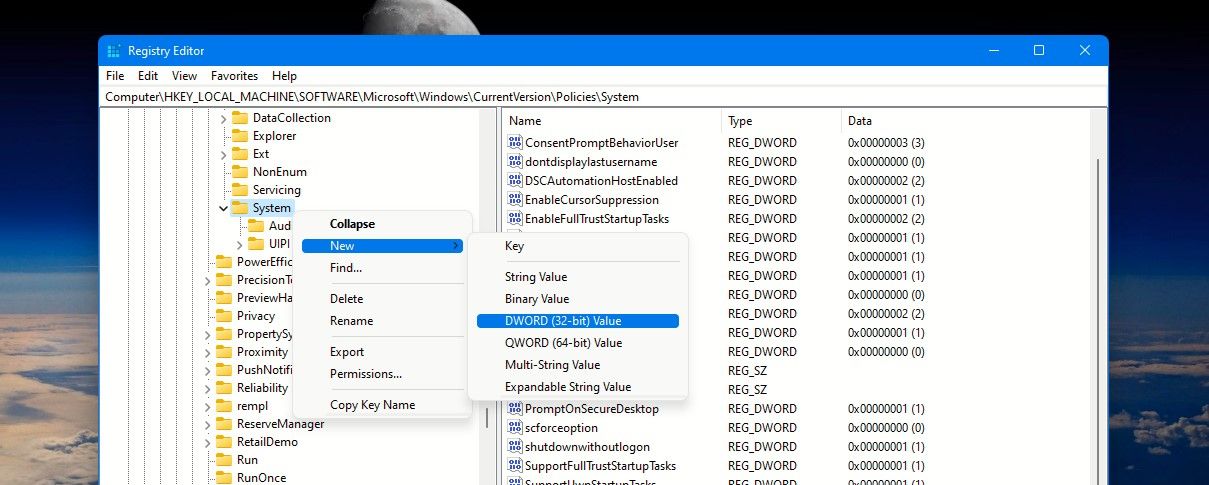
- In case you do not find theInactivityTimeoutSecs DWORD in your registry, you can create it. Right-click on theSystem key folder in the left pane or right-click on a space in the right pane of theSystem key. SelectNew , then selectDWORD (32-bit) Value .
HD Video Converter Factory Pro
A new value will be created in the right pane. Name itInactivityTimeoutSecs . Then pressEnter .
- Now double-click onInactivityTimeoutSecs DWORD, and enter the time after which you want your PC to get locked.
- Finally, close the Registry Editor and restart your PC to apply the changes.
 HD Video Converter Factory Pro
Now your PC will get locked if you’re not using it or are away from it after the time you have set in the Registry Editor. If you’re on a Windows 11 machine, you can also explore a few other ways to lock your PC .
To stop your PC from getting locked automatically, modify theInactivityTimeoutSecs DWORD value in the Registry Editor by changing the time to0 seconds.

Work Worry-Free on Your Windows PC With a Custom Time-Out Lock
Now never be tense about someone getting access to your PC or your work getting stolen while you’re away from your PC. Use one of the above methods to automatically lock your PC after a set time.
You can also explore how to set up Dynamic Lock using your phone to automatically lock your PC when you move away from it.
- Title: Windows: Custom Inactive Period Setting
- Author: Richard
- Created at : 2024-08-16 02:14:57
- Updated at : 2024-08-17 02:14:57
- Link: https://win11-tips.techidaily.com/windows-custom-inactive-period-setting/
- License: This work is licensed under CC BY-NC-SA 4.0.