
Windows Newbies' Guide to Easier Access

Windows Newbies’ Guide to Easier Access
Microsoft has been at the forefront of accessibility and first took steps to address it in 1990 with Windows 3.0. Now with Windows 11, they’ve ramped up their Windows Accessibility tools with new features and tools.
So, let’s dive in and peek through all the different accessibility tools on Windows.
A Beginner’s Guide to Accessibility Tools on Windows
You can access all Accessibility tools straight from your Settings on Windows. Launch the Windows Settings by pressing the Windows Key + I, and head to the Accessibility section.
Microsoft has divided its tools into three major sections that aim to cover different types of accessibility issues. They are: Vision, Hearing, and Interaction.
Let’s first start with Vision.
A Guide to Windows’ Vision-Based Tools
It’s no secret that individuals with vision impairments can face significant problems performing tasks such as typing, using a mouse, and navigating menus and explorers. In fact, according to a 2022 report from WHO , approximately 2 billion people worldwide suffer from a visual impairment of one kind or another.
It’s safe to assume some of them likely use tech to make their lives easier; even if one percent of them use Windows, that’s a massive amount of people possibly struggling with their tech.
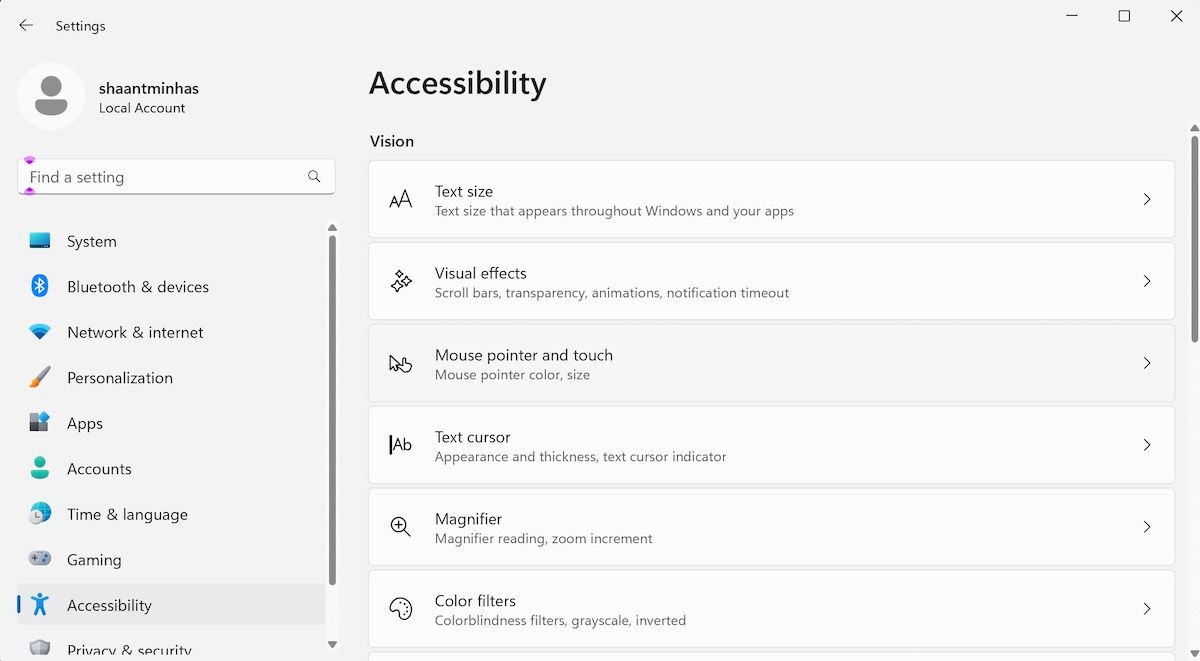
The Vision Accessibility tool on Windows serves the needs and abilities of many such Windows users who’d otherwise fail to make the best use of Windows.
To that end, Windows has provided a plethora of tools under the Vision section. Let’s cover all of them individually.
1. Text Size
Text size does what it says on the tin. It helps you tweak the size of your text all over your PC and apps with a simple adjustment through the slider.
After you’ve made the changes, make sure you click on Apply to save them.
2. Visual Effects
It’s sometimes quipped that visual effects are not just eye candy; they are, in fact, an integral part of the user interface, giving you critical context and clarity.
Moreover, the visual effects on Windows can make or break the user experience for many users with partial visual impairments. With the tools in Visual effects, you can manage these visual effects to some degree, and get the most out of them.
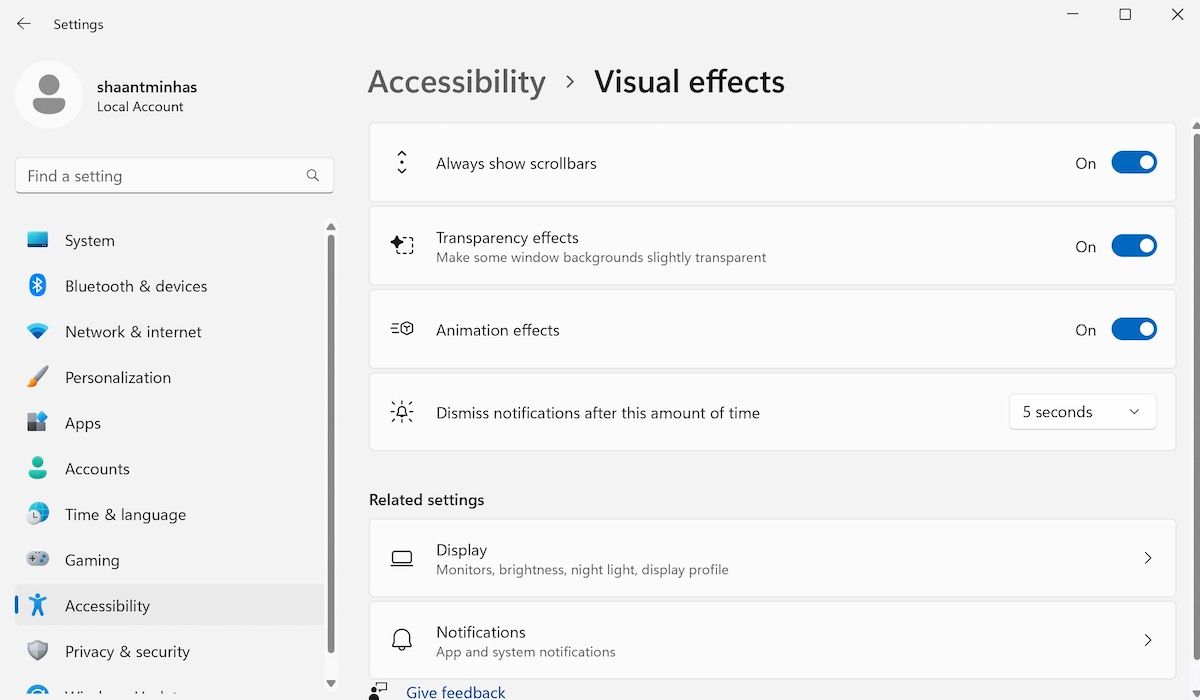
Scrollbar
By default, the scrollbar next to your search results will disappear whenever you search for something from the Start menu. You can change this, though.
Simply toggle on the button for Always show scrollbars, and you will be good to go from there.
Transparency Effects
Transparency effects improve your PC’s aesthetics, and Windows keeps them enabled by default. But if you face any visual impairments, they can unnecessarily make your eyes work hard.
Toggle off the switch in front of Transparency effects, and the tool will turn off all the shiny effects on your PC.
Animation Effects
Windows packs a ton of cool animations that briefly appear on your screen throughout transitions of one sort or the other, usually as an enhancement.
However, they are not everyone’s cup of tea. If you find them distracting, you can easily disable them by toggling off the button for Animation effects.
Notifications
Every notification on your Windows stays for a specific amount of time. With Dismiss notification after this time, you can tweak the time to increase or decrease it with ease, anywhere from 5 seconds up to 5 minutes.
3. Mouse Pointer and Touch
This tool lets you easily change your mouse cursor’s size and style. For instance, you can tweak the pointer character from four different shapes. Alternatively, you can increase or decrease its size as well.
Touch Indicator
You can toggle on the switch for the Touch indicator, and wherever you touch the screen, you will see an enlarged circle. You can also check the Make the circle darker and larger radio box to get things set up.
4. Text Cursor
Windows also lets you change the appearance and thickness of the text cursor, which will help you improve the visibility of your text.
First, toggle on the Text cursor indicator to turn on the tools. From there, you can also tweak the size of the cursor by sliding it sideways.
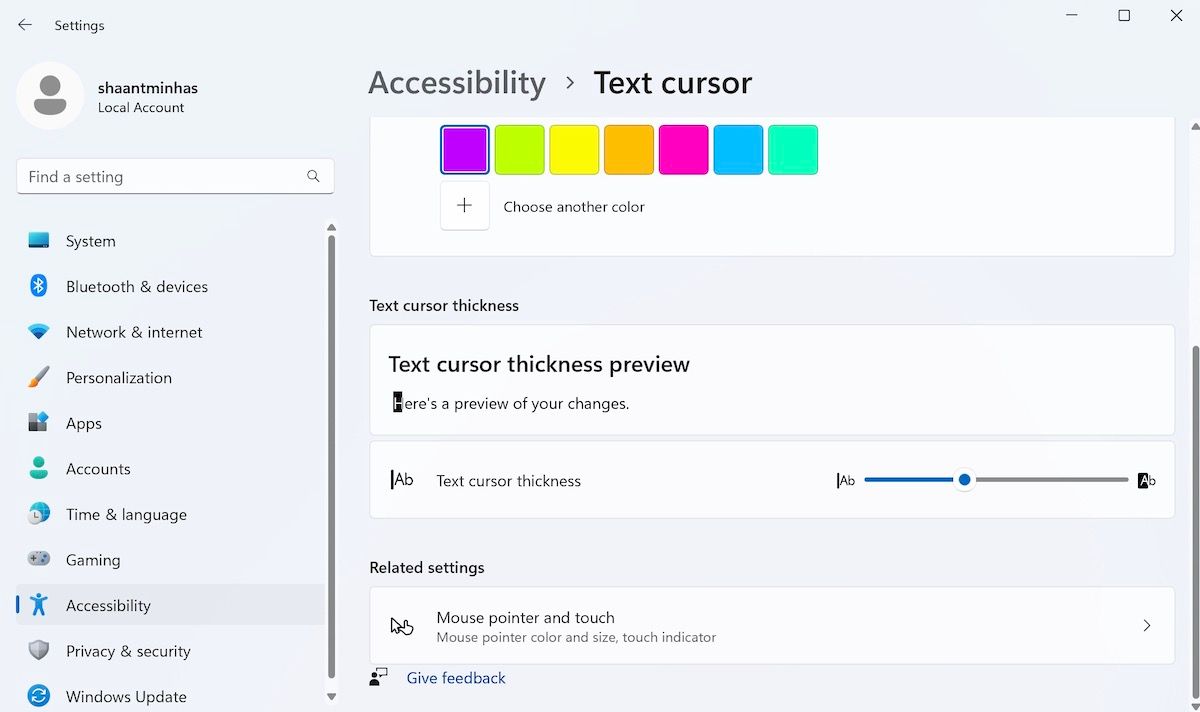
On top of this, you also have many different colors to pick from below; choose one, and your Text cursor’s indicator will be tweaked.
Text Color Thickness
Alternatively, you can also tweak the cursor’s thickness by moving the slider as shown below:
5. Magnifier
As you can probably guess from the name, Magnifier is a handy tool for users with bad eyesight. Even if your eyesight is fine, you can use them to read any hidden text on the internet or any document you otherwise wouldn’t be able to read. To turn on Magnifier, toggle on the switch for Magnifier.
Alternatively, you can use the shortcut by pressing the Windows logo key + the Plus sign. After you have the Magnifier on, you can zoom in and out by holding the Ctrl + Alt and rotating your mouse wheel. You can also choose to increase the increment simply by picking from a variety of values.
You can learn how to use Magnifier from one of our previous guides.
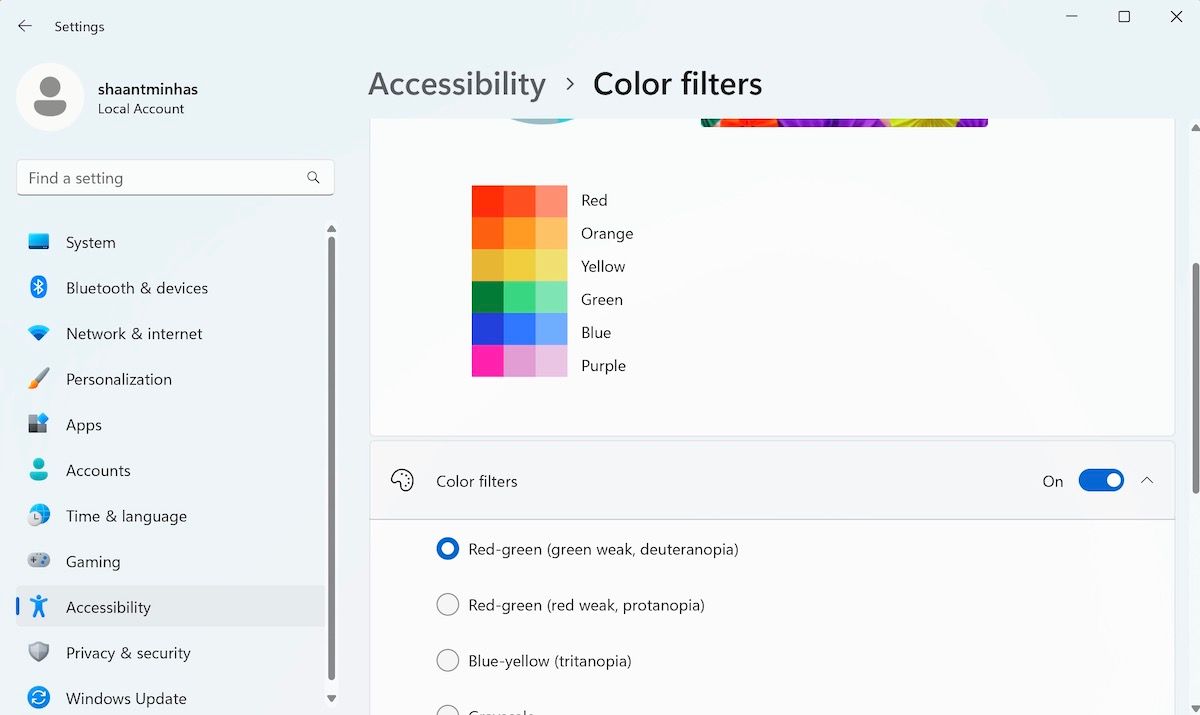
6. Color Filters
Next up on the list is Color filters. If you face any trouble in seeing and differentiating between the colors on your PC, then this is the tool for you.
After you’ve toggled on the switch for Color filter, you have the following shades to pick from:
- Red-green (green weak, deuteranopia)
- Red-green (red weak, protanopia)
- Blue-yellow (tritanopia)
- Grayscale
- Grayscale inverted
- Inverted

Alternatively, you can use simple shortcuts like Windows key logo + Ctrl + C to turn color filters on or off.
7. Contrast Themes
If you have trouble figuring out what’s what on an app or document, then Contrast Themes is for you.
With Contrast themes, you can pick a theme using a combination of colors and effects to make reading easier for yourself. In total, you have four different Contrast themes to pick from:
- Aquatic
- Desert
- Dusk
- Night sky
To pick a specific theme, click on the toggle menu and select one of the themes from there.
8. Narrator
In brief, the Narrator helps you navigate web pages and documents by reading your screen text on your screen aloud. We have a detailed guide that covers everything about Narrator on your PC . You can learn all things about Narrator from the linked guide.
A Guide to Windows’ Audio-Based Tools
The second section of Accessibility tools, Hearing, helps you use your device easily even if you face hearing impairments. First, let’s look at the first tool, that covers audio of your PC.
1. Audio
When you click on Audio, you will find two different options: Mono Audio and a feature to flash your screen.
By toggling on the switch for Mono Audio, you get the ability to the right and left channels into a single one. Don’t take our word for it; do it, and you will notice an instant difference in sound quality. This feature will be handy if you’re facing any hearing troubles.
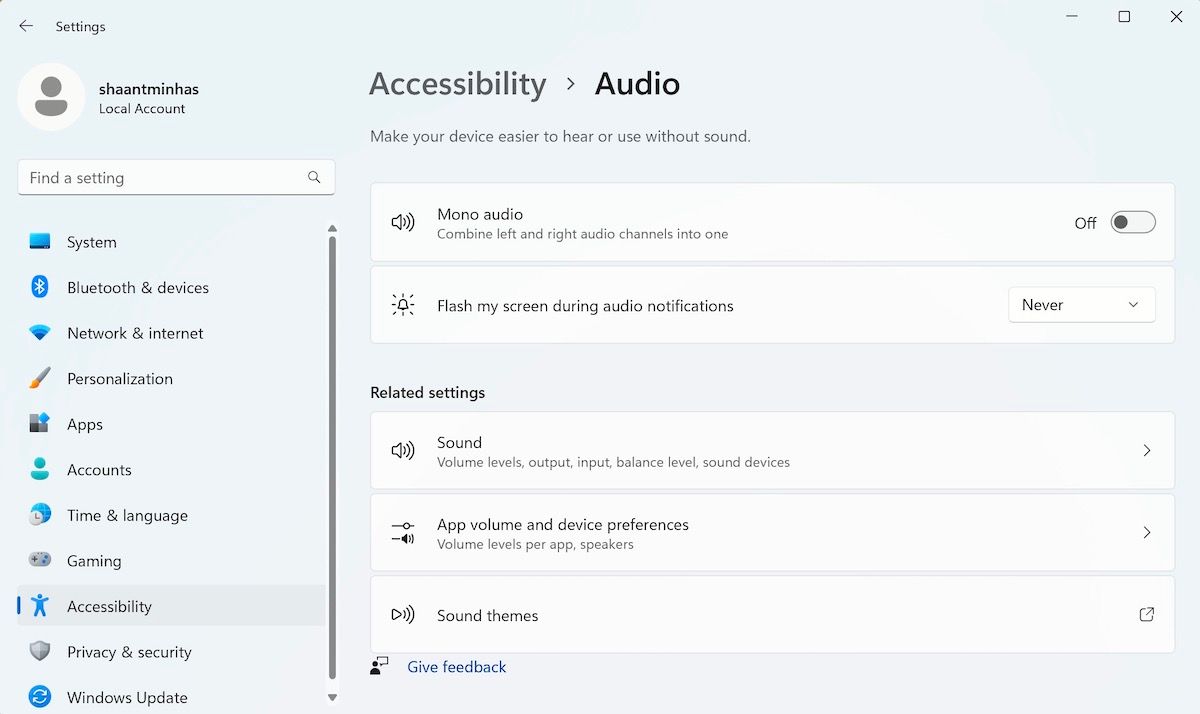
On the other hand, if you turn on the switch for Flash my screen during audio notifications, you will get an option to pick from various settings like:
- Flash the title bar of the active windows
- Flash the active window
- Flash the entire screen
2. Captions
Captions is another boon for users with hearing impairments. But even if you have perfect hearing, using subtitles can enhance your user experience; this will be particularly true if you’re trying to learn a new language through watching movies or other videos, where watching subtitled videos can boost your learning process.
To turn on live captions, simply toggle on the Live caption switch, and you will be good to go. Alternatively, you can use the Windows logo key + Ctrl + L.
You will also get to choose how your caption style looks. Simply select the caption style from White on black, Small caps, Large text, Yellow on blue. If you’d like to add more variation, click on Edit to choose the new settings for Text, Background, or Window.
Interaction
The last feature of Accessibility tools on Windows, unsurprisingly as its name suggests, covers all things that help you interact with your PC. This includes everything from Speech, Keyboard, Mouse, or Eye Control.
1. Speech
Toggle on the Voice access tool to do things on your PC—all with your voice. And while you’re at it, you can toggle on the Start voice access after you sign in to your PC switch.
2. Keyboard
The keyboard accessibility section is about making it easier to make the most out of your keyboard on Windows.
From turning on specific keys and shortcuts for various keys to other valuable settings like the On-screen keyboard, Underline access keys, etc.—the Keyboard section is what you’re looking for if you want to make the most out of your keyboard.
3. Mouse
Like the keyboard above, the Mouse tool is about improving your mouse’s accessibility to all users. Toggle on the Mouse keys switch, and you will find a host of settings such as Mouse key speed, Mouse keys acceleration, etc.
All About Accessibility Tools on a Windows PC
The Accessibility tools from Microsoft make Windows more inclusive and is part of a growing approach to design known as Universal Design. This makes Windows useful for as many people as possible, regardless of their age, disability, or place in life.
While we’ve covered almost all accessibility tools available on Windows, we’ll also encourage you to go through individual tools.
So, let’s dive in and peek through all the different accessibility tools on Windows.
- Title: Windows Newbies' Guide to Easier Access
- Author: Richard
- Created at : 2024-08-16 01:40:16
- Updated at : 2024-08-17 01:40:16
- Link: https://win11-tips.techidaily.com/windows-newbies-guide-to-easier-access/
- License: This work is licensed under CC BY-NC-SA 4.0.
 PCDJ DEX 3 for Windows & MAC is the total entertainment DJ software solution, offering audio, video, and karaoke mixing ability. Automatic beat-sync, smart looping, 4 decks, DJ MIDI controller support, Karaoke Streaming and much more.
 DLNow Video Downloader
 Epubor Audible Converter for Mac: Download and convert Audible AAXC/AA/AAX to MP3 with 100% original quality preserved.
 Greeting Card Builder
 With Screensaver Wonder you can easily make a screensaver from your own pictures and video files. Create screensavers for your own computer or create standalone, self-installing screensavers for easy sharing with your friends. Together with its sister product Screensaver Factory, Screensaver Wonder is one of the most popular screensaver software products in the world, helping thousands of users decorate their computer screens quickly and easily.
 PaperScan Professional: PaperScan Scanner Software is a powerful TWAIN & WIA scanning application centered on one idea: making document acquisition an unparalleled easy task for anyone.