
Winning Over Windows Updater Failure X712
Winning Over Windows Updater Failure X712
Microsoft frequently releases updates to fix security issues, and introduce new features and stability to the Windows OS. But not all updates install smoothly on your system and trigger an error code while doing so. Many users share their woes with the 0x80073712 update error code with the error message that some files are missing from the system.
If you experience the same update error code and are unable to install the latest Windows update, don’t worry. We will list out all the possible fixes that you can try to resolve the 0x80073712 error code.
1. Use the Windows Troubleshooter
Before jumping onto major fixes, leverage the in-built troubleshooter on Windows 10 and 11. It tries to find out existing problems with Windows Update and try to fix them. Repeat the following steps:
- PressWin + I to launch the settings app.
- Navigate to theSystem > Troubleshoot section.
- Click on theOther Troubleshooter option.
- Locate theWindows Update troubleshooter option from the list.
- Then, click on theRun button to start the troubleshooter.

- Wait for the Windows Update troubleshooter to identify problems. Click on theNext button.
- Close the troubleshooter window and reattempt the Windows update installation.

2. Perform a Complete system shutdown
Windows OS enables the fast startup option by default. Even if you restart your system, or shut it down, it preserves the system state using hibernate. So, you need to perform a complete system shutdown and then power it back on to close and restart all background services.
Here’s how to perform a complete system shutdown:
- PressWin + X to launch the Power user menu. Scroll down and select theTerminal (Admin) option from the list.
- The Terminal app will open with an instance of a command prompt with admin privileges.
- Type theshutdown /s /f /t 0 command and press theenter key.
- Your system will power off. It will take a tad bit longer that a normal shutdown procedure.
- Now, restart your Windows PC and try to install the Windows update.
3. Restart Windows Update services
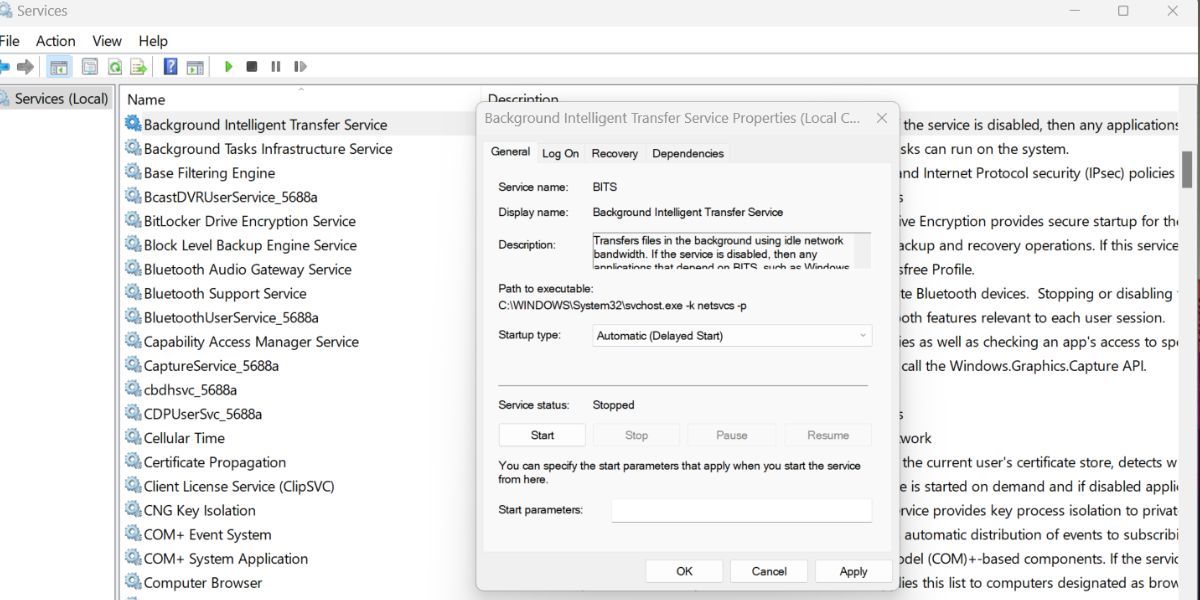
Windows Update uses a bunch of background services to fetch and download updates. If these services aren’t running automatically, you will encounter an error. These includeWindows Update Service ,Windows Installer Service ,Cryptographic Services , andBackground Intelligent Transfer Service .
Repeat the following steps to start the necessary services:
- PressWin + R to launch the Run dialog box . Typeservices.msc and press theenter key
- Services utility will launch on your system. Now locate theBackground Intelligent Transfer service in the list.
- Double-click on the BITS service to open theproperties window. Set theStartup Type asAutomatic and click on theApply button.
- Click on theOK button and close the Properties windows. Now, right-click on the service and select theStart option from the context menu.
- Similarly, set all the services as automatic and manually start them.
- Close the Services window and reattempt the Windows update.
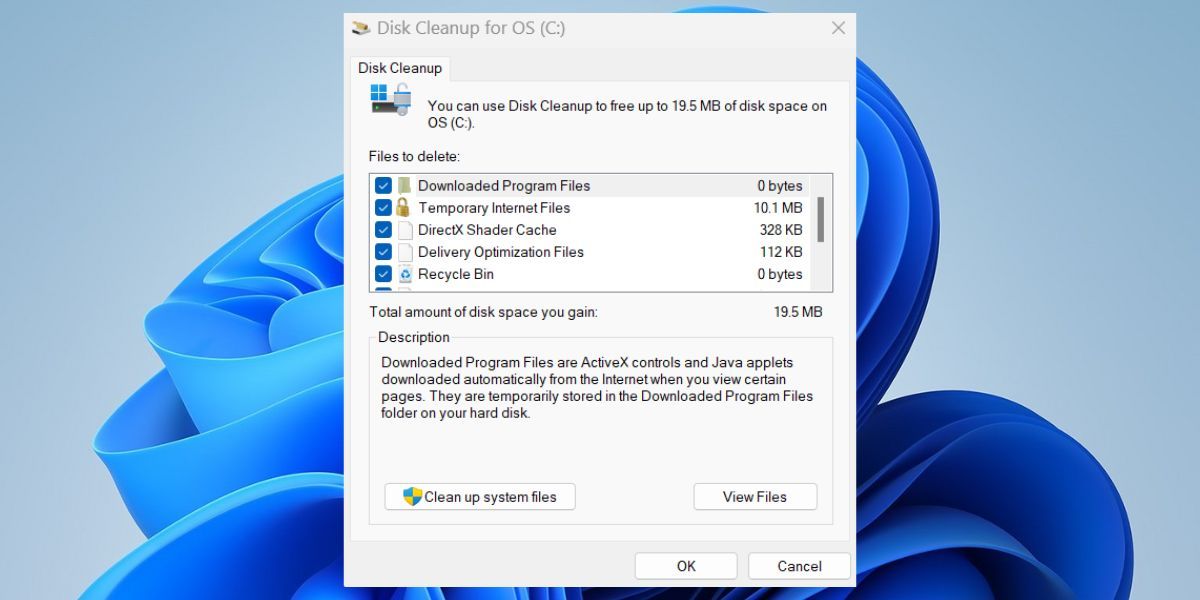
4. Run the Disk Cleanup Tool
Disk Cleanup can wipe the delivery optimization files, old Windows update files as well as the Temp folder. If files in these locations are corrupted, they can interfere with the normal update process. Here’s how to run disk cleanup on Windows:
- PressWin + S to open the search utility in Windows.
- Typecleanmgr.exe and press the enter key to open the Disk Cleanup tool.
- It will select the system drive (C) by default. Click on theOK button to continue.
- Select the checkboxes of files that you want the tool to clean up. Then, click on theClean up system files button.
- Disk Cleanup will close and redirect you to pick the appropriate drive. Click on theOK button.
- Lastly, click on theDelete files button.
5. Rename the SoftwareDistribution Folder
Windows update stores its content in the SoftwareDistribution folder. Since it is located inside the Windows folder in the C drive, you mustn’t delete it. Instead, you can rename the folder to force the update service to recreate the folder again.
Repeat the following steps:
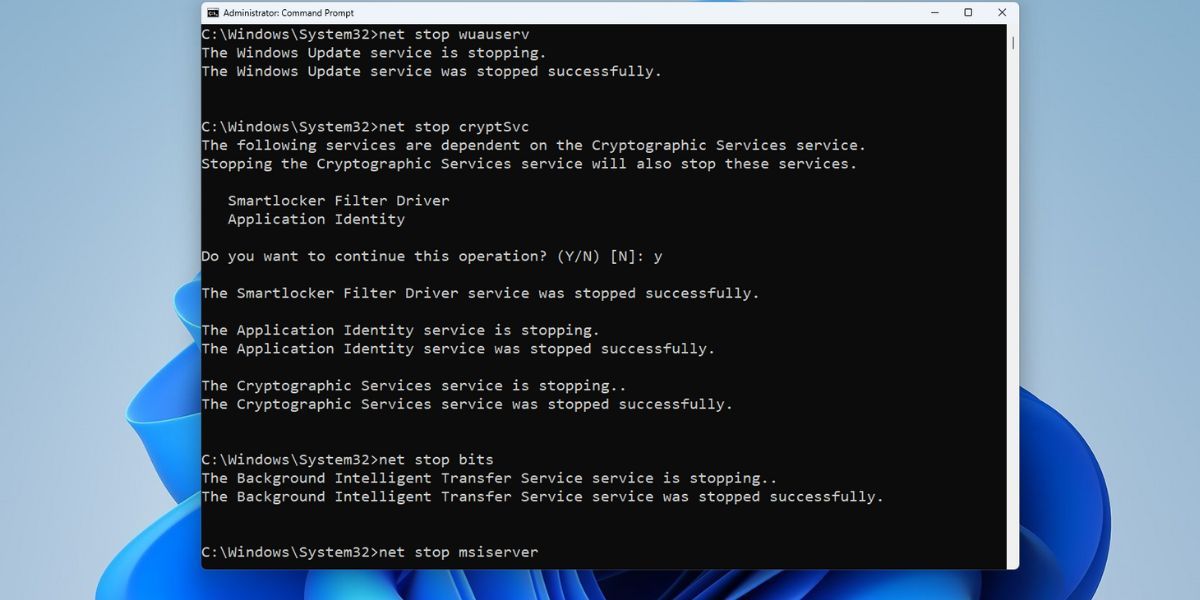
- Open the Start menu and search CMD. Press Ctrl + Shift + Enter to open the command prompt with admin privileges.
- Type the following commands to stop all the Windows update-related services:
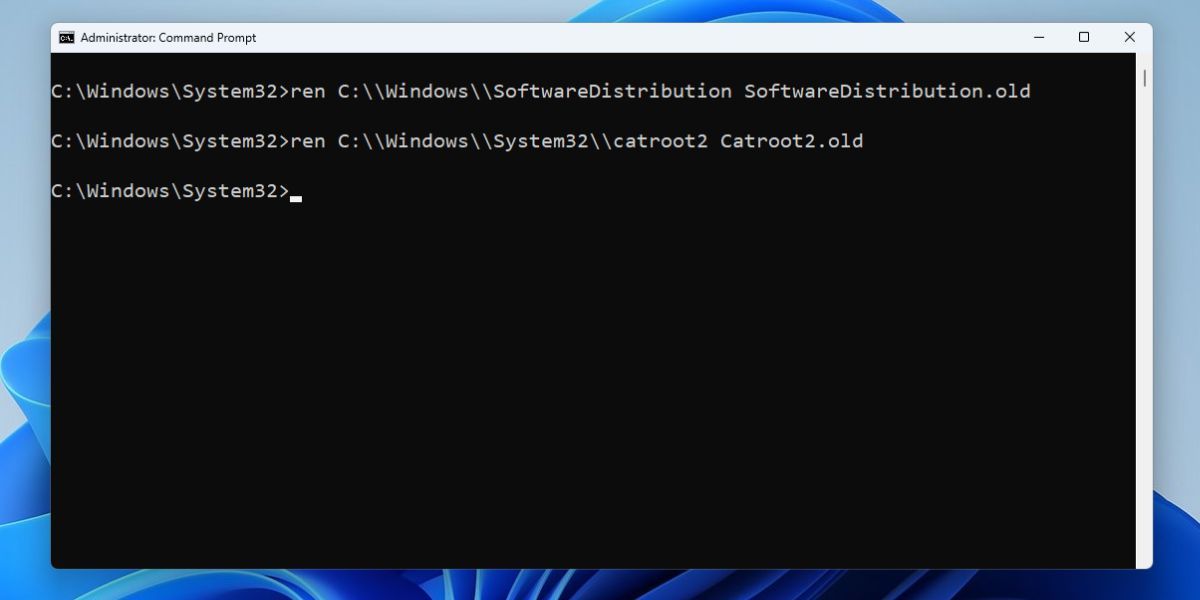
net stop wuauserv net stop cryptSvc net stop bits net stop msiserver - Once these services stop running, typecls in the command prompt windows. Then enter the following commands:
ren C:\Windows\SoftwareDistribution SoftwareDistribution.old ren C:\Windows\System32\catroot2 Catroot2.old - Both the above commands rename theSoftwareDistribution folder andCatroot2 folder.
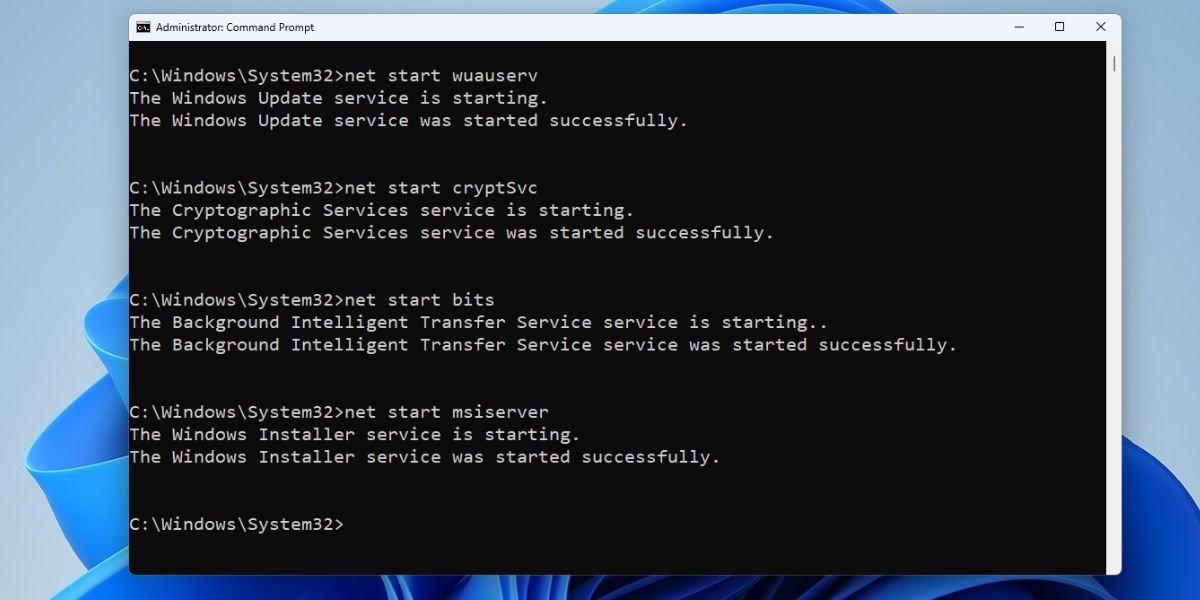
- Now, you need to restart all the Windows services you stopped in step 3. Enter the following commands:
net start wuauserv net start cryptSvc net start bits net start msiserver - Lastly,restart your system and visit the following folder location:C:\Windows . You will notice that there is a new SoftwareDistribution folder in that location.
- Open the Windows update in Settings and try to download and install updates.
6. Delete the Pending.xml file
The pending.xml file contains all the pending Windows update tasks. Oftentimes, it can interfere with installing new updates because there are already multiple incomplete old update tasks. So, you must delete this file and proceed with the Windows update.
Retrace the following steps to delete the pending.xml file:
- Log in with an administrator account. Then, pressWin + E to launch the file explorer.
- Navigate to theC:\Windows\WinSxS folder.
- Locate thepending.xml in theWinSxS folder and right-click on it.
- Press theShift key and click on theDelete option.
- Restart your computer.
7. Manually Download Windows Updates
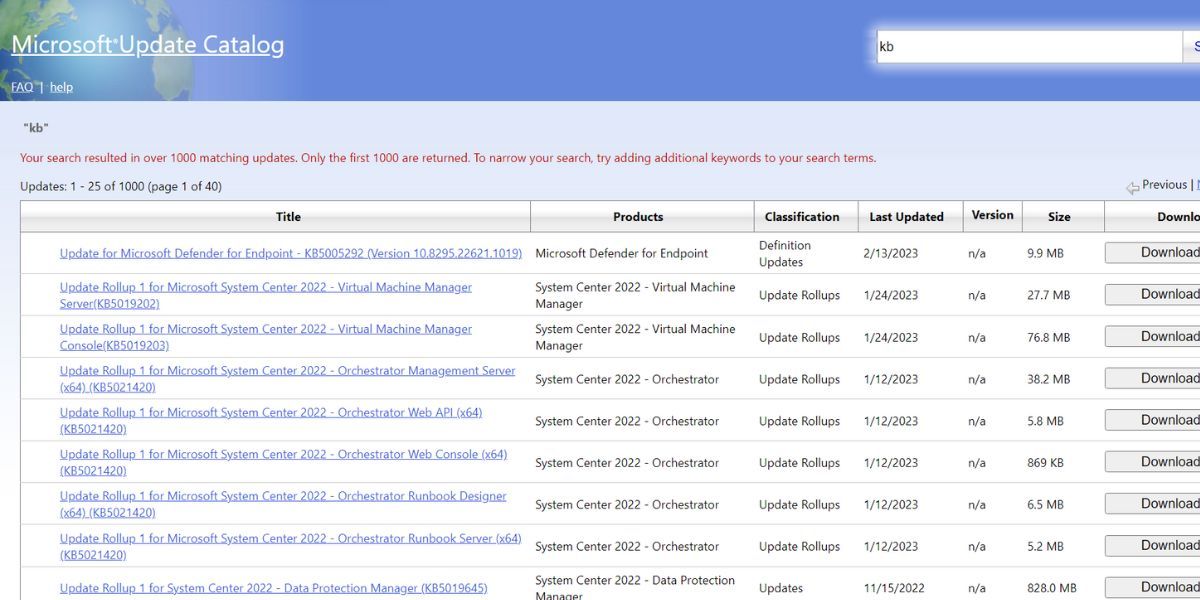
If you are unable to download a specific Windows update using the Settings page, consider a direct download and install approach. Visit the Microsoft Update Catalog website and search for the KB update you want to download. However, you first have to check the corresponding update number which is failing to download and install on your system.
8. Reset Windows
Resetting Windows is the last resort you have if none of the above methods work in your favor. However, before learning how to perform a Windows system reset , try out general fixes such as SFC, CHKDSK, and DISM scans on your system. Also,disable Windows Defender and try updating your system before hitting the reset button.
Update Windows Without Hiccups
Windows updates can be tricky to install sometimes. Use the inbuilt troubleshooter to identify and fix problems. After that restart, all the crucial Windows update services and run the Disk Cleanup tool. If everything else fails, try doing a manual update or performing a Windows Reset.
Also read:
- [Updated] 2024 Approved Effortless MP4 Conversion From Facebook HD Content – All For Free
- [Updated] Exploring iMovie's Default Cropping Behavior
- 1. Step-by-Step Guide: Adding Personalized Fonts to Your Kindle Without Modifying System Settings
- 5 Ways to Track Huawei P60 without App | Dr.fone
- Comment Transformer Des Fichiers CR2 en Images JPEG Sur Internet Et Ordinateur: Guide Complet Pour 2024
- Conversion Libre De Fichier RAM À Format MP4 en Ligne - Vérifiez La Solution Du Site Movavi!
- Detailed Study of Frozen Delights Playback Gadgets for 2024
- Free Online AVI to MP4 Converter - Movavi
- Programele Video Editare Libera Și Intrigi 2024 - Oferile La Deschiderea Continua
- Title: Winning Over Windows Updater Failure X712
- Author: Richard
- Created at : 2025-02-28 23:32:39
- Updated at : 2025-03-04 18:29:12
- Link: https://win11-tips.techidaily.com/winning-over-windows-updater-failure-x712/
- License: This work is licensed under CC BY-NC-SA 4.0.